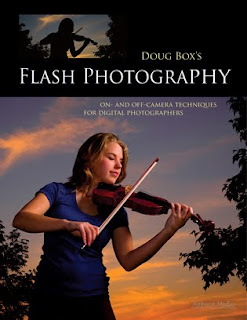
 Today's post comes from the book Doug Box's Flash Photography: On- and Off-Camera Flash Techniques for Digital Photographers by Doug Box. It is available from Amazon.com and other fine retailers.
Working with flash can make shooting on location less of a hassle. Prior to using off-camera flash, I used to have to bring two or three power heads, a couple of umbrellas, light stands, and a sack full of cords to every location. The setup and teardown would take 30 minutes. Now I bring in one off-camera flash in a softbox, a lightstand, a tripod, and my camera. I can carry everything in one trip, and the setup is a snap. Since I’ve begun working with flash, I’m more relaxed when photographing a session, and I love the results. The images are more natural looking.
 Here, I had the flash positioned high above and behind the subject’s head, still at a 45 degree angle. Note the beautiful result I was able to achieve using this unusual light position.
Here is the image created with the off-camera flash. I used Photoshop to do a little retouching and to create the brown line and black frame.
In one-light flash setups, the ambient light, which comes from windows, doorways, and existing light fixtures, provides the fill. As this light fills the room, it illuminates the background of the portrait. With everything in the room already illuminated, when I bring in the subject, I simply need to add light on him or her. Let’s look at a couple of images that illustrate this technique, which I call the ambient fill method.


 To create these images, I metered the existing light and added the flash at 2/3 stop over the ambient exposure.
 The Ambient Fill Method. Let’s take a closer look at how the ambient fill method can be used to create beautifully lit, salable images in no time. Here’s a step-by-step look at creating a one-light image on location. I’ve chosen some images of a beautiful bride to illustrate this approach.
 The setup for this beautiful image was simple. I used one small softbox with a battery-powered flash, two PocketWizards, one light meter, and a camera with a tripod.
 You will notice that the subject’s face, part of the dress, and flowers are lit by the off-camera flash, housed in a softbox. I made sure the face of the box was position flat and parallel to the subject, and placed it at the 45º/45º position. With the light in this position, I was able to achieve beautiful light on the face and a nice falloff on the gown.
• Analyze the scene. How bright is the background? Is the ambient light level sufficient to allow you to show details of the background in the portrait? If so, are there elements in the background that will draw the viewer’s eye away from the subject?
• Decide where to place your camera. Consider where the subject will be posed and the direction in which the subject’s face will be turned in relation to the camera.
• Calculate the proper placement for the softbox. Remember, ensuring that the light unit is at the 45º/45º position will enable you to record catchlights in the desired 10 o’clock or 2 o’clock position. We want to light the mask of the face (eyes, forehead, nose, mouth, and chin), letting the side of the face closest to the camera fall into shadow.
• Meter the ambient light at the subject. Add flash so that the final (combined) reading is 2/3 stop over the ambient light exposure reading.

BUY THIS BOOK FROM AMAZON


No comments:
Post a Comment