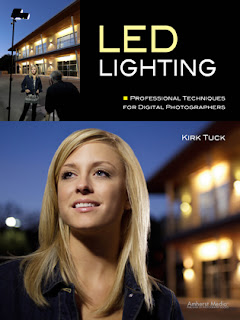
 Today's post comes from the LED Lighting: Professional Techniques for Digital Photographers by Kirk Tuck. It is available from Amazon, Barnes & Noble, and other fine retailers.
I’ve been working with LED panels to create portraits for a while now, and I’m not sure I’d be comfortable going back to an all-flash studio at this point. Let me explain. I think any continuous light source is better at showing you what you’ll end up with. It’s just easier to visualize what each light does for the subject and what all the lights do to each other when you mix them together.
Enhanced Control. As portrait photographers, we like to have total control of our lights. We want to see what every bit of light does and be able to modify it to get what we want. If we can do that modification in-camera, as opposed to adding steps in post-processing, it will make us more efficient. For example, I love using a flag with a black net on it to control exposure on certain areas (like the shoulder of a person wearing white) at the time of shooting. If I can precisely funnel the light toward the person’s face and away from his white shirt, I’ll have a lot more options when I go to print the photograph. With continuous lights, I can also see the exact point at which a hair light has come too far forward. Similarly, I can see if the fill light is too strong while I’m looking at the subject.
This portrait shows a harder lighting approach, accomplished with smaller panels.
You could shoot and then check your progress on the LCD, but I think looking at the LCD over and over again conveys to the client that you might not know what you are doing—and that you need to depend on trial and error to get into the right ballpark with your lighting.
This is a softer look, shot with a large diffuser. You can see how much difference a big light makes.
Setting up the Lights. As noted in the previous chapter, most of the steps you would normally take to set up the lights with flash are similar to the steps you’d take to set up LED lights instead. Let’s go through a typical setup with a medium-toned canvas background—but this time with a little more detail.
I usually start my lighting by setting up a main light at about a forty-five degree angle to my camera (as I face the subject). Then, I bring the bottom edge of a big, soft light just below the sitter’s chin. I normally put the light about as far away from the subject’s face as the diameter of the final layer of diffusion. For a 4-foot soft-box with a flash, the front of the softbox would be about four feet away from the subject. That’s the point at which I get a good wraparound light with enough contrast to model a person’s face correctly. When I use LEDs, I just use diffusion material on a frame instead of a softbox. The diffusion material can be thinner than the material on the front of a softbox because the bigger size of a typical LED panel intended for studio use makes the light softer to begin with.
My next step is to add a reflector panel on the opposite side of the subject to provide fill light. I might move it away if I want deeper shadows or closer if I want more open shadows. Alternately, if I’m going for a flatter look, I might add a second diffusion frame and LED panel for a higher level of fill.
The key light was a diffused 1000-LED light used off camera at a 45 degree angle to the right and 45 degrees up.
My next step was to add a large reflector, opposite the main light, to fill in the shadows and raise the overall illumination.
The diffused 1000-LED light was still too contrasty for my taste, so I added an extra bit of diffusion—a 4x4-foot layer of diffusion stretched across a Chimera frame.
After I’ve established the main light and the fill light, I set up a background light. This brings up the background so that it reads as I intend. I want the backlight to feather softly and smoothly out from the center, creating a soft halo of light around my subject. As the light falls off toward the edges, it puts more emphasis back on the subject’s face. For the backlight, I tend to use an LED panel covered with one layer of soft diffusion, placing it close in to the background. If the panel has a dimmer knob, I use that to match the
background exposure to the subject exposure. If there’s no dimmer, the light probably has switch-es that allow me to use separate banks of lights to control the intensity; I’ll use those as needed to reduce the background light level. ( Note: It’s important to use diffusion when working close to the background. If the light unit has built-in polished barn doors, you’ll often see multiple shadows from the rows of bulbs projected onto the background material; the diffusion material stops this cold.)
My next addition was a backlight to add a little drama to the scene. Even though I don’t always like backlighting, in a wedding shot it just seems to make the photos more exciting.
I added one more 500-LED light with diffusion from the other side of the model.
Here’s what the studio looked like from the back corner. (Thank goodness I bought plenty of light stands over the years!)
The final results. Even the turn of her head can make a big difference in the final image.


No comments:
Post a Comment