Creating Studio Lighting at Home

Today's post comes from the book Available Light: Photographic Techniques for Using Exisitng Light Sources by Don Marr. It is available from Amazon.com and other fine retailers.

The number-one question I get asked when teaching lighting workshops is, “How much is all of this lighting equipment going to cost me?” It’s true that I am a recovering strobe nerd who has spent thousands of dollars on big power packs and several strobe heads. I still love the power that my strobe packs give me when I need to light a big area or am shooting in a very dark area. But I have been using them less and less these days. I prefer the freedom of working without strobes—the freedom to move quickly, the freedom to change lighting setups more quickly, and the relaxed feeling my subjects get when there isn’t a ton of gear surrounding them. If it makes you feel better or more professional to shoot a portrait with three power packs and ten strobe heads then go ahead and do it. Just don’t call me to haul your gear.

So the answer to the question above is, “You don’t need lighting equipment to take good portraits.” You can get a lot of shots to look like they were done with strobes just by using the lights and windows you have around your house or by buying some inexpensive lights from the hardware store.

Your Thumb, Your Friend
When it comes to photographing someone in your home, you will probable ask the question: Where should I put him or her?My answer is: Let the light guide you. Use an area that has pleasing light to your eye. If you are not sure where that might be or you don’t want to move your subject from sofa, to dining room, to barstool, to family room just to find the right light, then use this ancient photographer’s secret. Hold your thumb out at arm’s length at the position your subject will be at. Observe how the light is hitting your thumb. Your thumb is like a little face. It’s round and has a pointy front. Look at the lighting contrast from side to side. Is it frontal or side lighting? Is there enough fill light on the shadow side? Is light from the rear wrapping around the sides of your thumb? Does your thumb look like it’s in a good mood today? Take your thumb on a walk from room to room to find the good light.

Positioning the Subject
The first image was taken in a living room. Sunlight came through a window and created a very high-contrast situation. I actually prefer more contrast when I’m photographing men because I think it gives them a stronger appearance. Although this shot is interesting, it has a bit too much contrast. The interior of the room acts like a big cave and hardly reflects any sunlight back onto the dark side of the subject’s face. And there are hot spots on the highlight side of his face. So, in essence, the bright side is too bright and the dark side is too dark. Also the wall in the background is flat and uninteresting. You get the idea.


A quick solution to this high-contrast situation is to turn the subject away from the sunlight so that the sun hits their hair and shoulder, as with the image below. Now the sun acts like a hair light. In this case, a simple lamp (with a daylight-balanced low energy fluorescent bulb) was added at camera left to light his face. You can see the catchlight from this lamp reflected in his eyes. This is a simple reading lamp with a movable lamp head that can be pointed in any direction.

Window blinds form the background for this shot, and by playing around with these a bit I was able to position “the hair light” (the sunlight) exactly where I wanted it to hit the subject. Comparing the first and second images, you can see that the blinds also are a better looking background than the wall since they create some shape and texture. For a shot like this, it’s also helpful to shoot with a telephoto lens and a narrow depth of field. The telephoto lens and shallow depth of field help throw the background out of focus and keep the attention on the subject’s face, especially their eyes.


To create the next image, the lamp was moved to camera right and placed a bit higher. This is a classic light placement called loop lighting. The lamp is placed about 45 degrees to the side of the subject and about 45 degrees up from the subject. It’s called a loop light because of the loop-shaped shadow formed by the subject’s nose. The sun still acted as hair light on the back of his head and shoulders, although it was toned down a bit by closing the blinds further.


The Living Room Studio
The next sequence illustrates a technique you can use to produce a variety of studioesque (is that a word?) looks right in your own living room. The following sequence of shots were taken on a cloudy day in a living room with windows on three walls, but they could have been done in a room with windows on two walls, as well. The subject faced a north-facing window. North light is always soft, especially on a cloudy day, so this was a good choice for our portrait. There were also translucent white curtains on this window, which gave more options for controlling the quality of light. It wasn’t very bright, so a slower shutter speed was used—along with a tripod.

In the first shot, the translucent curtains were pulled closed behind the camera. This diffused the northern light even more, creating a very soft main light. The window at the back wall let some light in to light the subject’s right shoulder and hair. The dark green curtain over her left shoulder was closed to block virtually all of the light from that window.


In the next shot, the translucent curtain behind the camera position was opened up to allow the overcast daylight to light the subject’s face fully. Of course, this let a lot more light into the room but mostly just in the area of the subject. This affected the exposure, so a faster shutter speed was used to keep a correct exposure on the subject’s face. Notice that the background has gone darker now, relative to the subject. The quality of light has changed slightly, as well. It is a bit higher in contrast due to the fact that the diffusing curtain was not used.


For this next shot, the dark green curtains directly behind the subject were opened slightly. You can see them clearly in the shot. This created a hair light on the subject. Be careful about letting too much light in from this “hair light,” though; it could cause lens flare. Not that there’s anything wrong with that! Just be aware of it.


For the final shot, the translucent white curtains behind the camera were closed once again. This reduced the light on the subject, so the exposure was changed back to what it had been in the first shot. Now the background has gone lighter since the overall exposure has increased. And we are back to our softer quality of light on the subject’s face. I think this is the best shot of the bunch!


BUY THIS BOOK NOW

Shoulders and Arms

Today's post comes from the book Jeff Smith's Guide to Head and Shoulders Portrait Photography. It is available from Amazon.com and other fine retailers.


In a head and shoulders pose, the composition of a portrait looks finished if the shoulders fill the bottom of the frame from one side to the other. If the portrait is composed showing more of the body, then the arms can be used to fill in the void areas at the bottom of the frame. Basically, this is completing a triangular composition, with the shoulders and arms forming the base of the triangle and the head at its peak. (Note: Many poses offer the photographer the ability to choose from different compositions. Poses like these work very well in high-volume photography studios. Once the subject is in the pose, you can make a full length or three-quarter-length image, then move in for a tighter head and shoulders image without having to re-pose the subject.)


The Shoulders. The widest view of any person is when the person is squared off to the camera. By turning the shoulders and torso to a side view, preferably toward the shadow side of the frame, you create the thinnest view of the body. The shoulders of a man should appear broad and be posed at less of an angle than the shoulders of a woman.


Additionally, portrait subjects appear stiff when their shoulders are running perfectly horizontal through the frame or when their spine (if you could see it) is running perfectly vertical in the frame. Posing the person reclining slightly backwards or leaning slightly forward, makes the shoulders and spine run diagonally through the frame for a more relaxed look. The portrait will have a professional look and it will be more visually appealing. It will also create a more flattering impression of the subject’s personality, making them look much less rigid.


Women’s shoulders can be a very appealing part of a portrait if posed properly. I like when my wife wears dresses that show off her shoulders. However, my wife is thin and very fit, unlike the majority of people we photograph each day. For this reason, it is always a good idea to have the shoulders covered with clothing if the subject’s weight is at all an issue.


Clothing itself, however, can create problems in this area of the body. Large shoulder pads in a jacket, for example, will make just about any kind of posing impossible; your client will look like a football player. As you can imagine, this is good for skinny guys but not so good for larger guys or any woman.

The Arms. Like the shoulders, arms often have problems that are best hidden by clothing, which is why we suggest that everyone wear long sleeves. Models may have perfect arms, but our clients are plagued with a variety of problems—arms that are too large or too boney, loose skin, hair appearing in embarrassing places, stretch marks, bruises, veins, etc. The list is a long one, so cover those things up.


To learn how to pose the arms, watch people as they are relaxing. They fold their arms, they lean back and relax on one elbow, they lay on their stomachs and relax on both elbows, or they will use their arms to rest their chin and head. However, any time weight is put onto the arms (by resting them on the back of a chair, the knee, etc.) it should be placed on the bone of the elbow. If weight is put on the forearm or biceps area, it will cause the area to mushroom and make it appear much larger in size than it actually is. This is another reason to have the arms covered if it at all possible.


*excerpted from the book Jeff Smith's Guide to Head and Shoulders Portrait Photography

BUY THIS BOOK FROM AMAZON

Light Modifiers

Today's post comes from the book Lighting Techniques for Photographing Model Portfolios by Billy Pegram. It is available from Amazon.com and other fine retailers.

Some light modifiers can be used with any light source, from sunlight to studio strobe. These are all handy devices to have around. Best of all, they tend to be inexpensive—and many can even be improvised with a quick trip to the hardware store. Reflectors, gobos, and scrims fall into this category. Other light modifiers, like softboxes and umbrellas, are designed specifically for use on studio lights. These can range widely in price, but are invaluable for exercising complete creative control.

Reflectors
A reflector is any object used to bounce light—it could be a wall, a white tshirt, a mirror, or a commercially purchased kit. This is an easy and effective way to control light. Unlike using flash for fill light, reflectors give you visual confirmation of where the light is. With reflectors, you can also set up and fine-tune your results more quickly than with flash. Additionally, you are not limited to the flash-sync speed of your camera.

Collapsible reflectors, available in a wide variety of finishes, are a very popular (and portable) type of reflector.

Surface. Reflectors range widely in size, color, and design. Typically, photographic reflectors have either a matte white, silver foil, or gold foil surface. The metallic surfaces provide more light intensity and contrast in the bounced light than the matte white surface. Gold reflectors also add a warm coloration to the bounced light.Mirrors are another type of reflector to experiment with. Because they return almost all of the light that strikes them, they can actually be used outdoors to turn backlight into front light.

Design. Round fabric reflectors on collapsible metal frames (often called disc reflectors) are a very popular design option, especially for location photography. They are easy to transport and simple to position—an assistant can simply hold the reflector in position, then adjust it according to your instructions. (Note:When I shoot on location, I typically bring a piece of white cardboard to use as a reflector, along with a Westcott disc reflector that is silver on one side and gold on the other.) For studio photography, large, white opaque reflectors (often called flats) are often moved into position on rollers or casters. Once in place, studio lights can be bounced into them to create a large, soft source of light.

For Fill. Reflectors are most commonly used to provide fill light, picking up some of the main light and wrapping it around onto the shadow side of the face to make the shadows less intense. To use a reflector for fill, place it slightly in front of the model’s face. Direct the reflected beam of light gradually toward the subject’s face until you get the desired results. Be careful when doing this; the reflected light can actually be quite intense if you shine it right in the model’s eyes. You must also avoid creating unwanted shadows of the nose on the opposite cheek. This is best accomplished by positioning the reflector to fill in the whole mask of the face.

Practical Example: Reflected Fill on Location. Let’s look at the different effect you can create using a variety of reflectors for fill when shooting on location. The image below shows the subject with no reflected fill.


In the next image , the assistant is holding a white card. The white board reflects the same color of light that is striking it and reflects back to the model a soft light that is usually easy on her eyes. This eliminates some of the squinting associated with shooting in bright sunlight. Even if the reflected light is not intense enough to increase the light value much in the shadow area, the reflector still creates pleasing catch lights in the eyes. The disadvantage of using a white board is that it is rigid and doesn’t reflect a great deal of light back to the subject compared to a silver reflector. However, its dual function as a gobo outweighs the disadvantages. Additionally, since it is rigid, it can easily be leaned against a tree or a stand while the assistant is busy or holding another reflector.


A white board is used to add soft fill light.


Like the white board, a silver reflector bounces light without changing the color balance (images below). However, because the surface of the reflector is metallic, it is highly reflective. This means that, used at the same distance to the subject as a white reflector, the light from a silver reflector will be more intense. To reduce the intensity of the fill, the reflector can be placed at a greater distance from the subject. The physical flexibility of the discs makes them versatile in kicking light to a specified area. They can be used to increase light levels in the shadow areas but also to create beautiful highlights on the hair, a piece of jewelry, or even a shoulder (to help separate the model from the background).

A silver reflector.


Below, a gold disc reflector reflects warm and romantic light back to the subject. The gold color can also compensate for some of the blue cast that is prevalent in a heavily shadowed area. Although I personally would not have chosen this image (because of the hand positions), it was the model’s favorite image from this series. To finish it, the image was cleaned up in Photoshop and the edges were darkened slightly to direct the viewer’s eyes to the model’s face.

A gold reflector adds warm-colored fill light.


Practical Example: Natural Reflectors. This image was taken with the late afternoon sun reflecting off a building and onto the model at an industrial park. The gray background was another building in the complex. Because I used a long lens, a 300mm Nikkor, and shot with the aperture wide open, the building in the background went out of focus just enough to look like the horizon line on a beach. Keep your eyes open for great natural reflectors in your environment—and when you see them, note the time of day to shoot there. These can be simple, beautiful light sources.

Natural reflectors, like the late-day light reflected off a building, can be very flattering light sources.


Placing A Softbox

Today's post comes from the book Off-Camera Flash: Techniques for Digital Photographers by Neil van Niekerk. It is available from Amazon.com and other fine retailers.

A softbox is generally placed at about a 45 to 60 degree angle to the camera’s left or right. The light is typically about 30 degrees above the subject’s head. This puts enough light in the eyes of the subject and directs it at an angle that makes visual sense (with the light coming from higher than the subject’s view). Essentially, you want to make sure that the cone of light coming from the softbox hits your subject’s head and shoulders.

Fortunately, a softbox is a forgiving light source. You have a fair amount of play when it comes to the height and angle. In fact, the larger your light source is, the more forgiving it is in terms of placement. In comparison, if you use direct off-camera flashguns without diffusion you will need to be more precise in your placement of the flash.

The lighting here was a flashgun in a softbox, held aloft on a monopod. (1/250 second at f/8 and 200 iso; ttl flash at –0.3 eV)

A pull-back shot showing the setup for first image.

Let’s look at an example. During a photo session with Christina and David (above), I needed to match the bright sunlight, so I worked at the maximum fash sync speed to get the most power from my flash. The light was so bright that it was getting to the edge of what the flashgun was capable of when diffused with a softbox. I used wireless TTL fash, with the master flashgun on my camera and aimed at the slave fashgun mounted on the softbox. In the second image, you can see the placement of the softbox, held aloft on a monopod by an assistant. To shoot the final image, I was standing right next to the bicycle. (Note: The final image had some editing done to remove distracting background elements such as the motorbike.)

When combining a single off-camera light source (such as the softbox and flashgun combination used in the images below) with ambient lighting, it also becomes necessary to position the model (here, Camille) in such a way that the light from the fash strikes the subject from a sensible angle. Generally, what I look for is that the light opens her features that are in shade. I also want some light on the model’s eyes, without a heavy shadow under the brow.

LEFT, with ambient light only, shows the direction of the existing light (from camera left). RIGHT, a softbox was added to camera left to blend with the natural light while opening up the shadows.

The setup for the final image.

Feathering the Light
In the previous example, I positioned the light with the central “sweet spot” from the softbox pointed at my subject’s features. Sometimes, though, we need to control the position of our softbox more precisely—and control the spread of light from the softbox. The following image sequences show situations where I feathered the light from my softbox.

In the next images, I wanted to prevent a hot-spot of glare from appearing on the metallic door in the background. Positioning the softbox as I normally would resulted in the light from the softbox being directly reflected toward the camera.


Glare from the flash is evident on the metallic wall.

By angling the softbox away to a fair extent (images above), I made sure that most of the light reaching the model was from the light from the edge of the softbox’s spill—and that the glare-causing light did not strike the door. (Note: A minor problem now is that we do see the shadow of the softbox being cast.)


Feathering the flash eliminated the glare. (1/200 second at f/4 and 400 iso; ttl flash at +0.7 eV)

In the second example (below), I feathered the light from my softbox to avoid too much light spilling on the top part of the wooden structure. The idea was to accentuate the model, Stacy, by having the light more concentrated on her. This technique should be apparent from the photos. I simply rotated the softbox away from the wall, making sure I still got enough light on our model.

LEFT, here is the scene with the flash disabled. RIGHT, directing the flash at the model as I normally would spilled too much light onto the building above her


A pull-back shot showing the placement of the softbox for the final image.

Feathering the light kept the emphasis on the model and created a pleasing lighting pattern on her face. (1/125 second at f/5.6 and 200 iso; ttl fash at –0.7 eV)

BUY THIS BOOK FROM AMAZON

Posing for Pregnancy Photography

Today's post comes from the book The Art of Pregnancy Photography by Jennifer George. It is available from Amazon.com and other fine retailers.

In photographic print competition, posing is one element that jumps out at the judges. An awkward pose will destroy any chance an image has of earning a high score.

Poor posing is also readily evident to the general public.When the subject’s pose appears unnatural, the viewer will feel uncomfortable, even if they are not sure what it is that is technically wrong with the image. Conversely, when a photographer is able to capture a natural-looking pose, the viewer will be drawn into the portrait and will feel a connection to the subject.

Posing is an art in and of itself. Some people are born with the innate ability to position their subjects and immediately see comfort and grace in the pose. Then there are those of us who need to study, practice, and experiment in order to portray our clients in a way that looks natural and unposed. There are many steps to learning good posing techniques, and the sections that follow will outline a variety of techniques you can use to improve that aspect of your portraiture.

Nestling the mother and father together created a feeling of security, love, and anticipation between the couple. Their tender interaction helped to tell their story.

THE HISTORY OF POSING
From the beginning of time, people have created artistic representations of the human form. From cave drawings, to Renaissance painters, humans are fascinated with depicting one another. That fascination continues for photographers and their clients today.

In the early days of photography, excruciatingly long exposure times meant that portrait subjects had to hold a pose to ensure the success of the image. Today, advances in technology and a host of automated features allow us to easily capture an image in the blink of an eye! Posing, however, is one aspect of portraiture that still requires the photographer’s attention and direction—and always will.

CONCEPTUALIZING THE POSE
Body language is a form of communication, and you want your image to communicate the right message! When we think of a pregnant woman, we have thoughts of motherhood, love, affection, protection, nurturing, warmth, and tenderness. Today, with mothers taking care of their bodies and our in-creasing societal appreciation of the beauty of the pregnant female form, we also see motherhood as a time of beauty. You might wish to convey any of these moods or feelings in your portrait. This time in a woman’s life is fleeting and very different from any other stage, and it is a privilege to record it. Make it your goal to capture genuine emotion during the shoot.

THE BASIC POSE
A good pose is one that is flattering to the subject and provocative to the viewer. There are many poses—sitting, standing, or lying—that can easily meet this goal.

Standing.
Photographers always seem to first tackle photographing a pregnant woman by having her stand upright. The assumption is that if she sits, the viewer will not fully see the developed midriff. While a standing pose can be a good place to start your session, you may find that the design and flow of the image is most difficult with a single standing subject than with multiple clients or a seated or lying pose.

Many photographers prefer to begin the portrait session with a standing pose, and the technique illustrated here is a good option. The image was created using a single light and a reflector. The mom was asked to turn her body toward the main light and place her left had at the upper area of her tummy and her right had at the lower area. Her chin was angled toward her near shoulder. The intimate feel of this image is due in part to the fact that the subject’s gaze is not directed at the viewer; creating a profile of the face or having the subject look at the camera would produce a different look.

An image of the mother alone will be more dynamic if you take the time to consider the best-possible placement of the hands, arms, and face.

You can easily create a nurturing mood in the image by having mom place her hand on tummy, holding and loving the expected baby. In this image, the mother held the flowers lower and to the side so that the view of her tummy is free of obstruction.


In the image above, the mother’s arms wrap around and hold her tummy, and she looks away with a thoughtful expression on her face. Note the serenity and poise that is conveyed by the subject’s stance. The portrait shows the subject’s strength and contentment. To create this mood, the subject’s body was turned a few degrees away from the camera. She then turned her upper body toward the camera and turned her face toward the light. The position of her hands implies a sense of protection. By turning her body slightly away from the direction of her feet, a slimming effect was produced. Additionally, turning her face away from the direction of her body produced the desired S curve in the image.

Laying. The mother-to-be must be portrayed in the most relaxed, beautiful manner possible. When the mother is relaxed and surround by props like soft pillows and beautiful fabrics, you can capture something that transcends conventional pregnancy photos. In the past, many pregnancy portraits were taken with the mother-to-be in a standing position with the focus primarily on her midriff. However, that isn’t necessarily the most comfortable or aesthetically pleasing position for the subject. One of the most beautiful ways to photograph the mother is with her lying down in such a position that the woman becomes more relaxed and serene. From a technical viewpoint, her body is more elongated and appears thinner.

When posing the subjects, directing the gaze of your subjects can help tell the story. Here themother and the older sibling are looking off together, as if they are looking to the future as a loving and supportive family.

Create your scene with beautiful fabrics in colors that complement the subject. Then have her lie down in the middle of a bed or on the floor (note that it will be easier for your late-pregnancy clients to get up from the bed than from the floor). Place her legs in a slight bend, with her arms relaxed and her hands focused on her pregnancy.

Good posing of the hands is critical, as the hands express emotion. How and where you pose the hands can make an immense difference in the overall quality of the pose and the message you are trying to convey in the image.

Having the hands posed around the baby-to-be conveys a sense of protection and nurturing. In an image of the hands and tummy, an interesting contrast is formed between the mature adult hands and the anticipation of new life.

When posing the subjects, directing the gaze of your subjects can help tell the story. Here the mother and the older sibling are looking off together, as if they are looking to the future as a loving and supportive family.

The hands can speak volumes about the love the mother has for the baby, and hands touching between a couple tell about their shared love and anticipation. Additionally, the position of the hands, or the leading lines formed when a couple joins hands, can create the needed compositional elements that add polish, guide the viewer’s gaze through the image, and create a dynamic feel in the image.

Making the posing of the hands look natural can be difficult for some subjects and photographers. One easy method is to have the hands gently holding on to something. The mother can gently grasp the edge of the fabric she is draped in, or hold a bouquet of flowers, or simply rest them on her tummy. Make sure her hands are not positioned in the center of her tummy area but are placed side to side or top to bottom. If the mom’s hands look unnatural, ask her to take her hands off of her tummy or let go of the object she is holding for a few seconds, then place the hands back. Many times this will result in a more natural look. There will be times, however, when you will have to demonstrate with your own hands the position you want with the fingers in and the placement you are seeking.

Keep in mind that a flattering hand pose is one in which the fingers are spread slightly apart and bent away from the camera. Avoid having the back of the hand squarely pointed at the camera. Also note that the palm should never be faced toward the camera. If a hand is held away from the body, have the middle finger bent slightly more than the other fingers. This position is used by ballet dancers when the hand is held away from the body, and it produces a graceful look.

You can capture the image with the camera positioned by the feet or the head; either perspective can result in a breathtaking presentation.

Seated. By having your seated subject posed with her back straightened, you can present a full view of the mature pregnancy. In the image below, the mother is beautifully portrayed as she sits with her legs bent and to the side.

A standing pose is not your only option for posing your pregnant subject. As shown here, aseated pose can be elegant—and it may actually provide your client some relief from an aching back or knees.

The carefully designed lighting setup cast more illumination on the mother’s left side, leaving part of her form in shadow. This allows for a slim, smooth presentation of the body. Turning the subject’s head to the side brought her striking profile into view. With her eyes closed, a sense of calm and serenity was achieved.

This image of a couple has a unusual feel as the point of view is from above traveling down the embracing couple.

Location Lighting

Today's post comes from the book Wes Kroninger's Lighting: Design Techniques for Digital Photographers by Wes Kroninger. For this post we are featuring two of his many lighting designs from the book. In this book Kroninger showcases a number of his remarkable images and breaks them down into how they were setup and what equipment was used to achieve the final result, often times including valuable tips about that shot. Each shot is accompanied by multiple diagrams. This book is available from Amazon.com and other fine retailers.


The Scoop
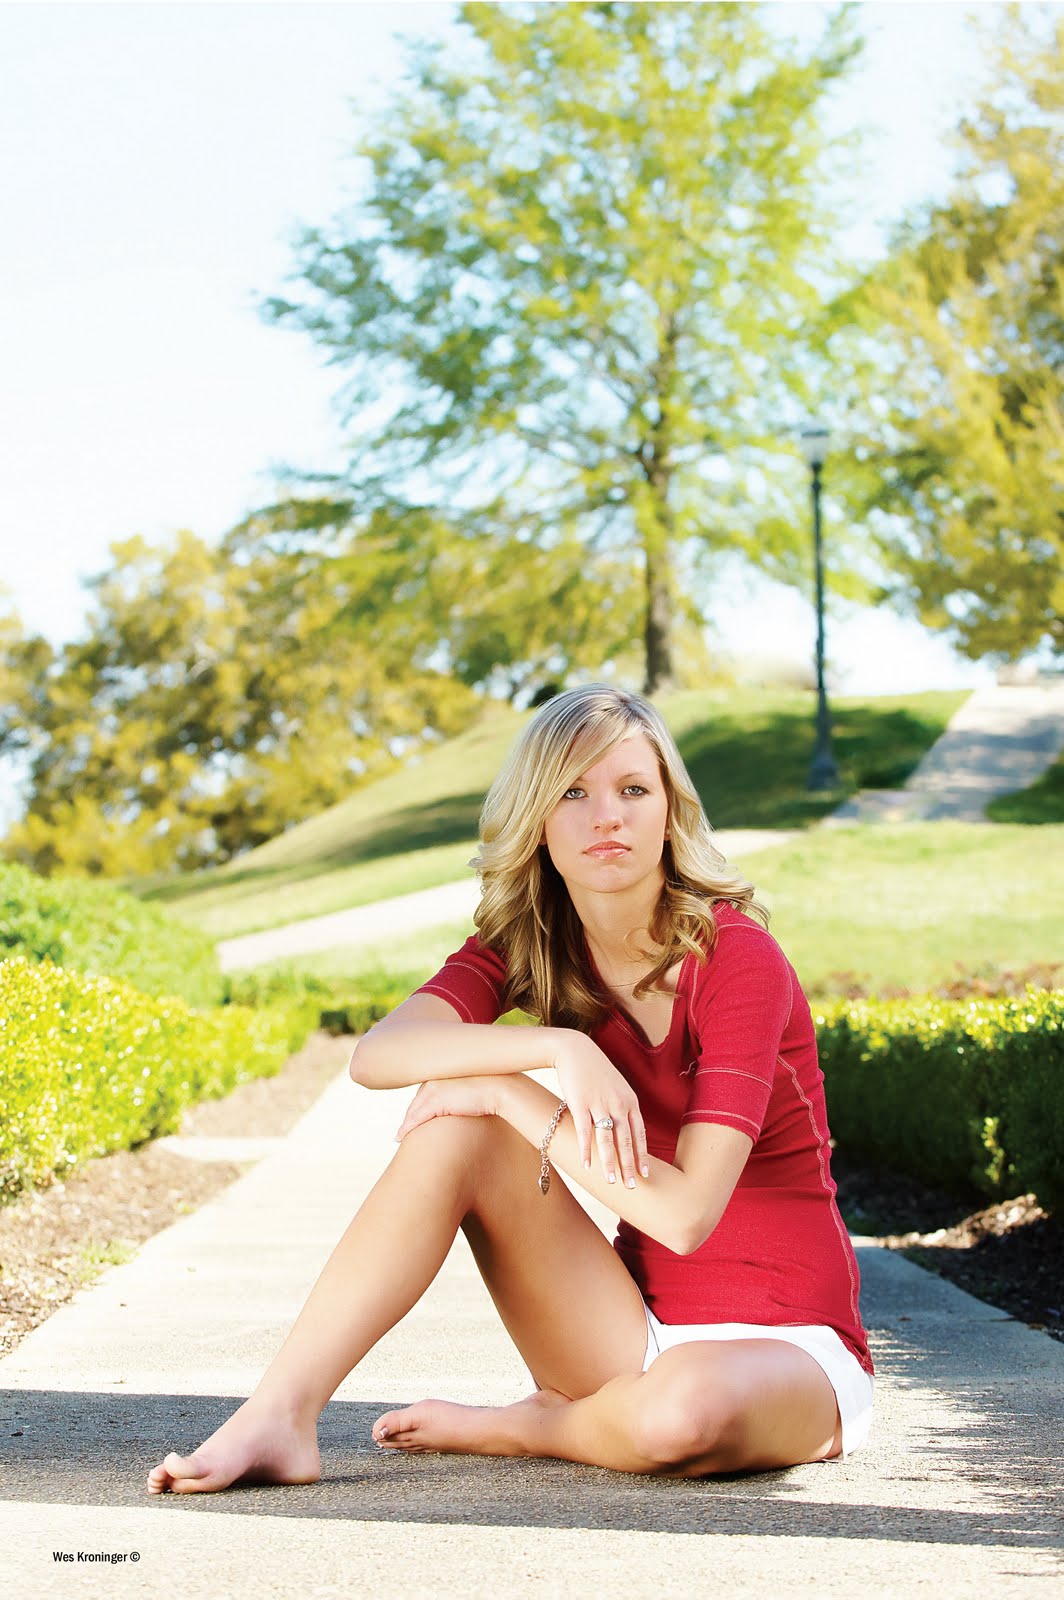
Photographing high school seniors outdoors often creates a grueling schedule. When we want to get many poses in a short amount of time, it is often impossible to use any kind of strobes or electronic flash units. Fortunately, a simple reflector used properly can create beautiful light that seems as if it were created using studio equipment.


Tech
For this image, the model was positioned in the shade of a building. A 3x4-foot reflector was positioned in the direct sun, throwing light back into the open shade. This created a beautifully soft yet crisp light. The simplicity of lighting with a reflector makes it a good choice for photographing high-school seniors and children outdoors.


Tip
I chose to create this image with extremely horizontal formatting—and also selected an aperture setting that would result in a shallow depth of field. Doing this can effectively drop the foreground and background out of focus, drawing the eye to the part of the frame that is in focus, which contains my subject.


The Scoop
The image below was taken in direct overhead sunlight. This is generally best to avoid—but sometimes there are limited options as to when a session can take place.


Tech
To eliminate the unflattering shadows associated with the overhead sunlight, I used a four-foot square scrim that was just barely large enough to create shade for my model (you can see the area of shade created on the ground below her). A 3x4-foot silver reflector was used from her right to add a directional main light to the image.


Tip
Notice that this pose, while also looking relaxed, creates a triangular composition that leads the viewer’s eyes back to my subject’s face.


BUY THIS BOOK FROM AMAZON