The Characteristics of Light

Today's post comes from the book Jeff Smith's Studio Flash Photography: Techniques for Digital Portrait Photographers by Jeff Smith. It is available from Amazon.com and other fine retailers.

Educators often talk about the quality of light that is produced by a light or light and modifier. I always thought this was confusing, as the term “quality” can also be used to refer to something that is a high quality—or better than others. Light has no quality, only quantity (the intensity or amount of light), but it does have characteristics—and it is these characteristics that are being referred to when a photographer says that a certain light or modifier was used to create a “quality” of light that was well suited to a subject.

In the studio, I have used everything from a spotlight to a cheap umbrella to light my clients’ portraits. Working outdoors, I have used soft light from the open sky as well as direct sunlight to produce the look I wanted. No single light source had a better quality than another. They all worked beautifully for the portrait I wanted to create. However, each source did have different characteristics.

When you conceptualize your portrait, you’ll need to decide whether you want a hard or soft lighting effect. Once you’ve made that decision, you’ll need to choose a main light source that produces light with the characteristics you are after. Let’s take a closer look at soft light and hard light so you can learn to identify and create the right lighting for the kind of portrait you want to shoot.

Soft/Diffused Light. Light is called “soft” or “diffuse” when there is a gradual transition from the highlight area of the image to the darkest shadow. In portraiture, soft light can diminish the appearance of harsh lines and wrinkles. It also produces less shine on the subject’s face than hard light will. The majority of traditional portraits are made with soft light. It is the most flattering light for portraiture and is more forgiving of poorly placed light sources. When I was a new photographer, I thought I should use the softest light possible. I was wrong. With a main light source that is too soft, the light lacks directionality and contrast, and the final image looks flat. It lacks the “pop” that you want in professional images.

Soft lighting is the most flattering option for most portraits. As you can see in this trio of images from a single session (left and facing page), it can be used to create an array of great, salable images.

There are many modifiers available that will allow you to create the degree of softness you desire in your portrait. For studio and indoor location portraiture, most photographers use softboxes as a main light source. There are a wide variety of softboxes available on the market—from extra small to extra large or long but narrow. They are also available in various shapes. Some softboxes have a single layer of diffusion, and others have double diffusion. There are many variables that affect the characteristics of the light. Let’s take a look at how changing some of the variables will affect the look you’re after.

In general, a larger light source provides softer light than a smaller source. However, moving a large source farther from the subject makes it smaller relative to the subject. Therefore, when a large softbox is used close to the subject, it will emit a much softer light than it will when it is moved to 10 feet. (This is due to a shift in its size relative to the subject.) Therefore, if you are new to the profession and can afford only one softbox, you should realize that changing the light-to-subject distance will change the effect of the light on your subject.

The light-to-subject distance affects the look of the lighting in the image. The closer the light is placed to the subject, the softer the light.

There are other ways that you can manipulate your softbox to make its light a little softer or harder. If you are using a softbox with the flash head facing the subject, the light will be harder than it would be if you aimed the flash head at the back of the box, as the light would bounce off of the back of the box before passing through the diffusion panel. Also, directing the light through a single diffusion panel would produce a less diffuse light than you could create by adding the second diffusion panel that most softboxes come with. Also, with everything else being equal, a softbox with a silver interior will produce a light that is harder than a softbox with a white interior.

If the light from your softbox is too hard, you can create a softer lighting effect by using just the light from the edge of the softbox, rather than the harder, more direct beam of light emitted by the full front panel of the modifier. This technique is called feathering. I tend to select softboxes that produce more contrast than I typically want and feather the light to soften it. Feathering is a great technique that allows you to create workable light from sources that would not otherwise be usable.

I like to use a softbox with a silver lining and a thinner front diffusion panel (thicker material diffuses the light more, making it softer). This fits my style of photography and my clients’ tastes. The majority of my clients are high school seniors, and they like portraits that have more contrast and a higher color saturation. If you are using a softbox like mine but want more contrast, you can glue mylar or aluminum foil to the interior of the box. If your light is too contrasty for your tastes, you can add an inner diffusion material or replace the outer diffuser with a thicker fabric.

Hard/Directional Light. Hard light is characterized by hard, sharp shadows and high contrast. There is a quick transition from highlight to shadow. As I mentioned earlier, soft light is the choice of most portrait photographers. However, hard light, when carefully controlled, can be used to create dramatic portraits. The Hollywood photographers used hard light to create their classic, high-contrast black & white portraits.

Like modifiers designed to diffuse light, light attachments that create harder, more directional light have subtle variation in design and functionality, but all produce harder light than a softbox. A flash unit fitted with a parabolic (metal) reflector is the tool of choice as a main light source for most traditional portraits. These reflectors come in a variety of shapes and sizes as well as different interior finishes. There are a great number of accessories that can be attached to the parabolic reflectors to allow enhanced control over the light (snoots, grids, etc.). You can also modify your parabolics by changing the finish of the interior or putting diffusion material over the end of the reflector.

The effects produced by window light will vary depending on the direction the window faces, the time of day, and the type of glass in the window. Window treatments can further modify the light that strikes your subject.

When used correctly, parabolic reflectors will help you re-create that old Hollywood look. The best part of parabolic light is the amount of control it offers. When you can add light precisely where you want it, you can create a dramatic portrait.

A hard light setup and final image.

Shooting Up, Down, and Across

Today's post comes from the book Christopher Grey's Lighting Techniques for Beauty and Glamour Photography by Christopher Grey. It is available from Amazon.com and other fine retailers.

Shooting down or shooting up are angles many of us don’t use. Why not? They’re dramatic or fun, depending on how they’re approached. They’re also difficult because you may have to angle yourself in an uncomfortable position to get what you want. Depending on her perspective to the camera, your model may have to do the same. Here are a few tips.

SHOOTING UP
The most important detail when shooting from any position is to carefully place the main light relative to your angle to the subject. In other words, if you light her so she looks great when you’re standing at full height, the setup will probably make her look awful when you drop to your knees and raise the camera. Set the light so it looks good from your shooting position, with the model in at least a basic pose, for better results. I can hear many of you questioning my sanity and asking why I would point out something so basic, but I’ve seen too many subjects lit badly when photographed from these angles that I felt I needed to address the issue.

Shooting up is more difficult than shooting down or across. The perspective problems you may encounter when the camera is so close to the model that the lower half of the image (the area closest to the lens) looks larger than the upper half might be difficult to deal with (see below).


Angling the model so that she leans slightly toward you and moving back a bit may be all you need to get an excellent image. In the first image, the light, a bare-tubed strobe, was placed at a typical height for her position. When she looked down at the camera, however, it was completely in the wrong position, creating deep shadows that hid her eyes and the underside of her cheeks and chin. Not very attractive. See imagebelow.


Angling the model toward the camera meant the main light needed to be lowered to get an attractive nose shadow. Consequently, the light stand holding the cookie (the flag with a quarter-moon pattern cut into it) had to be raised to get it to the same position.

The final image was augmented with an additional fill card at camera right. It filled in the shadows and added detail to her clothing. Net result? A beautiful image of a beautiful woman. See image below.


SHOOTING DOWN
Shooting down, at least from a perspective standpoint, is easier than shooting up. The same attention to the angle of light must be paid, though, or you may end up with lighting scenarios that are not flattering.

To create the image below, I used a 2x3-foot softbox for the main light (the only light necessary because the model was ringed with white cloth). It was set to the camera-left side of the set and angled it so it would produce an effect that would resemble butterfly lighting if the model had been upright to the camera. Two black flags, each 12x30 inches, were separately mounted to
accessory arms on light stands, cutting the light to the top of the pillow and the right side of the model’s shirt and body. The gobos were set at slightly different angles and close to the light, to avoid sharp shadows and deeper underexposure. This added a bit of visual interest that a typical viewer just can’t put a finger on.


I removed the gobos and moved in a three-stair stepstool to the side of the air mattress that kept my model comfortable. It’s difficult to position yourself directly over a model without building some sort of scaffold, something most of us (myself included) don’t have sitting around. The easiest way to simulate the effect is to get on a short ladder and lean over the subject.

Hold the camera in the landscape position (horizontally) and lean in as far as possible. You can rotate the image to the vertical position in postproduction. If the light is positioned correctly and you’re in the right place, you’ll be amazed how natural it looks, even though you might have been a foot or two off center. See the image below.


SHOOTING ACROSS
When you’re shooting across a reclining model, you’re subject to the same “rules” that apply when you’re shooting up or down, with one exception. Certainly, the main light must be placed in a situation that will render attractive light. That’s a given (or it should be). In any such situation, and regardless of the depth of field you may have dialed in, be sure to focus on the eye nearest the camera. Doing so will put the primary point of interest exactly where an eventual viewer expects it. This is especially true when using a telephoto lens wide open or with a large aperture. See below.

Tips for Photographing Babies

Today's post comes from the book Boutique Baby Photography: The Digital Photographer's Guide to Success in Maternity and Baby Portraiture by Mimika Cooney. It is available from Amazon.com and other fine retailers.

Clothing Choices. Babies are best photographed in their birthday suits—just plain naked. Most clothing swallows up a newborn and disguises what’s so cute about their tiny shape. The parents’ own clothing choices should be simple and neutral. You want to highlight their relationship and special bond with their new baby, not their outfits. Plain black long-sleeved shirts with jeans work very well.

Newborns are best photographed naked.


Moms just love seeing Daddy shirtless holding his little baby bundle—and there really is something special and heartwarming about seeing a dad’s strength in contrast with the delicateness of a newborn baby. So off with the shirts, Dads! Even if the father is not completely comfortable with his shape, you can use lighting to artistically hide the areas he doesn’t want highlighted (usually the arms and tummy).


Moms love shirtless dads—and portraits like these let you tell a story by contrasting the delicate with the strong. Using dramatic lighting you can artistically hide any areas that Dad isn’t comfortable having seen.

Accidents Will Happen! With most newborns, we’re tempting fate with those cute curled-up naked baby portraits. I always tell parents, “It’s not if but when.” Don’t panic; just be prepared for pee and poo accidents, keeping clean-up supplies at the ready. In my studio, we have an easily wipeable floor, loads of antibacterial wipes, paper towels, and hand sanitizer. Very often, the baby will warn you that they need to go by crying and wriggling. If they do, place a clean diaper loosely under their buttocks until they settle. It’s also advisable for the adults to bring an extra set of clothing; the probability is very high that someone is going to get wet!

With babies, accidents are a matter of when, not if.

What to Do When Baby Cries. Sometimes even adults wake up on the wrong side of the bed, so it is completely understandable that a child might cry during a photo session. If that happens, it’s best to pause the photography and give the little one a hug and cuddle to make them feel secure. The bright flashing lights, strange noises, and unfamiliarity can cause uncertainty. Crying may also be a sign that the child has passed their patience threshold. In that case, there is no use in forcing the matter; just wrap up the session quickly. They may even be unwell or coming down with a cold. If that is the case, reschedule the session for when they are feeling better. However, if it really is just a case of nerves, then a really talented photographer should be able to offer distractions to both the mom and the child and re-focus them when they feel at ease again.

Usually, persistent crying is baby’s sign that they are tired or about to fill up their diaper. If you can bear through the howling, swaddle them and rock them until they nod off. A great tip I got from the baby-whisperer Tracy Hogg is to use techniques in threes. For example, pat the baby’s back while “shooshing” loudly enough that the baby can hear it over their own crying, also while rocking. I like to use a sound machine that mimics womb sounds to offer that familiar heart-pumping the baby got used to in Mom’s tummy. Remember that, just days ago, the baby was tightly curled up in the womb, so all the flailing about they now find themselves able to do makes them feel insecure.

Naked newborns will cry.

Always have an assuring hand on the baby’s back or head to offer that feeling of warmth and security. Also, have Mom feed the baby in between poses; a full belly helps them sleep. Another great tip is to place a heating pad, gently warmed in the microwave, under a blanket and lay the baby on their side or tummy.

Posing Hands

Today's post comes from the book Doug Box's Guide to Posing For Portrait Photographers by Doug Box. It is available from Amazon.com and other fine retailers.

You’ve heard it said that you can tell a lot about a person by looking at their hands. Likewise, you can tell a lot about the portrait subject by looking at his or her hands. Fortunately or unfortunately, you can also gauge the photographer’s skill at posing by considering the hand pose of the subject.

When posing the client, you should take care to avoid pointing the hands straight on to the camera to prevent them from appearing distorted. The hands are best viewed at an angle to the camera, and, when possible, care should be taken to photograph the side of the hand, which gracefully continues the line of the arm when the hand is bent upward at the wrist.

Avoid having the client curl their fingers into a fist. Rather, present the hand with the fingers somewhat outstretched and with a slight space between all of the fingers.


Notice the effect that the hand pose has on the overall mood of the portrait. In the image on the left, the hands are tucked under her arms. The image has a closed off look. In the center image, the subject’s left hand appears attractive. The wrist is bent upward, there is space between the fingers, and the hand has a graceful appearance. However, with the woman’s right hand hidden from view, the pose seems unfinished. In the final image, the woman’s hands seem to show warmth and grace and add to the pleasant mood of the image.

In this image series, we start with the hand in an undesirable position. The back of the hand is straight on to the camera and, with the fingers curled inward, the hand looks like a fist. The second image shows an improved hand position, but the third and forth images are more pleasing still.

The above images show several ways in which the subject’s hand can be posed resting on her face. In the first image, the back of the hand shows, creating a fist-like appearance. The second image is better, but her hand obscures too much of her face. In the third image, the subject’s right hand was placed on her far cheek, and we have a full view of the left side of her face. Her left hand is wrapped around her elbow. To improve the pose, the woman extended her left index finger; this draws the viewer’s gaze to her face or, more specifically, to her eyes. We see the edge of the hand, and if we follow the lines of her arms with our gaze, we can see that the pose helps to lead our eyes through the frame. Since the eye is drawn to areas of sharp contrast, we hid a portion of her left hand from view. It does not appear “missing”; rather, with less of her skin showing, the prominence of the hand has been visually diminished.

This image pair shows two views of the woman’s hands. In the top photo, there is a slight space between the fingers; this creates separation, providing a defined view of the hand. Unfortunately, the angle of the hands to the camera makes the hands appear too prominent. Posing the hands as if the woman was pulling the chair out, with her hands on the sides of the chair back, provides a more elegant, graceful view.

The photos above illustrate two more hand posing options. The image on the left shows too much of the back of the hands. The right-hand photo presents a more desirable, graceful view.

In general, women’s hands should appear graceful, and men’s hands are posed to show strength. When posing men’s hands, it is common to slightly curl the fingers. Be careful to ensure that the fingers are not tightly curled into the palm; again, in this position, the hands look too much like fists. In posing men’s hands, it is also important to show the side of the hand rather than the back of the hand, as the more streamlined view is more attractive.

Controlling The Shadows

Today's post comes from the book Lighting Essentials: A Subject-Centric Approach for Digital Photographers by Don Giannatti. It is available from Amazon.com and other fine retailers.

I am sometimes amazed how many online discussions there are about the evils of shadows. Shadows are a natural result of light, so I’m not sure that killing all shadows is the best way to light everything. Sure, there are some cases when a shot requires nearly or completely nonexistent shadows, but for the most part, we define the light by showing the shadow—even a very faint one. Shadows tell us the direction of the light just as certainly as the highlights do. Shadows define and sculpt, create contrast, provide modeling of the subject, and can be used to add an air of mystery to a photograph. Shadows are very important to photography, so we need to be able to control them and their relation to the highlights also produced by the light that created them.

This image of Briana was photographed at a motel on Anna Maria Island. It was raining like heck and we couldn’t leave the little laundry room to wait for our ride to the airport, so we decided to make photographs. I placed one speedlight behind the fan (it was spinning; the strobe froze the blades) and one on a stand behind her to camera left, putting the shadow of her legs on the laundry sink. A third light was placed high and focused on her face. Each light was set to the same output, and their careful placement meant that she didn’t have a lot of leeway in her movement. The shadows are a big part of the feel of the final image, giving it a whimsical look that wouldn’t have been present with flat or one-sided lighting.

CONTROLLING THE SHADOWS
I love shadows. They give an image dimension and depth, mystery and grace. Shadows can be fairly faint and still help establish a background, the angle of light, or separation of the subject from the other elements in the picture. Conversely, they can be quite strong and add a hard “edge” to the image. Subject-centric lighting means knowing how to create the types of shadows
you need and place them to portray your subject in the way you have envisioned.

This shot of Richelle and the chair is made more interesting by the shadow on the wall. Shadows are not the enemy of photography, they are part of what we do.

The Angle of the Shadows. Shadows are created by a light source, so they fall away from whatever object blocked that light (creating the shadow) at the same angle as the light hit the obstruction. For example, if the light is coming in toward the subject at a 30 degree angle, the resulting shadow will also be at a 30 degree angle. Shadow is, after all, just the light interrupted. The Quality of the Shadows. Light sources that are large in relation to the subject (or, more to the point, the obstruction) produce soft-edged shadows. Light sources that are small relative to the subject yield sharp-edged shadows.

The Exposure of the Shadows. Shadows can be very light or very dark. One way to control this is by adding a light source on the shadow side of the subject. This light will “open” the shadow area—meaning that it will bring it closer to the exposure level of the main light side of the subject.

Many times, fill cards (reflectors) are used for this purpose. To do this, the card is placed on the shadow side of the subject and angled toward the face. Essentially, the card works like a mirror; light striking it from an angle (the angle of incidence) is reflected at an equal and opposite angle (the angle of reflectance). So when I put a fill card up next to a face, I make sure it is at the correct angle to receive as much light as possible from the main light and direct it onto the shadow side of the face, rendering the shadows brighter.

Alternately, you could add a second light source—or a third—to open up the shadows. There are boundless ways to have the subject be rendered by the light, and it is sometimes one’s personal style that determines what approach will be used.

On the whole, this image was exposed correctly; I like the way her hair is rendering and the white fence looks white. Unfortunately, it is not a good exposure for her face. To use the lighting as-is, I would have had to open up another 2/3 stop or so to compensate—but that would have changed the exposure of the whole shot.


Instead, I provided fill light on her face from a large white fill card in front of her. By controlling this, I made sure the face presented correctly (returning more light to the camera). Because the fill card only affected her face and the front of her shirt, the exposure for the rest of the scene remained unchanged—preserving what I liked about the previous image.

Controlling Blur

Today's post comes from the book Painting With A Lens: The Digital Photographer's Guide to Designing Artistic Images In-Camera by Rod & Robin Deutschmann. It is available from Amazon.com and other fine retailers.

As a society, we’re not accustomed to using blur to express a thought or feeling. As a result, when we encounter blur in our images, we tend to view it as a problem. In truth, blur can be a beautiful thing. It’s actually one of the most powerful compositional tools an artist has. As an artist with a camera, as a painter with light, you must master its use. Nothing says “brush stroke” better than a good blur.

PHYSICAL BLURS
In the previous chapter, we discussed depth of field. As it turns out, determining the depth of field we would like to see in our image is a critical first step in the image-creation process. It guides our aperture selection, the focal length we choose to shoot at, and the focus points in the image. With some practice, controlling the depth of field in an image and the resulting blurs (both in front of and behind your focus point) will become second nature. Once it is, you will be able to freely use it to your advantage to create a host of interesting blurred image effects.

BOKEH: AN EXPERIMENT
Bokeh (or boke) is the Japanese word for blur. Photographers use the term to describe the out-of-focus quality of lenses. Not all lenses produce the same amount of blur when used at similar focal lengths—even when the same aperture and focus point are selected. If you haven’t done it yet, check out your own lens’s maximum “bokeh.” If you’re going to be proficient with your paintbrushes, you have to know what they’re capable of.

The blur in this image (both in front of and behind the focus point) was made possible through the use of depth of field control. The photographer simply pre-focused his longer lens on home plate, checked his depth of field with his depth of field preview button (making sure he had at least two feet of focus), adjusted his aperture, then lined up the tiers of graphic information to tell the story (putting the pitcher in the scene). When the ball hit the focus point, the photographer shot. You will also notice (if you look hard enough) that this image was shot through a chain fence. The large aperture (f/4) and longer focal length (280mm) all but eliminated the obstruction and the given spatial distortion that occurs adds a wonderful painted “Rockwell-esque” quality to the image.

How to Do It. While in manual focus, rotate the focus ring of your lens to its minimum focus distance (i.e., as close as your lens will let you focus). Choose the largest aperture your lens offers and, if your lens is a zoom, zoom all of the way out. Find a small subject with a background that is uncluttered and far away, put your camera up to your eye, and move your body (camera included) forward and back toward your small subject (or away from it) until it falls into focus. Take a photo if you like. Look at the LCD and examine that background. Really look at the blur you’ve got. Analyze it. Make sure that you see just how shallow your depth of field is. What you’re looking at now (behind and in front of your small subject) is your maximum blur (bokeh). This is the greatest physical blur this particular lens can achieve. Now, repeat the exercise with each lens you own.

Blur can quickly isolate any individual intent. It also gives the photographer the ability to truly design an image—even if the image challenges our normal conceptions. Most photographers will not shoot an image in which the bride is intentionally rendered blurry, but an artist will take that chance. They do it all the time.

Different lenses offer different types of blur. It’s important to understand how close you can focus, what the minimum focus distance is for your lens, and what type of blur it offers, both in front of and behind your focus point. A 500mm mirrored lens produced the “painted” blur you see in this image.

Blur can be used to isolate your subject and wrap it in a blanket of color, tones, and meaning. Get to know what each lens you own affords, then use it well. Here, again, we see the “circled” blur effect that a mirrored 500mm lens offers. The “circles” stem from the construction of the lens itself. The blur you see is taking the shape of the mirror found in the lens.

Depth of field control proved vital in both of these images. In the top photo, a precise depth of field was chosen to keep the bride and groom in focus while blurring everyone else. In the bottom image, a shallower depth of field was dialed-in to blur the bridesmaids in the background.


WHAT YOU GAIN
When you start thinking about blur and controlling it, your pictures will change. They’ll become more controlled, better designed, and more artfully composed. You’ll stop worrying so much about simple subjects and their appearance in the frame and start being concerned with how that blur looks in your image. Eventually, you’ll do what you can to improve it. (Imagine being more worried about the blur in your image than the “stuff” that’s in focus. Crazy, huh?)

Once you’ve got it figured out, amazing things will happen. Take, for instance, an image of something nearly impossible to catch with your camera or lens set to auto. How about a picture of a bee in flight? Sound tough? It’s actually quite simple.

DEPTH OF FIELD CONTROL: AN EXPERIMENT
If you’re struggling with depth of field control, try this simple exercise.
Grab a water bottle and your favorite lens. Dial-in your largest aperture, turn your focus ring to its minimum focus distance (focusing as close as you can), and move your body (and camera) forward and back until the front-most part of the water bottle cap is in focus. You may discover (depending on your lens) that only a small portion of the cap is in focus. Adjust the aperture until the depth of field reaches across the bottle cap. Remember to check this by using your depth of field preview button. You may discover that you’ll have to use a very small aperture to gain the depth of field you desire. Adjust your shutter speed and ISO accordingly and snap the picture. The water bottle cap will be in focus. Great!

Capturing an image of a bee in flight is quite simple, as long as you don’t use your camera’s autofocus feature. It’s the same as shooting a moving baseball, only smaller. Simply dial-in the appropriate depth of field, choose a shutter speed fast enough to freeze a moving bee, and pick an ISO that allows you to illuminate the image as you wish. Pre-focus on where the bees are “hanging out,” wait for one to hit its mark, and snap! It’s a breeze.

Blur was a welcome part of this image. It illustrates the mood and feel of the event better than a static approach would. Sometimes allowing an image to blur is the right thing to do.

Now, imagine that we replaced that water bottle cap with a flower. Using the same procedure, dial-in the required depth of field. Imagine that there are lots of bees around you (hopefully you’re not allergic) and that they really like that flower. Now, wait until one of the bees flies into that depth of field and take the picture. Pow! You’ve got a photograph of a bee in flight!
Try that with your lens set to autofocus. We dare you.

Posing For Families

Today's post comes from the book Family Photography: The Digital Photographers Guide to Building a Business on Relationships by Christie Mumm. It is available from Amazon.com and other fine retailers.

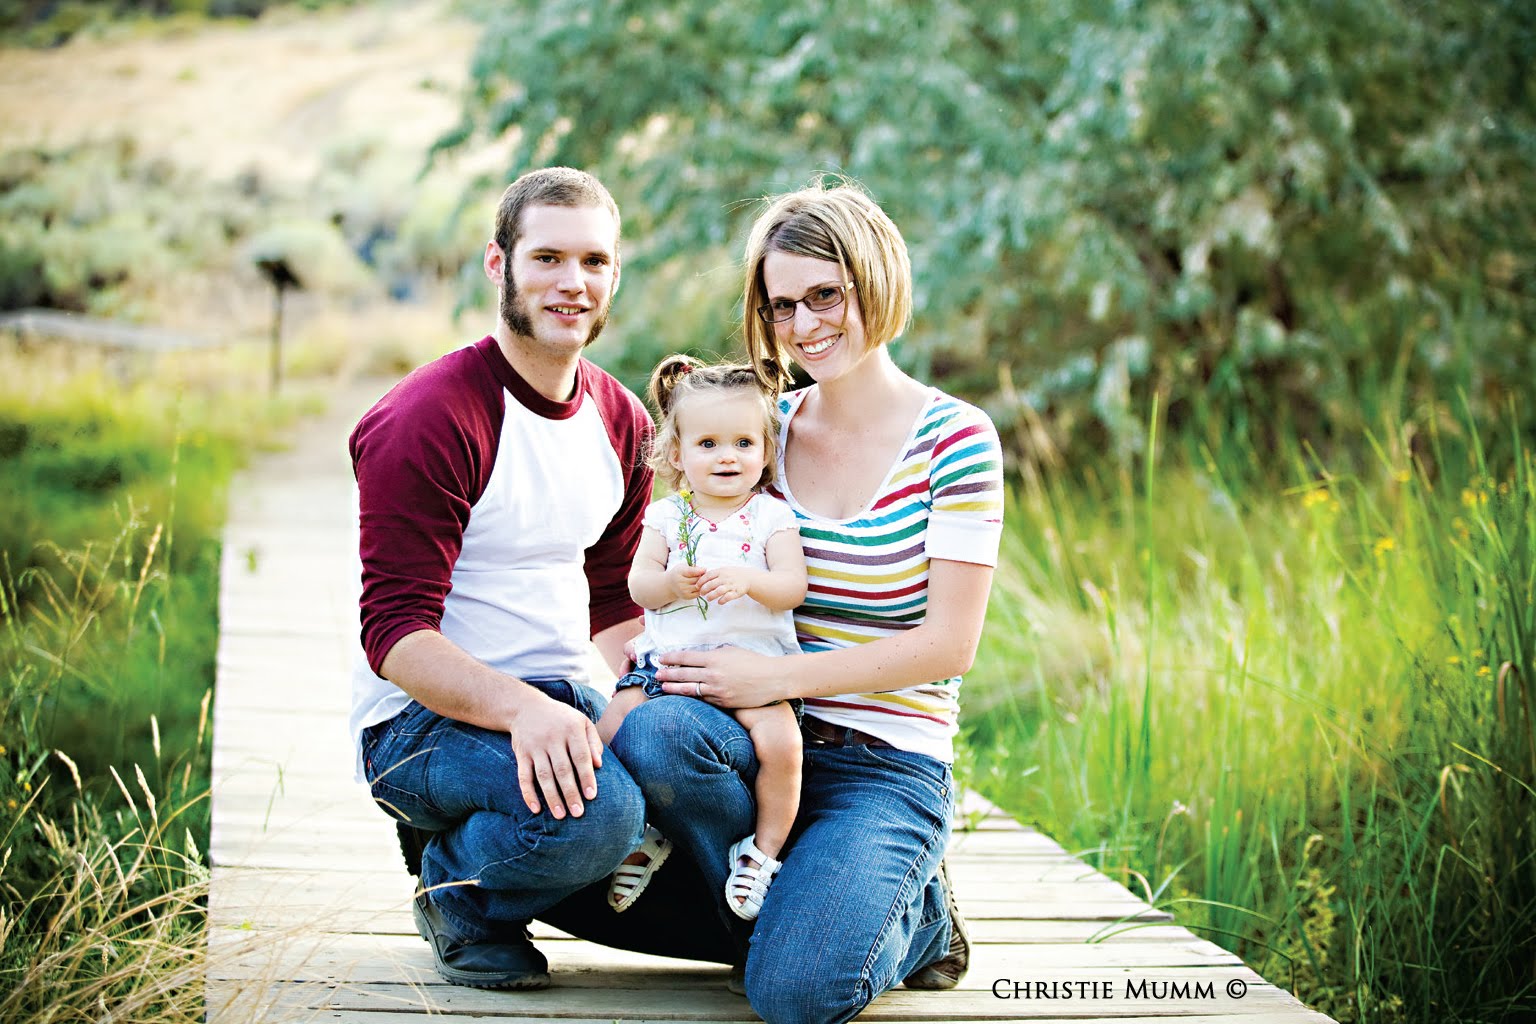
Most of my clients are looking for a good mix of casually posed and candid shots from their sessions. I begin by looking for the best light in any given location, then suggest posing that will allow the family to interact and reveal their personalities. Traditional posing rules for groups favor a balanced arrangement. I find that a few general rules serve me well.

The Triangle Rule. Posing families to create triangle patterns that are somewhat equidistant in spacing will feel balanced and keep the viewer’s eyes moving from subject to subject. It is human nature to be drawn to triangles, a shape that is repeated in nature over and over again. When you are looking at a family pose, be wary of groupings that place one subject out of balance or somehow “out” of the group. There are, of course, exceptions to this rule.

Families of three are very easy to pose as they will naturally fall into a triangle pattern.


With families that have an even number of members, be careful not to create a perfect square. With a family of four, a lopsided rectangle or parallelogram created from multiple triangles produces an intriguing yet balanced pose.

In certain cases, an offset subject can draw attention to that person in an interesting and narrative way. Typically speaking, however, you will want to be able to draw many different triangles with the placement of the faces in your composition.

The Linear Rule. Placing families in linear poses is a great way to draw the eye through the portrait in a fluid way. Try to use leading lines with these poses if at all possible; this will create a sense of flow in the image. Linear poses make fantastic panoramic or wide prints and can be placed on walls where vertical space is limited.

The “Groups” Rule. Posing families in smaller groups can make for fun, unique portraits. Whether you place the children separately from the parents or divide the boys and the girls, the “groups” rule can create poses that are fun and full of life. Encourage the smaller groups to follow either the triangle or linear rule; this will make each of the smaller groups feel more cohesive and balanced. One thing to consider with this rule is focus. When the groups are placed on different planes, you will have to make a decision about focal points and whether or not you want all of the subjects in focus.

Allowing this family to settle into their own personalities within the pose has made for a truly authentic portrayal of their family dynamic. I love how the littlest one is showing her stubbornness, the middle child is sneaking a peek at what everyone else is doing, and the eldest is picking on the little one. This image makes me smile every time I look at it and it ended up being their favorite from the session.

In this family portrait, the mother and father are positioned as the center of the group and their boys move out from them. The leading lines from the parents in the center to the outside children make the viewer’s eyes move back and forth through the image as they scan each face one at a time.


Here the “U” shape of the grouping has the eye moving from the father, to the daughter, to the son, and up to the mother—and back again.

This family portrait uses the “groups” rule, separating the boys from the girls to juxtapose their personalities. I love how the family clown in the middle is vying for Dad’s attention. Mom looks on, obviously amused at his antics.

The two groups are on different planes, rendering the parents and baby out of focus while the two big girls play it up for the camera in front.

The Lifestyle Portrait. The last posing rule I will talk about is the “unposed” rule. I try to capture a good mix of loosely posed images and candid shots in each session. When shooting in this fashion, you will be an observer and simply allow the family to interact and move around the shooting location. Walking, climbing, and otherwise being active is the name of the game here. Encourage your clients to play, explore, and try to forget that you are there at all. I will usually put on my long zoom lens for this portion of the session and shoot stealthily from a distance.


Allowing families to have some fun, unstructured play time during their session is a great way to capture images that convey the true nature of your clients’ relationships.

The philosophy of lifestyle portraiture is to capture the subjects in their natural environment. Interactions between family members are some of the most honest and authentic moments you will have the pleasure of capturing in your images. In fact, some of the most evocative and moving images you create will be those that are captured in moments when your direction is not present at all. I strive to be an observer of human nature and relationships. If you open your eyes to the world around you and allow the beauty of creation to wash over you in the present, your work will become a true representation of your subjects. Living life in the moment and appreciating your clients for who they are, and what they mean to each other, is paramount in this business.


Don’t be afraid to frame your subjects very tightly and even crop off portions of heads or faces. These shots create a sense of intimacy and can make for some beautiful, moving portraits.