
 Today's post comes from the book Sculpting with Light by Allison Earnest. It is available from Amazon.com and other fine retailers.
When talking about ambient light, we are referring to light (of all types) that is present in and around the area where we are photographing—light that we do not add to the scene or subject(s). Ambient light (also called available light) can come from the sun, the lamps or overhead lights inside a chapel or other room, or a variety of other sources. Ambient light can be measured using an incident light meter and controlled using a combination of shutter speed and aperture. Additionally, ambient light can be redirected using reflectors, diffused with scrims (also called silks or panels), and/or blocked with gobos (such as flags and black cards).
Sunlit Portraits
The Challenges of Sunlight. When you photograph using the sun as your only source of illumination, it is important that you learn to “see” the light and its effect on your subject. Sunlight is, of course, a notoriously challenging source of lighting for portraiture. In fact, a student once informed me that her previous photo instructor had told her to avoid the sun like the plague—and to always keep the sun behind the subject and flash them with straight flash. I strongly disagree.
Instead, I feel that the sun should be used and controlled just as you would control the lights in a studio environment. As in the studio, the position of the sun (the main light) will determine the lighting pattern on your subject’s face. The only difference is that you can’t move the sun when you want to change the lighting. As we’ve seen in previous studio examples, however, you can accomplish the same effect by moving your subject instead.
 The position of the subject’s face in relation to the sun dictates the lighting pattern that will be created
An important factor in using sunlight is predetermining the best time of day to photograph your subjects. This will greatly enhance your ability to produce pleasing portraits. It is not ideal to photograph portraits between the hours of 11:00AM and 1:00PM because the sun is directly overhead and will create unpleasant shadows under the eye area and facial mask, as seen in
the photo below. The light’s color temperature is also not ideal at this time of day.
 The image of Alena was created with the sun as the only source of illumination. The sun was at high noon and created unpleasant shadows under her eyes. This is not the ideal time of day to photograph portraits. (Program mode, ISO 100, 1/250 second, f/5.6)
 A better time of day for portrait photography is early in the morning or later in the evening. At these times of day, the sun is lower in the sky. This lower angle is more similar to the angles at which you would place your main light in the studio and results in the same flattering lighting patterns on the face. The light at these times of day also tends to be more golden, creating more appealing skin tones.
Using the Sun Alone. The following photographs illustrate how using the sun to your advantage can create pleasing images with essentially the same lighting patterns as you would see in images made in the studio. For example, the next photo is an image ofMichael Johnson that was created for his portfolio. We have become great friends and always come up with different themes for his portfolio shots. This day proved to be no different. Michael, a photographer himself, scouted the location and time of day to ensure dramatic light. An incident ambient exposure reading was recorded and the camera set accordingly. By adjusting Michael’s head placement, I produced a portrait with dramatic loop lighting on his face.
 Careful subject positioning was used to create a loop-lighting pattern in this ambient-light portrait. (Shutter priority mode, ISO 200, 1/250 second, f/10)
 On a beautiful sunny day, David Thompson and I drove his motorcycle through the yellow aspen groves of Colorado and came across the abandoned train car seen below. Fortunately, I had my camera and created this image as an illustration of the sun producing a beautiful dramatic Rembrandt lighting pattern. The portrait was created around sunset, when the sun is
lower on the horizon and produces a natural warm light.
 Late-day sun helped created warmth in this portrait, shot with a Rembrandt lighting pattern. (Shutter priority mode, ISO 200, 1/250 second, f/11)
 My dear friend Bob Ray, of California, created a beautiful portrait of Severine Tasset while in Italy the image below. Severine was posed lying on her side in a living room, in front of a green couch. A black leather jacket was draped behind her to create a low-key background. She was lit only by window light, which streamed through a sliding glass door to camera right. The curtains on this window were drawn but parted slightly, creating a natural strip light.
 Partially drawn curtains created a natural strip light that illuminated this portrait by Bob Ray. (Aperture priority mode, ISO 640, 1/60 second, f/11)
 Photographer Taralyn Turner Quigley created this beautiful bridal portrait of Rebecca Bruns using only sunlight. Taralyn arrived at the chapel early to scout out possible locations to create a soft formal portrait of her bride. Selecting the location, she positioned Rebecca close to a sunlit arched window that acted as a natural diffuser. Taking extra time to familiarize yourself with your shooting situations will greatly enhance your ability to create beautiful images.
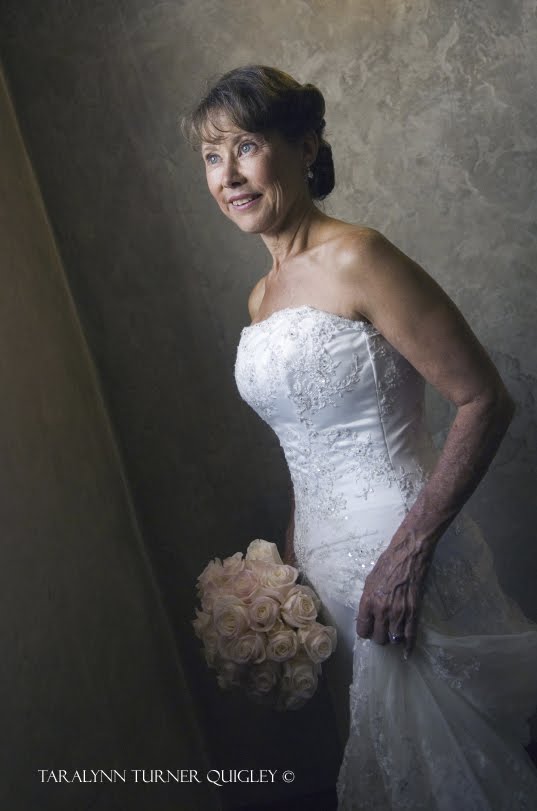 Window light often provides a naturally soft source of lighting, as seen in this bridal portrait by Taralyn Turner Quigley. (Manual mode, ISO 250, 1/100 second, f/2.8)
 Using the Sun with Natural Reflectors. Learning to recognize the natural reflectors that exist all around us can add a nice look to your outdoor photographs. For example, try positioning your subject under a white porch where sunlight is able to bounce onto him or her, allowing the shadows to be filled with natural light. Alternately, look for reflective surfaces, such as a nearby white wall or other highly reflective material, and find ways to incorporate this light into a beautiful portrait.
Jon Asp of Colorado photographed the next image, a wedding-day image of groom John Teten. Jon recognized the harsh Colorado sun and positioned his subject in a stairwell that had a naturally reflective surface. An incident meter reading was made and the camera set accordingly. With the sunlight behind the subject, light reflected off the granite to camera left produced a pleasant image that clearly sculpted the groom’s face.
 Jon Asp created this portrait of the groom using reflected light. (Aperture priority mode, ISO 125, 1/200 second, f/4.5)
 Scouting locations to photograph Meryl Vedros and Daniel Davis was a bit challenging as we were shooting on a bright, sunny day (below). I finally found the perfect spot between two old buildings. The location was very narrow birdbath. An incident meter reading was made with the meter pointing toward the light that was shining in between the buildings. The recorded exposure was f/8, and a higher ISO setting was chosen to create a little more grain, which worked well for this particular portrait.
 This portrait, photographed inWeston, MO, was created by posing the subjects between two old buildings, which served as natural reflectors. Meryl was wearing white pants, but I came prepared with a blanket for them to sit on—a good practice for all your location shoots. (Manual mode, ISO 1600, 1/400 second, f/8)
 The beautiful image ofMeryl Vedros below was created with the sun behind the model, resulting in the beautiful accent light on her left cheek. The main source of illumination came from the sun bouncing off the white building directly in front of the model, which produced a gentle lighting quality that was perfectly suited to her soft features. To determine the correct exposure, an incident-light reading was made with the dome of the meter at the subject position and facing the camera.

With the sun behind the subject, reflected light from a white building served as the main light. (ISO 200, 1/60 second, f/5)
No comments:
Post a Comment