 Today's post comes from the book Painting With A Lens: The Digital Photographer's Guide to Designing Artistic Images In-Camera by Rod & Robin Deutschmann. It is available from Amazon.com and other fine retailers.
As a society, we’re not accustomed to using blur to express a thought or feeling. As a result, when we encounter blur in our images, we tend to view it as a problem. In truth, blur can be a beautiful thing. It’s actually one of the most powerful compositional tools an artist has. As an artist with a camera, as a painter with light, you must master its use. Nothing says “brush stroke” better than a good blur.
PHYSICAL BLURS
In the previous chapter, we discussed depth of field. As it turns out, determining the depth of field we would like to see in our image is a critical first step in the image-creation process. It guides our aperture selection, the focal length we choose to shoot at, and the focus points in the image. With some practice, controlling the depth of field in an image and the resulting blurs (both in front of and behind your focus point) will become second nature. Once it is, you will be able to freely use it to your advantage to create a host of interesting blurred image effects.
BOKEH: AN EXPERIMENT
Bokeh (or boke) is the Japanese word for blur. Photographers use the term to describe the out-of-focus quality of lenses. Not all lenses produce the same amount of blur when used at similar focal lengths—even when the same aperture and focus point are selected. If you haven’t done it yet, check out your own lens’s maximum “bokeh.” If you’re going to be proficient with your paintbrushes, you have to know what they’re capable of.
 The blur in this image (both in front of and behind the focus point) was made possible through the use of depth of field control. The photographer simply pre-focused his longer lens on home plate, checked his depth of field with his depth of field preview button (making sure he had at least two feet of focus), adjusted his aperture, then lined up the tiers of graphic information to tell the story (putting the pitcher in the scene). When the ball hit the focus point, the photographer shot. You will also notice (if you look hard enough) that this image was shot through a chain fence. The large aperture (f/4) and longer focal length (280mm) all but eliminated the obstruction and the given spatial distortion that occurs adds a wonderful painted “Rockwell-esque” quality to the image.
 How to Do It. While in manual focus, rotate the focus ring of your lens to its minimum focus distance (i.e., as close as your lens will let you focus). Choose the largest aperture your lens offers and, if your lens is a zoom, zoom all of the way out. Find a small subject with a background that is uncluttered and far away, put your camera up to your eye, and move your body (camera included) forward and back toward your small subject (or away from it) until it falls into focus. Take a photo if you like. Look at the LCD and examine that background. Really look at the blur you’ve got. Analyze it. Make sure that you see just how shallow your depth of field is. What you’re looking at now (behind and in front of your small subject) is your maximum blur (bokeh). This is the greatest physical blur this particular lens can achieve. Now, repeat the exercise with each lens you own.
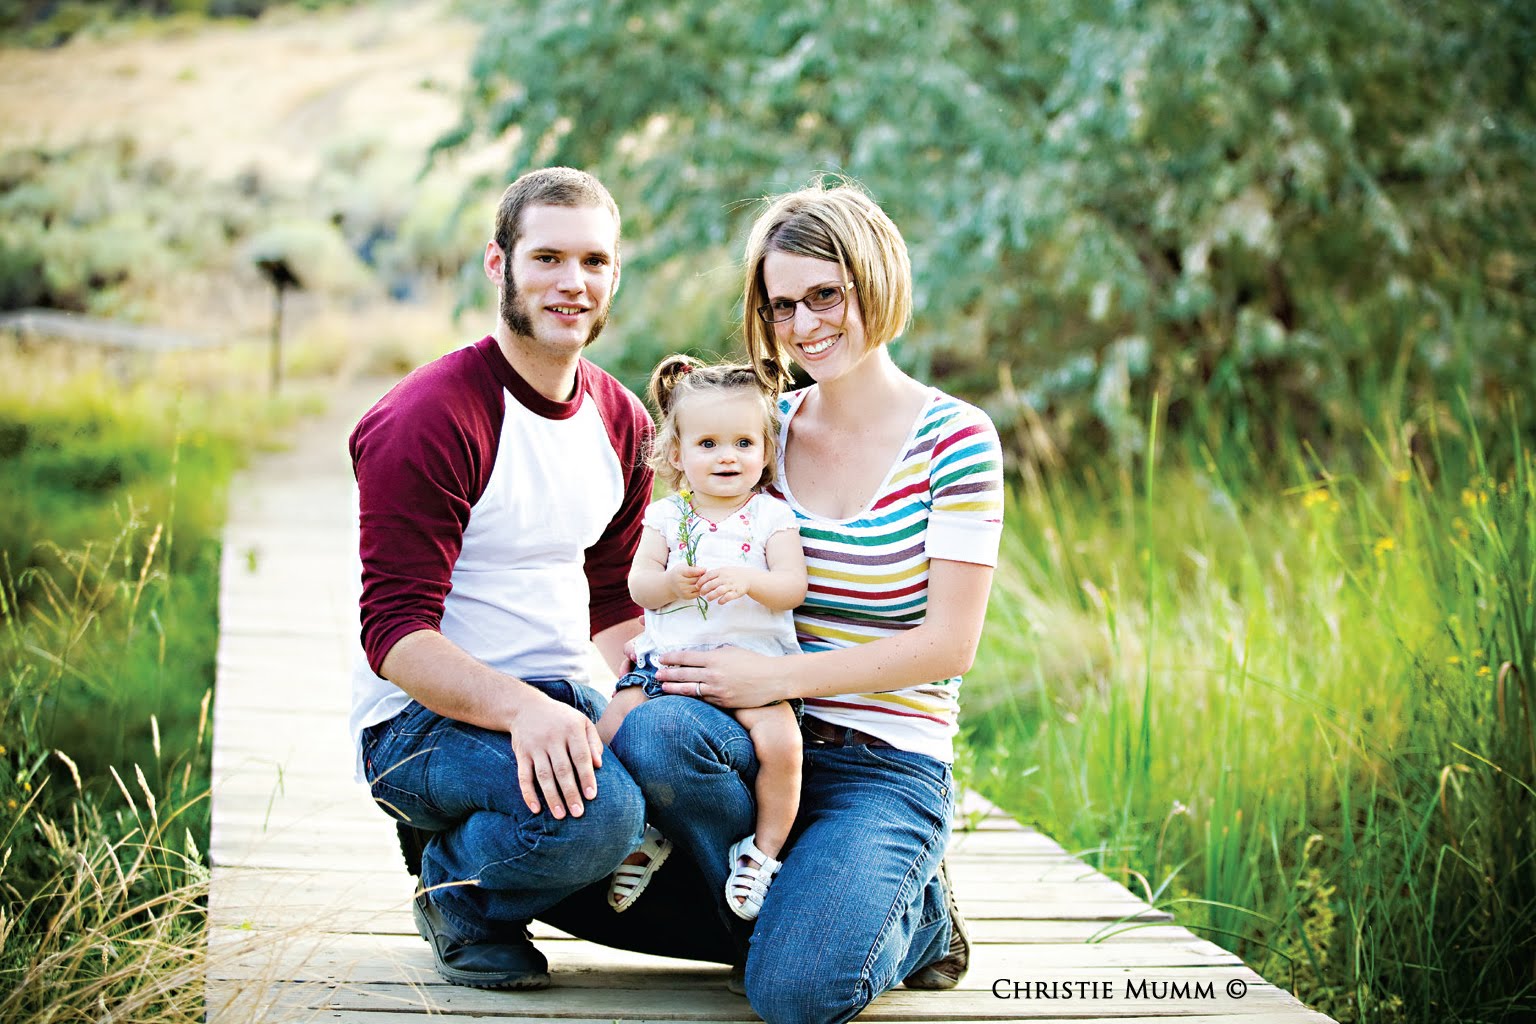
 Blur can quickly isolate any individual intent. It also gives the photographer the ability to truly design an image—even if the image challenges our normal conceptions. Most photographers will not shoot an image in which the bride is intentionally rendered blurry, but an artist will take that chance. They do it all the time.
 Different lenses offer different types of blur. It’s important to understand how close you can focus, what the minimum focus distance is for your lens, and what type of blur it offers, both in front of and behind your focus point. A 500mm mirrored lens produced the “painted” blur you see in this image.
 Blur can be used to isolate your subject and wrap it in a blanket of color, tones, and meaning. Get to know what each lens you own affords, then use it well. Here, again, we see the “circled” blur effect that a mirrored 500mm lens offers. The “circles” stem from the construction of the lens itself. The blur you see is taking the shape of the mirror found in the lens.
 Depth of field control proved vital in both of these images. In the top photo, a precise depth of field was chosen to keep the bride and groom in focus while blurring everyone else. In the bottom image, a shallower depth of field was dialed-in to blur the bridesmaids in the background.
WHAT YOU GAIN
When you start thinking about blur and controlling it, your pictures will change. They’ll become more controlled, better designed, and more artfully composed. You’ll stop worrying so much about simple subjects and their appearance in the frame and start being concerned with how that blur looks in your image. Eventually, you’ll do what you can to improve it. (Imagine being more worried about the blur in your image than the “stuff” that’s in focus. Crazy, huh?)
Once you’ve got it figured out, amazing things will happen. Take, for instance, an image of something nearly impossible to catch with your camera or lens set to auto. How about a picture of a bee in flight? Sound tough? It’s actually quite simple.
DEPTH OF FIELD CONTROL: AN EXPERIMENT
If you’re struggling with depth of field control, try this simple exercise.
Grab a water bottle and your favorite lens. Dial-in your largest aperture, turn your focus ring to its minimum focus distance (focusing as close as you can), and move your body (and camera) forward and back until the front-most part of the water bottle cap is in focus. You may discover (depending on your lens) that only a small portion of the cap is in focus. Adjust the aperture until the depth of field reaches across the bottle cap. Remember to check this by using your depth of field preview button. You may discover that you’ll have to use a very small aperture to gain the depth of field you desire. Adjust your shutter speed and ISO accordingly and snap the picture. The water bottle cap will be in focus. Great!
 Capturing an image of a bee in flight is quite simple, as long as you don’t use your camera’s autofocus feature. It’s the same as shooting a moving baseball, only smaller. Simply dial-in the appropriate depth of field, choose a shutter speed fast enough to freeze a moving bee, and pick an ISO that allows you to illuminate the image as you wish. Pre-focus on where the bees are “hanging out,” wait for one to hit its mark, and snap! It’s a breeze.
  Blur was a welcome part of this image. It illustrates the mood and feel of the event better than a static approach would. Sometimes allowing an image to blur is the right thing to do.
 Now, imagine that we replaced that water bottle cap with a flower. Using the same procedure, dial-in the required depth of field. Imagine that there are lots of bees around you (hopefully you’re not allergic) and that they really like that flower. Now, wait until one of the bees flies into that depth of field and take the picture. Pow! You’ve got a photograph of a bee in flight!
Try that with your lens set to autofocus. We dare you.