The Hands

Today's post comes from the book The Best of Portrait Photography, 2nd Edition by Bill Hurter. It is available at Amazon.com and from other fine retailers.


At the heart of any great portrait photographer’s body of work is a complete and thorough understanding of the traditional rules of posing. While it has become fashionable to break these, the true hallmark of finesse is knowing which rules to break and when.

In any discussion of subject posing, the two critical elements are that the pose appear natural and that the person’s features be undistorted. If the pose is natural and the features look normal, then you have achieved your goal and the portrait will be pleasing to you and the subject. While every rule of posing could not possibly be followed in every portrait, these rules exist to provide a framework for portraying the human form naturally, attractively, and without distortion.


The Hands
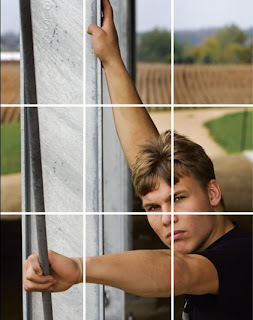
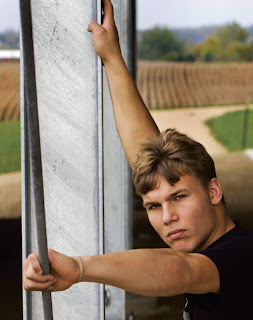
Posing hands properly can be very difficult because, in most portraits, they are closer to the camera than the subject’s head. Thus, they appear larger. One thing that will give hands a more natural perspective is to use a longer-than-normal lens. Although holding the focus of both hands and face is more difficult with a longer focal length, the size relationship between them will appear more natural. Additionally, if the hands are slightly out of focus, it is not as crucial as when the eyes or face are soft.


One basic rule is never to photograph a subject’s hands pointing straight into the camera lens. This distorts the size and shape of the hands. Always have the hands at an angle to the lens. Another basic is to photograph the outer edge of the hand whenever possible. This gives a natural, flowing line to the hand and eliminates the distortion that occurs when the hand is photographed from the top or head-on.


The following suggestions give you a few additional elements to keep in mind as you pose your subjects’ hands.

1. Always try to “break” the wrist. This means raising the wrist slightly so there is a smooth bend and gently curving line where the wrist and hand join.

2. Always try to photograph the fingers with a slight separation in between them. This gives the fingers form and definition. When the fingers are close together, they look like a two-dimensional blob.

3. When photographing a man’s closed hand, give him something small (like a pen cap), to wrap his fingers around. This gives roundness and dimension to the hand so that it doesn’t become a clenched fist.

4. As generalizations go, it is important that the hands of a woman have grace, and the hands of a man have strength.


Hands in Group Portraits. Hands can be a problem in small groups. Despite their small size, they attract attention to themselves, particularly against dark clothing. They can be especially problematic in seated groups, where at first glance you might think there are more hands than there should be.

One rule of thumb is to either show all of the hand or none of it. Don’t allow half a hand or a few fingers to show. Hide as many hands as you can behind flowers, hats, or other people. For men, have them put their hands in their pockets or “hitch” their thumb outside the pocket, which forms a nice triangle shape in the bent arm and gives recognition to the viewer that the hand is in pocket. For women, try to hide their hands in their laps or with others in the group.

Be aware of these potentially distracting elements and look for them as part of your visual inspection of the frame before you make the exposure.


Hands in Standing Poses. When the subject is standing for a three-quarter- or full-length portrait, the hands become a real problem. If you are photographing a man, folding the arms across his chest produces a good, strong pose. Remember, however, to have the man turn his hands slightly, so the edge of the hand is more prominent than the top. In such a pose, have him lightly grasp his biceps—but not too hard or it will look like he is cold and trying to keep warm. Also, remember to instruct the man to bring his folded arms out from his body a little bit. This slims down the arms, which would otherwise be flattened against his body and appear larger. Remember to separate the fingers slightly.

With a standing woman, one hand on a hip and the other at her side is a good standard pose. Don’t let the free hand dangle, but rather have her twist the hand so that the edge shows to the camera. Always create a break in the wrist for a more dynamic line.


*excerpted from The Best of Portrait Photography, 2nd Edition.

BUY THIS BOOK FROM AMAZON

The Subject

Today's post comes from the book Monte Zucker's Portrait Photography Handbook by Monte Zucker. It is available from Amazon.com and other fine retailers.


When I ask photographers what goes through their minds when they begin to create a portrait, I usually hear vague comments but nothing with substance. It seems to me that photographers have never had any definite guidelines to follow when starting a portrait. That’s why I’m beginning with what everyone should know. You should begin by studying your subject’s face—and a few specific features in particular. After just a few moments, you will actually know exactly how you’re going to photograph each and every one of your subjects.


DOING A FACIAL ANALYSIS
Begin your analysis with the subject turned straight toward you. Look at the full face. Then, turn the head and body slightly, viewing the face from an angle. Finally, turn the subject still more to see the side view. You can accomplish a similar effect by changing your own viewpoint, rather than asking the subject to move. Repeat this evaluation to view the other side of the subject’s face.


What you’re looking for is how the face seems to change as you view each specific angle. When viewing the full face, be sure to have the subject facing straight at you. Examine the hairstyle, the size of both eyes, and how a change in their expression changes the size of the eyes and the outline of the face.

Eventually, you will be able to do this analysis while simply holding a conversation with the person. Of course, this makes your subjects more comfortable than when they are aware that you are studying their faces. Once you’ve decided to photograph either the left side or the right side of a face, stick with your decision. If you photograph a person from every conceivable angle, you will only tend to confuse them when it comes to making a selection. If you’re totally unsure, of course, then go for both sides of the face—but I rarely do that.


DETERMINE THE BEST ANGLE
Since each face has its own special characteristics, it’s important to know how you can best determine the specific angle that will be the most flattering to a given subject. There are basically three angles of view to consider.

Full Face. This is the view you achieve when looking at the face straight-on. When they are not covered by the subject’s hair, both ears will show equally in this view.

Even if you’re beginning a portrait sitting with a full face, you should think about which way you’re going to turn the face for the two-thirds view. Think about the easiest way to go from one facial view to the other without having to switch the main light from one side to the other.


Two-Thirds View. A two-thirds view of the face is achieved when the head is turned to the side, leaving both eyes visible from the camera position. The eye on the far side of the face should go almost to the edge of the outline of the face, but a small amount of flesh should still separate this eye from the background. The tip of the nose should be contained within the outline of the cheek; it should not come close to the edge of the face or cross over the outline of the face and protrude into the background.

In this facial view, the bridge of the nose should not cover any of the eye on the far side of the face. If the subject’s nose has a high bridge and it begins to cover the eye, you must ease the face back slightly toward the camera position.


The two-thirds view usually slims the face, making the cheekbones stand out more.When you use this view, you’ll find that round faces will seem more oval. This view can also be used to provide considerable softening for subjects with a square jawline. It also has advantages for subjects with protruding ears; it causes the ear on the far side of the face to disappear, while the ear closest to the camera position seems to flatten out against the side of the face, minimizing its appearance.

Profile. In a profile view, you see exactly half of the face. To achieve a pure profile turn the face away from the camera until the far eye and eyebrow both disappear. If they are long enough, you may see the eyelashes of the second eye, but this is is unimportant. All that really matters is that you see an exact profile. Once you have your subject posed for a profile, be sure to reposition any hair that may be showing on the far side of the face—especially below a woman’s chin.


Many people think that they are looking at a profile when they’re actually viewing slightly more or less than the side of the face. If your subject is turned too far away, you’ll be showing more of the back of the head. When the subject is not turned far enough, you begin to see some of the far eye—plus some of the flesh beneath the nose. Obviously, both of these problems tend to detract
from the outline of the face.

In a profile position, the entire shape of the face seems to be dramatized. Even subjects with a “less than perfect” nose often look very good in a properly lit profile. Just think of some of the famous profile portraits you’ve seen.

ADDITIONAL CONSIDERATIONS
Hair. As you look at the different views of the face, take into consideration the difference your subject’s hairstyle can make. If the hair looks better from one side than the other, then I would certainly consider photographing the subject with that side toward the camera. I usually photograph the fuller side of the hair, rather than photographing into the part.


Eye Size. Always take note when a subject has one eye that is smaller than the other. When you find that, you can make them appear more equal in size by turning the smaller eye away from the lens. The reason for this is that the eye is basically almond-shaped; it is wider in the center than on the outside edge. When the smaller eye is turned away from the lens, the larger part of the eye will be toward the camera. Conversely, when the larger eye is turned toward the lens you will be looking at the smaller part of that eye. Thus, the two eyes will appear to be more equal in size from the camera’s viewpoint.

Noses. Some subjects have a bump or curve in on one side of their nose, while the other side of the nose is straighter. To disguise this, light the curve or the bump, placing the straighter side of the nose against the shadow. The curved side of the nose (facing the light) will tend to flatten out when the light hits it.

Follow Your Instincts. What happens when the hair, the eyes, or the nose tell you to turn the subject’s head in one direction and one of the other guidelines tells you to turn the head the other way? Then, you simply have to make a judgement call; determine which guideline is more important and follow your instincts. I look at the hairstyle first, since that is the most obvious element in the portrait. I follow with a study of the eyes. Lastly, I look at the nose.


*excerpted from the book Monte Zucker's Portrait Photography Handbook

BUY THIS BOOK FROM AMAZON

Minimalist Portrait Lighting

Today's post comes from the book Minimalist Lighting- Professional Techniques for Studio Photography by Kirk Tuck. This book is available from Amazon.com and other fine retailers.


The One-Light Portrait
Let’s start with a scenario that we’ll all face: the one-light portrait. Here, we build it one step at a time. Let’s start by looking at our model in front of a gray background using just the available light that’s coming through the windows. The light is soft and directionless and gives no modeling to our subject’s face. As the light bounces throughout the room, and the light bouncing from the white walls and the ceiling lower the contrast of the scene.


Heidi was photographed with just the light coming in through the windows.

With no lights, here is the wide view.

Now, let’s add a single light. In this example, I’ve set up an Alien Bees strobe with a standard reflector. I placed the light directly in front of my model, then moved it in an arc until it was about 45 degrees to camera left. As I did this, I looked for a little triangle of light surrounded by shadow to appear under the eye on the opposite side of her face from my light. This is my standard method for positioning my main light for most portraiture. With the light set at the right position (see images below), we can see that the light is hard and specular. It brings out a lot of surface texture, which is rarely welcome in a portrait, and creates a harsh transition from highlight to shadow.


Here’s a basic setup with the main light 45 degrees to camera left.


And here’s the result: deep shadows and sharp lines.

Next, let’s switch to umbrellas. We’ll start with a small (32-inch) umbrella with black backing for the main light (see image below, first). The resulting light is softened and the transition from light to dark is more pleasing. I think the 32-inch umbrella is too small for a flattering portrait, so let’s exchange it for a 45-inch Photek umbrella. The lighting is softer but not dramatically so (see image below, second). Finally, let’s exchange the 45-inch unit for a 60-inch umbrella. Now the transitions from highlight to shadow are very graceful. The wrap-around quality of the larger modifier helps to smooth the skin texture and it does a better job spreading to the background (see image below, third).


We used a small 32-inch umbrella as our main light. Notice how the light spill illuminates the background.


A 45-inch umbrella offers little discernable effect (versus the 32-inch umbrella).


Large umbrellas with very little fill are my favorite tools for lighting faces. Here, I’ve switched to a different brand of 60-inch umbrella than was seen in the previous shot and used it with no fill.

Let’s further modify the image by adding some fill reflection to the other side of the subject. We’ll just use a chunk of white foamcore. The result is a reduction in total image contrast, a filling-in of skin texture, and an even softer transition from highlight to shadow. Additionally, the shadow areas show more detail.

Here’s the overview of our 60-inch umbrella shot with the foamcore reflector just to the right of the camera.

Adding a fill card to the shot opens up the shadows and bounces more light around the room and onto the background.

The only real issue with this one-light image is a background that may be on the dark side. We can cure this by letting more light strike the background and reducing the amount of light that is striking our model. For our final example, I placed a translucent diffuser in front of part of the light from the umbrella, then turned the umbrella so that more light spilled on to the background (see image below). This technique works well with all one-light setups, whether you use plain reflectors, umbrellas, or softboxes.

I love using light blockers and diffusers to change the distribution of light instead of having to use more lighting instruments. Here, a diffuser blocks some of the light on Heidi while unobstructed light hits the background.

Adding a Second Light
Given a second light source, many beginners press it into service by adding it as a fill light. Indeed, photographers used to depend on a second light for fill, but large flat panels or big pop-up reflectors create a more natural look and require less equipment, fewer power cords, and less setup.

With this in mind, the most important use of a second light is to illuminate the background and help separate the subject from it. In this example, we use our second light (with its supplied metal reflector) as a background light. In comparing our image with and without a real background light, you will instantly see that the second light source, used in this way, adds a sense of depth to the image.

Using a second light for the background will also allow you to position your main light without having to rely on its spill or power to help illuminate the background. This means that you are free to move your subject as far forward from the background as you would like. The benefit? The further you move the subject and your camera from the background, the more out-of-focus the background becomes. Diminished focus on the background eliminates random details that attract the viewer’s eye and take away attention from your main subject. When using a second
light to light the background you can also control the size and shape of the light on the background and how quickly it falls off from its center.


Our final permutation of the shot we started building on page 85 includes both a fill reflector to camera right and a gridded background light.

Adding a little bit of glancing backlight from the rear of the set gives additional depth cues.

Adding a Third Light
Adding a third light is always interesting. The role of the third light should be that of an accent light.

Rim Light. This can be positioned directly behind the model and pointed back toward camera position. The model will block the direct light and be subtly rimmed by highlight.

Hair Light. Alternately, the third light can be used as a hair light. In this application, the light must be carefully positioned so that it lights only the subject’s hair. It should not be so far forward that it casts light on the subject’s forehead. If I use a hair light, I adjust it to a very low power setting; it is just there to offer a bit more separation from a dark background.

Glancing Backlight. The third use of a third light is as a glancing backlight. This is placed behind the subject on the side opposite the main light. Rather than allowing the subject to block the light, however, it directly strikes the subject’s cheek on the shadow side of the frame, adding a bit of fill and a specular highlight. This look is currently cropping up more and more in fashion photos. It’s also used to provide a bit more separation when using a dark background.

*excerpted from the book Minimalist Lighting- Professional Techniques for Studio Photography

BUY THIS BOOK FROM AMAZON

Techniques from the Masters


Today's post comes from the book Professional Portrait Photography by Lou Jacobs Jr. In this book he profiles ten professional photographers to learn the secrets that have helped them achieve success in every aspect of the business. Here is an excerpt from Lou's profile of photographer Vicki Taufer about the photography studio she co-owns with her husband Jed. This book is available from Amazon.com and other fine retailers.

Describe your studio
.
We have a 6,800-square-foot studio with a lot of window light in three camera rooms. Currently V Gallery is operated by Jed and myself with the help of three full-time employees: an office manager, a graphic designer, and a salesperson. We employ a second photographer part time, and my sister Michelle does retouching, bookkeeping, and is webmistress.

Our studio was designed and decorated to look and feel like a boutique so clients might feel our fees were worth every penny. Recently we’ve expanded the studio by over 3,000 square feet to create Haven, our educational retreat. The space also doubles as two more camera rooms. In the last two years we’ve hosted over a dozen workshops, and we plan to do about twenty more over the next eighteen months.

Jed and I have made sure our roles are well-defined. I am the primary photographer, and I mainly shoot in the studio, usually without an assistant. I take care of most (brand-based) marketing for the studio. Occasionally I take Jed with me on location. He’s a jack-of-all-trades in charge of everything technical.


Do you have a philosophy that guides your approach to fine portraiture?
My philosophy centers around making sure clients are comfortable and enjoying the session experience in an atmosphere where they can relax and be themselves. This is an important part of my style and may even be my defining attribute. We love to hear that a husband or father has enjoyed his time with us. That’s exactly what “fine portraiture” is all about. It’s more than beautiful lighting, posing, expressions, or backgrounds. It’s an experience.


Describe your approach to scheduling.
Most of our sessions are shot Tuesday through Friday with a few on Saturdays. We reserve several weeks in the year to attend or speak at photographic events. We would like to take more time for ourselves, but we become overwhelmed with business opportunities. We realize taking a break has its advantages; many of our best ideas originate away from the chaos of the studio when we see things from different perspectives. Some of our best creative conversations occur when we can think without distractions, but in the last few years, time off has usually been a day or two tacked onto a speaking trip. This is when we take most of our personal pictures. Images from Italy are all over our home and studio.


Were your early business expectations realistic?
I was pretty aggressive when I created our business plan, but I didn’t really know what to expect. Starting a business was fairly easy, but managing it effectively was a completely different thing. Coming to that realization forced us to think about both the short-term and long-term effects of our decisions. And the most important decisions were who we hired to work with us. Our employees are central to our business, and managing people is very challenging for me. Jed has helped a lot because he has a tactful way with handling certain situations.

A key benefit of working with your spouse is filling in the gaps for each other; he or she can also provide support. One person’s strengths can help to offset the other’s weaknesses. From an emotional standpoint, a huge challenge for us is dealing with fear. It pops up out of nowhere and as our careers have progressed, using fear as a motivator has been a major sign of growth and maturity for us. It’s definitely easier said than done, but as time passes, dealing with fear becomes an almost normal part of the business process, and it isn’t that scary.


How do you approach posing?
As opposed to formal posing, I tag my style as “unposed.” I see myself as the conductor of a symphony. I try to offer limited guidance and suggestions at a session, because I want subjects to do most of the “work” themselves. Sometimes I’ll demonstrate what I want by posing myself, but I rarely touch my subjects in order to pose them. I’ve found that I can achieve a natural look more easily if I leave most of the movement and posing up to them.

What strategies do you employ to communicate with your subjects and elicit the desired expressions?
I spend much of my energy throughout the shoot just talking to and encouraging clients to make them feel comfortable. I’m not talking to distract them but to encourage them to open up and relax. Jed has helped me quite a bit as he is very good at read ing people. If I’m having trouble with a family or even a small child, I’ll ask him into a session. He has a way of making people laugh and open up.

Smiles. Often the easiest way to get someone to smile or laugh is to tell them not to. Or ask for a fake laugh that usually turns real. This works for all ages. I get some of my favorite images this way. With shy people I pay close attention to help them get comfortably involved. However, some people will never be at ease being photographed, and as an antidote, I offer the most pleasant experience possible.


How do you promote your studio?
We promote our studio through two main concepts: relationship marketing and event marketing. Relationship marketing is when we work with other businesses in the same market niche and display images in their stores. We also build relationships with the owners and employees. We send them business cards and gifts for the holidays. We photograph their families so they can fall in love with the experience we offer. We advise following up on a regular basis. Our best displays are in women’s and children’s clothing boutiques plus spas and hair salons.

We also do event marketing, which gets people in our community talking about our studio. One of our biggest annual events is Girls’ Night Out. When we host this event on a February evening, twenty-five vendors sell everything from handmade jewelry to clothing and mini neck massages. Each vendor pays $50, brings food, advertises the event, donates an item to the 250 gift bags we give away, and donates a large item for a raffle. The proceeds are given to a charity. V Gallery promotes new products and offers special prices on frames and sessions booked. Of the average 300 women who attend, thirty will book sessions. If you don’t have a large studio
space to host such an event, share the costs by hosting with another business in the same niche market.

Web Site and Blog. Both web sites and blogs are great marketing tools. My sister handles them in-house. We have considered outsourcing some of the web site, while maintaining control of content. V Gallery also offers four to five limited-edition specials a year for Mother’s Day and Christmas, which includes holiday cards. Year round we offer the Bebe Collection; my associate photographs a baby three times during the infant’s first year. Clients also buy matted images, collages, and coffee-table books from these sessions. We donate to numerous auctions and charities that agree to return our display. We also donate our time for a variety of nonprofit organizations.


Are there any business details you’d like to share?
The first two years we put our money back in the business, but for the past six years Jed and I have paid ourselves a salary. We also put retirement funds away from each paycheck. It is important to have money saved to fall back on.

How important is a photographer’s personality to his or her success?
Communicating is very important to successful portrait photography. When clients pay for sessions, they expect us to responsibly make them feel comfortable. They expect their portraits to include honest and true expressions. Some clients have told me about negative experiences they have had with other photographers whose personalities seemed indifferent. Being aware of the experience you offer your clients pays off in mutual satisfaction as well as income.

*excerpted from the book Professional Portrait Photography

BUY THIS BOOK ON AMAZON

Five Keys to Great Outdoor and Location Sessions

Today's post comes from the book Master Guide for Photographing High School Seniors. This book is available from Amazon.com and other fine retailers.


Identify the Customers’ Wants.
Although the "serving a need” business can be profitable and pay some bills, we are principally in the “want” business. Portraiture is mostly a luxury item, and we need people to truly want our products. A want comes from the heart, and if we can satisfy their want we can establish a long-term bond with the client, enhance positive word-of-mouth, and build a loyal customer base.


Remember, the session is about the client and what they want. It is your job to get to know them, reveal their wants, and do your best to deliver fine portraits that they will enjoy for many years. As a creative professional, it is easy to get caught up in new surroundings while photographing on location. When you go to the senior’s home,farm, special place downtown, etc.; you may be introduced to new elements: architecture, colors, design, props, etc. and be like a kid in a candy store. You may loose focus on the job at hand and begin photographing scenes—forgetting the subject and what makes the location meaningful to them.

Of course, you’ll find that the senior and their parents may not know what they really want besides “something different.” In that case, survey their location, select your favorite spots, and do your best. Listen for clues about their favorites and least favorites, then adjust accordingly.


Respect Them and Their Space.
Although you are being commissioned to create an art piece, that doesn’t give you free reign to dictate the session. Again, they hired you to come to their location for a reason. Don’t waste their time and money by doing work to enhance your portfolio. Most importantly, if the location is their property, respect it and be tasteful. Don’t barge into their bedrooms, bathrooms, etc. Go where they ask you to go first, and ask permission to do otherwise. Once you have done what they expected, feel free to experiment —but always be courteous and professional.


Create, Don’t Chase.
Over the past few decades, a new style of portraiture has evolved called photojournalistic portraiture. Done properly, it can be very powerful. Unfortunately, there are only a few that have the skills to execute this type of photography. An experienced photojournalist knows that rarely does a great image “just happen.” “Candid” isn’t just another word for “lucky.” You need to be in the right place, at the right time, with the right equipment, with the right settings, and be prepared to capture the image when it happens. You must master the entire gamut of photographic skills to consistently produce quality images and justify your clients returning to you for repeat business. Simply grabbing a camera and chasing your subjects while taking thousands of images is not professional. Create portraits that tell thousands of words, don’t just take thousands of worthless snapshots. “Machine gun” style photography is the work of paparazzi; it isn’t photojournalism.

Analyze the Location.
Location analysis is very important. You must do this first before setting up your camera, etc. Otherwise, you will risk needing to reset and re-create everything—or, worse, missing problems entirely and being surprised when you process your images later. Let’s assume that your senior wants you to come to their home at the lake and you’ve determined that they want their portrait by the water. Turn on your artist eyes and survey the territory. Look for three key elements to help you choose a specific spot: scene brightness, composition/ dynamics, and posing tools/levels.

Scene Brightness. Control of scene brightness is crucial while on location. Unbalanced scene brightness can cause severe exposure and contrast issues that will distract from your subject. To determine scene brightness, step back and see the entire scene that will be captured within the portrait, not just where the subject is placed. Try to meter the different zones to define the difference. A spotmeter can be particularly useful for this job. Be wary of scene elements that differ by more than two stops from the light illuminating the subject. Unless you are striving for a graphic image, going beyond that point will risk loss of control of contrast and even detail in shadow and/or highlight areas.


Photographing along the water’s edge presents a classic scene-brightness challenge. Typically, your first thought will be to put the subject near the water with the water behind them. However, water is a big reflector. Except in specific light conditions (or with a nearby opposite shoreline) the water will be much brighter than your subject—and it will be “nuclear bright” in the captured image. Only skillful use of artificial light and faster shutter speeds can make this configuration plausible. Instead, try to photograph along the shoreline, using the water as a light source instead of a background. Doing so will give more dimension to the contours of the senior’s face and figure and will often make the water a more interesting part of the image. Instead of being a blown-out mass of white, now it will have more definition in the surface. Reflections of scenery along the shoreline (trees, etc.) may also enhance the image with color and natural details. Additionally, in dull light situations you will be amazed by the power of water as a reflector. Because of its size and reflectivity, it can provide a light source where there may seem to be none. You can apply the water’s edge example to other locations. In the country, it may be a brightly lit field that draws unneeded attention. In town, buildings with large windows (or that just reflect lots of light) can be a blessing or a curse—just like the water.


Working indoors requires the same analysis, as well. If you’re using window light to illuminate your subject, be aware of overly dark background areas in your scene that don’t receive the same amount of lighting as the subject. Much like photographing near water, photographing parallel to a window is often much more effective that photographing directly into it (use it as a light source, not a background).

Composition/Dynamics. Location portraiture is a great chance for you to use your compositional skills, because you have more than one subject matter. Besides the senior, the background and its major elements are another. Buildings, props, pets, etc., are potential others. Arranging them in an interesting and pleasing way is composition.


A dynamic senior portrait typically places emphasis on the subject and makes them the primary subject matter. The other subjects should then be carefully placed to en-hance the overall image and tell something about the subject, while not being too distracting. Emphasis can be placed by several means:

Size—Getting in close to the senior will make them larger and more prominent.
Lighting—Illuminating the subject with significantly more or less light will draw attention to them.
Color—If your subject is wearing a color, or has a skin color, that contrasts with the scenery, they may become the focal point.

Artistic guidelines like the Rule of Thirds can also help you identify key locations in the frame for placing your primary and secondary subjects. According to the Rule of Thirds, if you divide the image frame into thirds, vertically and horizontally, the four resulting intersections are powerful points to place your subject(s).


Since we read from left to right, we are most comfortable with images where the primary subject falls on the right side of the frame (at either on the upper or lower point). Our eye comes in from the left edge of the frame, flows through the image, rests at the primary subject for a moment, and then proceeds back through the image toward the left, briefly enjoying the other subject(s) along the way, and then begins again. This circular flow is what makes a piece of art dynamic and exciting.

However, this doesn’t mean you can’t break the rules! If you do, smash them! For example, place a tough guy or girl senior in his or her athletic jersey or leather jacket dead center in the frame (compositionally, the least graceful position) to add to his or her apparent intensity and toughness. (Note: Avoid placing your subjects in between the center and the power points. This will cause an uncomfortable lack of balance in the image.)

Posing Tools/Levels. Finally, think about what types of furniture and props work well for poses at your studio and then search for similar sized and shaped ones while on location. (Or, it may be possible to take chairs, benches, etc., with you to the location.) Most chairs for adults are approximately eighteen inches up to the seat, and are made for someone to sit erect with their legs bent. Depending upon the pose desired, look for available posing tools (chairs, stumps, steps, boxes, etc.) at that height—or lower, which will encourage more dynamic leans.

Analyze the Lighting.
Lighting analysis goes hand in hand with location analysis. The level of difficulty of lighting the senior subject will depend heavily upon how specific their wants are. Lighting a senior “downtown” will be easier than “in this alley, against this wall, from this angle.” If they are very specific, you can’t say “no” and just do something else—you may need to reschedule for a different time of day, or you’ll need to put on your professional superhero cape and make it work. Professional fishing guides can’t just say, “Sorry, it’s too rainy today, the fish won’t bite . . . . we’ll just have to go to the restaurant to get a fish dinner tonight.” They need to rely on their skills and experience to find a way to help their customers catch fish, regardless of the less-than-optimal conditions.


*excerpted from the book Master Guide for Photographing High School Seniors