
 Today's post comes from the book Master Guide for Photographing High School Seniors. This book is available from Amazon.com and other fine retailers.
 Identify the Customers’ Wants.
Although the "serving a need” business can be profitable and pay some bills, we are principally in the “want” business. Portraiture is mostly a luxury item, and we need people to truly want our products. A want comes from the heart, and if we can satisfy their want we can establish a long-term bond with the client, enhance positive word-of-mouth, and build a loyal customer base.
Remember, the session is about the client and what they want. It is your job to get to know them, reveal their wants, and do your best to deliver fine portraits that they will enjoy for many years. As a creative professional, it is easy to get caught up in new surroundings while photographing on location. When you go to the senior’s home,farm, special place downtown, etc.; you may be introduced to new elements: architecture, colors, design, props, etc. and be like a kid in a candy store. You may loose focus on the job at hand and begin photographing scenes—forgetting the subject and what makes the location meaningful to them.
Of course, you’ll find that the senior and their parents may not know what they really want besides “something different.” In that case, survey their location, select your favorite spots, and do your best. Listen for clues about their favorites and least favorites, then adjust accordingly.
Respect Them and Their Space.
Although you are being commissioned to create an art piece, that doesn’t give you free reign to dictate the session. Again, they hired you to come to their location for a reason. Don’t waste their time and money by doing work to enhance your portfolio. Most importantly, if the location is their property, respect it and be tasteful. Don’t barge into their bedrooms, bathrooms, etc. Go where they ask you to go first, and ask permission to do otherwise. Once you have done what they expected, feel free to experiment —but always be courteous and professional.
Create, Don’t Chase.
Over the past few decades, a new style of portraiture has evolved called photojournalistic portraiture. Done properly, it can be very powerful. Unfortunately, there are only a few that have the skills to execute this type of photography. An experienced photojournalist knows that rarely does a great image “just happen.” “Candid” isn’t just another word for “lucky.” You need to be in the right place, at the right time, with the right equipment, with the right settings, and be prepared to capture the image when it happens. You must master the entire gamut of photographic skills to consistently produce quality images and justify your clients returning to you for repeat business. Simply grabbing a camera and chasing your subjects while taking thousands of images is not professional. Create portraits that tell thousands of words, don’t just take thousands of worthless snapshots. “Machine gun” style photography is the work of paparazzi; it isn’t photojournalism.
Analyze the Location.
Location analysis is very important. You must do this first before setting up your camera, etc. Otherwise, you will risk needing to reset and re-create everything—or, worse, missing problems entirely and being surprised when you process your images later. Let’s assume that your senior wants you to come to their home at the lake and you’ve determined that they want their portrait by the water. Turn on your artist eyes and survey the territory. Look for three key elements to help you choose a specific spot: scene brightness, composition/ dynamics, and posing tools/levels.
Scene Brightness. Control of scene brightness is crucial while on location. Unbalanced scene brightness can cause severe exposure and contrast issues that will distract from your subject. To determine scene brightness, step back and see the entire scene that will be captured within the portrait, not just where the subject is placed. Try to meter the different zones to define the difference. A spotmeter can be particularly useful for this job. Be wary of scene elements that differ by more than two stops from the light illuminating the subject. Unless you are striving for a graphic image, going beyond that point will risk loss of control of contrast and even detail in shadow and/or highlight areas.
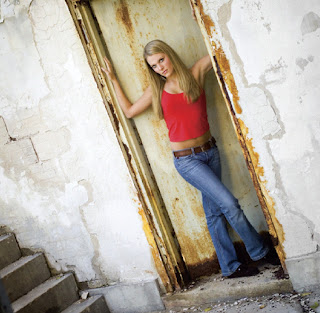
Photographing along the water’s edge presents a classic scene-brightness challenge. Typically, your first thought will be to put the subject near the water with the water behind them. However, water is a big reflector. Except in specific light conditions (or with a nearby opposite shoreline) the water will be much brighter than your subject—and it will be “nuclear bright” in the captured image. Only skillful use of artificial light and faster shutter speeds can make this configuration plausible. Instead, try to photograph along the shoreline, using the water as a light source instead of a background. Doing so will give more dimension to the contours of the senior’s face and figure and will often make the water a more interesting part of the image. Instead of being a blown-out mass of white, now it will have more definition in the surface. Reflections of scenery along the shoreline (trees, etc.) may also enhance the image with color and natural details. Additionally, in dull light situations you will be amazed by the power of water as a reflector. Because of its size and reflectivity, it can provide a light source where there may seem to be none. You can apply the water’s edge example to other locations. In the country, it may be a brightly lit field that draws unneeded attention. In town, buildings with large windows (or that just reflect lots of light) can be a blessing or a curse—just like the water.
Working indoors requires the same analysis, as well. If you’re using window light to illuminate your subject, be aware of overly dark background areas in your scene that don’t receive the same amount of lighting as the subject. Much like photographing near water, photographing parallel to a window is often much more effective that photographing directly into it (use it as a light source, not a background).
Composition/Dynamics. Location portraiture is a great chance for you to use your compositional skills, because you have more than one subject matter. Besides the senior, the background and its major elements are another. Buildings, props, pets, etc., are potential others. Arranging them in an interesting and pleasing way is composition.
A dynamic senior portrait typically places emphasis on the subject and makes them the primary subject matter. The other subjects should then be carefully placed to en-hance the overall image and tell something about the subject, while not being too distracting. Emphasis can be placed by several means:
Size—Getting in close to the senior will make them larger and more prominent.
Lighting—Illuminating the subject with significantly more or less light will draw attention to them.
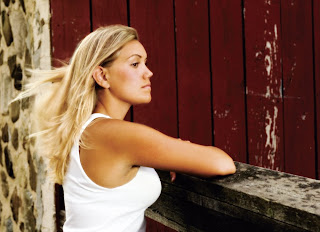
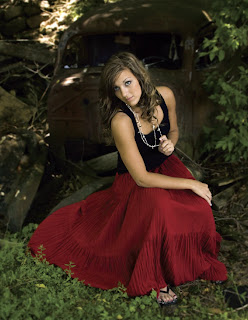
Color—If your subject is wearing a color, or has a skin color, that contrasts with the scenery, they may become the focal point.
Artistic guidelines like the Rule of Thirds can also help you identify key locations in the frame for placing your primary and secondary subjects. According to the Rule of Thirds, if you divide the image frame into thirds, vertically and horizontally, the four resulting intersections are powerful points to place your subject(s).
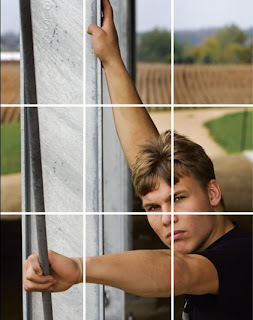
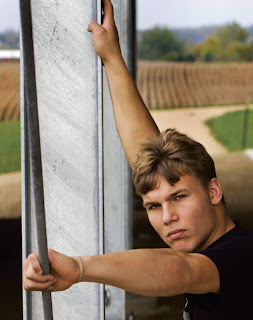
Since we read from left to right, we are most comfortable with images where the primary subject falls on the right side of the frame (at either on the upper or lower point). Our eye comes in from the left edge of the frame, flows through the image, rests at the primary subject for a moment, and then proceeds back through the image toward the left, briefly enjoying the other subject(s) along the way, and then begins again. This circular flow is what makes a piece of art dynamic and exciting.
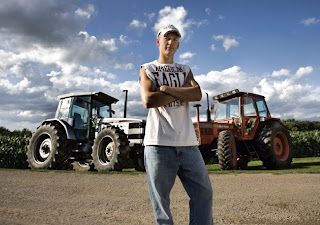
However, this doesn’t mean you can’t break the rules! If you do, smash them! For example, place a tough guy or girl senior in his or her athletic jersey or leather jacket dead center in the frame (compositionally, the least graceful position) to add to his or her apparent intensity and toughness. (Note: Avoid placing your subjects in between the center and the power points. This will cause an uncomfortable lack of balance in the image.)
Posing Tools/Levels. Finally, think about what types of furniture and props work well for poses at your studio and then search for similar sized and shaped ones while on location. (Or, it may be possible to take chairs, benches, etc., with you to the location.) Most chairs for adults are approximately eighteen inches up to the seat, and are made for someone to sit erect with their legs bent. Depending upon the pose desired, look for available posing tools (chairs, stumps, steps, boxes, etc.) at that height—or lower, which will encourage more dynamic leans.
Analyze the Lighting.
Lighting analysis goes hand in hand with location analysis. The level of difficulty of lighting the senior subject will depend heavily upon how specific their wants are. Lighting a senior “downtown” will be easier than “in this alley, against this wall, from this angle.” If they are very specific, you can’t say “no” and just do something else—you may need to reschedule for a different time of day, or you’ll need to put on your professional superhero cape and make it work. Professional fishing guides can’t just say, “Sorry, it’s too rainy today, the fish won’t bite . . . . we’ll just have to go to the restaurant to get a fish dinner tonight.” They need to rely on their skills and experience to find a way to help their customers catch fish, regardless of the less-than-optimal conditions.
*excerpted from the book Master Guide for Photographing High School Seniors
No comments:
Post a Comment