The Shoulders and Arms

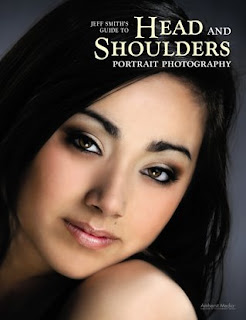
Today's post comes from the book Jeff Smith's Guide to Head and Shoulders Portrait Photography. It is available from Amazon.com and other fine retailers.


In a head and shoulders pose, the composition of a portrait looks finished if the shoulders fill the bottom of the frame from one side to the other. If the portrait is composed showing more of the body, then the arms can be used to fill in the void areas at the bottom of the frame. Basically, this is completing a triangular composition, with the shoulders and arms forming the base of the triangle and the head at its peak. (Note: Many poses offer the photographer the ability to choose from different compositions. Poses like these work very well in high-volume photography studios. Once the subject is in the pose, you can make a full length or three-quarter-length image, then move in for a tighter head and shoulders image without having to re-pose the subject.)
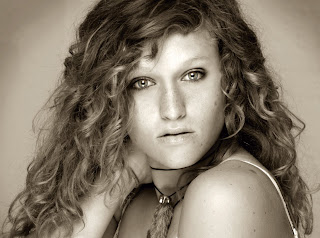


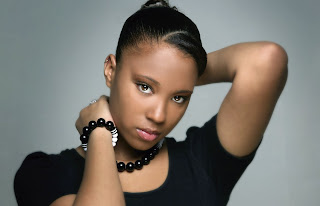
The Shoulders. The widest view of any person is when the person is squared off to the camera. By turning the shoulders and torso to a side view, preferably toward the shadow side of the frame, you create the thinnest view of the body. The shoulders of a man should appear broad and be posed at less of an angle than the shoulders of a woman.
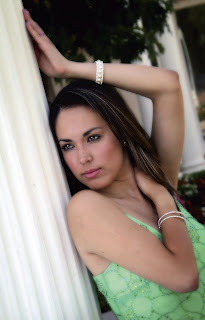

Additionally, portrait subjects appear stiff when their shoulders are running perfectly horizontal through the frame or when their spine (if you could see it) is running perfectly vertical in the frame. Posing the person reclining slightly backwards or leaning slightly forward, makes the shoulders and spine run diagonally through the frame for a more relaxed look. The portrait will have a professional look and it will be more visually appealing. It will also create a more flattering impression of the subject’s personality, making them look much less rigid.
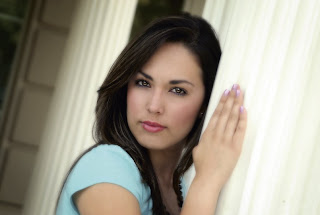


Women’s shoulders can be a very appealing part of a portrait if posed properly. I like when my wife wears dresses that show off her shoulders. However, my wife is thin and very fit, unlike the majority of people we photograph each day. For this reason, it is always a good idea to have the shoulders covered with clothing if the subject’s weight is at all an issue.
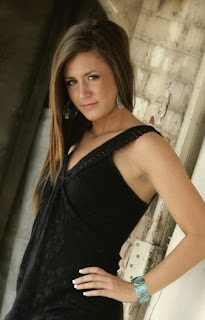


Clothing itself, however, can create problems in this area of the body. Large shoulder pads in a jacket, for example, will make just about any kind of posing impossible; your client will look like a football player. As you can imagine, this is good for skinny guys but not so good for larger guys or any woman.

The Arms. Like the shoulders, arms often have problems that are best hidden by clothing, which is why we suggest that everyone wear long sleeves. Models may have perfect arms, but our clients are plagued with a variety of problems—arms that are too large or too boney, loose skin, hair appearing in embarrassing places, stretch marks, bruises, veins, etc. The list is a long one, so cover those things up.
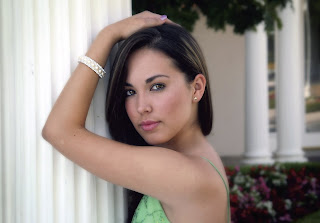


To learn how to pose the arms, watch people as they are relaxing. They fold their arms, they lean back and relax on one elbow, they lay on their stomachs and relax on both elbows, or they will use their arms to rest their chin and head. However, any time weight is put onto the arms (by resting them on the back of a chair, the knee, etc.) it should be placed on the bone of the elbow. If weight is put on the forearm or biceps area, it will cause the area to mushroom and make it appear much larger in size than it actually is. This is another reason to have the arms covered if it at all possible.

*excerpted from the book Jeff Smith's Guide to Head and Shoulders Portrait Photography

BUY THIS BOOK FROM AMAZON

Softboxes


Today's post comes from the Softbox Lighting Techniques for Professional Photographers by Stephen Dantzig. It is available from Amazon.com and other fine retailers.

Softboxes are a specific type of light modifier. They are designed to produce an even spread of light from all parts of the box. Your light fits into a housing that you use to attach the softbox. The housings will be different depending on your strobe or hot light. The number of connectors will also vary according to the shape of the softbox.

HOW THEY WORK
Softboxes work by spreading out the light from what would be a small specular light source. Softboxes are designed to go from narrow by the light to as broad as the outside dimensions of the softbox. The inside of softboxes are lined with highly reflective fabric—oftentimes bright silver. As the light travels through the expanding corridor, it bounces around the inside of the box, reflecting off of the fabric in all directions. It is no longer a spot source of light by the time it reaches the outside diffusion material. Rather, it becomes a wall of light that is equal at all points. It is this wall of light that is further diffused as it passes through the outside diffusion material. Note that you can use different-colored panels to line the inside of your softbox to change the color of the light illuminating your subject.

There are usually two sets of diffusion material that the light waves pass through before illuminating your subject. The first is known as a bevel. This is a thin piece of translucent white fabric that attaches to the inside of the softbox. This material is usually fairly close to the light and provides the initial diffusion. The now diffused light continues to travel through the softbox until it hits the outer translucent white material. The outside dimensions of the box determine the size of your light source, creating a larger (and hence softer) light source than what you attached to the softbox. Furthermore, the light leaving the softbox is diffused twice, and this softens the light even more.


The double diffusion design of the softbox yields a beautifully soft light that is perfect for beauty headshots. The quality of light will differ depending upon the size of the softbox, but it will still be softer than the spotlight. In this case, a 30x40-inch softbox was fitted with a Circlemask to create this beauty image of Midori Every. The Circlemask creates round catchlights that look natural. The main light was metered at f113/10 with a silver board in place to bounce light back under Midori’s chin. Two medium StripDomes were used as hair lights. The image was exposed at f11—1/3 of a stop overexposed.


The inside bevel is just one of the things you can modify to change the effect created by the softbox. Here, we removed the inside bevel and created a beauty image with a little more “pop” than we had with the bevel attached. The new exposure was f117/10, so the inside bevel “eats” almost 1/2 a stop of light! We turned down the strobe to f113/10 to make the exposure the same as the shot with the bevel. The light is still soft enough for general use, and the technique may help if you do not have powerful strobes and you need all the output you can get.


WHY USE THEM?
Light, in most cases, needs to be diffused before it will give you a pleasing photograph. Spotlights can produce very dramatic fashion images—partly due to the harsh quality of light, but also to the repetitive shadow patterns that can be created. However, diffused light has many more applications.

HOW TO USE THEM
Every light source has an “ideal” distance that allows you to maximize its design. In the case of a rectangular softbox, you use the Pythagorean theorem to determine the theoretical distance that will optimize the contrast of the box while maintaining its quality of light. You would have two right triangles if a rectangular softbox were dissected along its diagonal.

The theoretical ideal distance would be the hypotenuse of the right triangle. The Pythagorean theorem tells us that the hypotenuse (C) is obtainable via the following equation: A2 plus B2 equals C2 . Let’s assume that A=40 inches and B=30 inches for a fairly standard 30x40-inch softbox. A2=1600 and B2=900, so C2=2500. The hypotenuse, C, is determined by taking the square root of 2500, which is 50 inches. The theoretical ideal placement for a 30x40-inch softbox is 50 inches from the subject! However, there is a less scientific (and easier) way to judge the proper distance from the light to your subject: watch the light as you pull the softbox closer to your subject, and stop when his or her face “pops.”


Diagram and above image—We created a very dramatic glamour headshot of Tishanna by keeping the inside bevel but removing the outside translucent fabric. In this case, we created a fairly large spotlight that was softened a little by the inside bevel. The exposure from the softbox was f11. The hair light was a small StripDome set to f112/10. There was also a spotlight with a 10- degree grid that illuminated Tishanna’s hip when we backed up and shot full length and 3/4 poses. The spotlight was also set for f11. You need to be extremely careful when lights overlap on your subject. In this case, we had to be even more careful because Tishanna put baby oil all over her body and hair to add a shimmer to the reflections from the light and accentuate the “glamour” feel of the image. The shine made it more difficult to control the highlights. The combination of the softbox and spotlight on her hip was f114/10— well within my desired range of 1 stop from the working aperture.


This 3/4 pose shows the effect of the lighting technique just described. In this case, the hair light was set at f112/10. Both images were exposed at f11.


Diagram and above imageThe extremely small lights create a harsh lighting effect that can add some snap to an image. Here, we used a couple of spotlights with honeycomb grids to add a stylish look to blue jeans. Two spots were positioned directly behind the camera and aimed at Ruthchelle Melchor’s face and torso. The falloff from the lights places her legs and feet in relative shadow, drawing your eye to her face. The spotlights also create a strong shadow behind her, adding a new graphic dimension to the image. The gray seamless backdrop was also lit with a spotlight without a grid, but covered with a green gel. Honeycomb grids come in varying degrees and narrow the beam of light even further—creating a smaller and even harsher light source!

BUY THIS BOOK FROM AMAZON

*excerpted from the book Softbox Lighting Techniques for Professional Photographers

Oval Faces


Today's post come from the book Sculpting with Light by Allison Earnest. It is available from Amazon.com and other fine retailers.

The oval-shaped face is perhaps the most symmetrical and easiest to photograph. If you look at magazines with female models you will see an abundance of oval face shapes, because they are quite photogenic and can be lit in all types of setups and patterns with great success. Typically, oval faces are thin, so they will not benefit from Rembrandt lighting or any other lighting setup designed to slim the face. Instead, broad lighting—especially with Paramount and loop-lighting setups—works beautifully with oval-faced subjects. Of course, your average client with an oval face may have imperfections, such as extra weight on the face or neck area. If your subject has any features that would look best diminished, place them in the shadow areas of the portrait.

Accenting Natural Beauty. The next series of images features Amanda Enloe, a model with no noticeable flaws. Therefore, these examples show how to accentuate a subject’s natural beauty and features by incorporating additional lights and reflector techniques.

The set of images here illustrates the effects of a 45-degree light setup that creates soft loop lighting. Starting with one main light, I progressively added light sources and reflectors to create classic portraits of Amanda.

In the first image, Amanda was illuminated with a single Hensel Integra 500 with a medium softbox placed at a 45-degree angle to the subject at camera left. An incident meter reading was made at the subject position with meter’s dome facing the main light. The recorded exposure of f/8 was set on the camera while the shutter speed was set at 1/250 second at ISO 100. The model was directed to tilt her head slightly and turn her nose away from the main light source to produce an open loop pattern on her face. The white background was lit with a 7-inch parabolic reflector attached to a monolight. The intensity of the light was adjusted to record at f/5.6 (one stop less exposure than the main light). This kept the background a denser shade of gray.


Without moving the main light or changing the exposure settings on the camera, I asked Amanda to turn her nose slightly toward the main light, which brought her left cheek out of shadow (second photo). A second monolight with a small softbox attached was placed behind the subject to camera right to slightly illuminate the background. The backlight exposure was adjusted to record half a stop brighter than the main light. To ensure the background received no additional illumination from the backlight, the softbox was “feathered” away from the background to retain the exposure and gray color of background. Finally, to add a slight fill and sparkle to Amanda’s eyes, a mini zebra California Sunbounce reflector was placed to camera right.


For the third photo, a third light (a monolight with a small strip light attached) was added to camera right at approximately a 75 degree angle to the subject. This added a beautiful specular highlight that accentuated Amanda’s left cheek. The exposure of the accent light was set three-quarters of a stop brighter than the main light. The highlight on the model’s right cheek was from the original backlight, which was feathered toward the model to create further specularity and dimension.


The beautiful high-fashion image seen below was created by turning off the background light and adding a reflector. A 4-foot mini zebra California Sunbounce reflector was positioned under Amanda’s face to brighten her eyes.


In the last photo, you can see the variety of lights and their placement used to create the series of images of Amanda. Without ever moving the main light, creating a series of different looks was as easy as adding a light or reflector, redirecting the subject, or merely turning off a light. Notice that Amanda is actually holding the reflector—by all means, don’t be afraid to ask your clients for help. They will almost always be excited to be included in the creative process.


*excerpted from the book Sculpting with Light

BUY THIS BOOK FROM AMAZON

One-, Two- and Three-Light Setups


Today's post comes from the The Best of Photographic Lighting, 2nd Edition, by Bill Hurter. It is available from Amazon.com and other fine retailers.

Fuzzy Duenkel is well known for his sophisticated senior portraits. While he transports his studio-lighting setups to make stunning portraits in the subject’s home, these techniques are equally applicable to studio shoots. As you’ll see, Fuzzy’s lighting technique differs significantly from the traditional portrait lighting setups, yet there are similarities. He uses one key light with ample fill. He also uses a background light and kickers (what he calls “edge lights”) to illuminate the perimeter of his subjects. The following descriptions cover three of his more frequently used setups, employing one, two, and three lights, respectively.


One-Light Setup. Fuzzy’s one-light setup uses a single key light, a 5x7-foot softbox set at about chin height and forward of the subject. A large 6x6-foot silver reflector is the only fill, and it is used close to the subject. A homemade Mylar mirror reflector is used to redirect light from the key light back onto the subject. Fuzzy calls this an edge light because it illuminates the side or hair or torso of the subject, depending on where it is aimed.

One other interesting feature of this setup is that a large gobo (2x8-feet) is used to block light from hitting the camera, which could cause flare. The opposite side of the gobo is mirrored Mylar to increase the relative size of the key light. You will notice that the canvas background is not lit separately. It is pulling light from the key light and reflector and is only positioned four feet from the subject, as seen in the following diagram. You will see, in subsequent setups, that the larger and farther the background is from the subject, the more it needs its own light source.

In the one-light setup, the large softbox is used close to the subject and the frontal reflector, which also gobos the camera and lens, broadens the light for an elegant, diffuse highlight. The background is lit mostly from spill from the main light and reflectors.


In the one-light setup, the large softbox is used close to the subject and the frontal reflector, which also gobos the camera and lens, broadens the light for an elegant, diffuse highlight. The background is lit mostly from spill from the main light and reflectors.


Two-Light Setup.
The same 5x7-foot softbox and 6x6-foot silver reflector are used as in the one-light setup, as is the mirrored gobo, which is used to minimize flare and expand the key light’s apparent size.

Note that, in the diagram, the subject is eight feet from the background, which is farther than in the first example. Thus, a 24x32-inch Chimera softbox is used to light the background and produce an edge light on the subject. The light can be feathered toward the background for more emphasis, or it can be feathered toward the subject for stronger backlight. The removable louvers control the amount of edge light and also prevent stray light from causing flare. An optional barn door (or gobo) may be used between the background light and subject to control the amount of edge light and shield the camera from stray light, which might cause flare. The gobo is used in case you want to remove the louvers from the softbox for more light on the subject and less feathered light on the background.

It is important to control the difference in output between the key light and the background light. Fuzzy aims for f/11 from the key light, then sets the background light to produce f/8 for low-key backgrounds, or f/16 for high-key backgrounds.


Three-Light Setup. The main difference with this setup is that a second background light is used to add double-edged lighting on the subject (or for high-key backgrounds). You will note in the diagram that a hinged reflector is used very close to the subject, just out of view of the camera. This reflector, like so many of Fuzzy’s lighting accessories, is homemade from insulation boards and is white on one side and silver on the other. The other part of the reflector is being used as a gobo to keep stray light from hitting the camera lens.


As with the other lighting setups, the key light is positioned just under chin height. This keeps light in the eyes and helps avoid what Fuzzy calls “dark eye bags.” It should be noted that while softboxes are used as a key light in all three setups, a flash bounced into a white wall may be used in tight quarters. Fuzzy normally uses an f/8 setting for the key light with a background light setting between f/5.6 and f/8. In all three lighting setups, Fuzzy also recommends adjusting the fill reflector by eye.

*excerpted from the book The Best of Photographic Lighting, 2nd Edition

BUY THIS BOOK FROM AMAZON