Showing posts with label studio. Show all posts

Mixed Lighting


Today's post comes from the book Doug Box's Flash Photography: On- and Off-Camera Flash for Digital Photographers by Doug Box. It is available from Amazon.com and other fine retailers.


Color Conversion Gels
Every light source, natural or artificial, has a specific color temperature, measured in Kelvin degrees. Daylight and flash, for instance, have a color temperature of about 5500K, while incandescent light measures about 3200K. The lower the temperature of the source, the “warmer” the light. The higher the color temperature, the “cooler” the light.

When you’re working in the studio, you have complete control over your lighting. However, when you’re shooting on location, you will encounter many lighting variables. When you’re faced with working with lights of different color temperatures, you have a powerful tool at your disposal: gels. These gelatin sheets can be used to modify your light source, changing the color temperature of your flash. You cannot gel the ambient light, so you must gel your on or off-camera flash to match the color temperature of the ambient light.

Here is an image taken on a cruise ship. It was nighttime, so the incandescent lightbulbs provided the only light in the scene. To capture the final image, I determined the exposure, placed a conversion filter on my flash, and changed the camera’s white balance preset to incandescent. That was it.

I photographed this image using an off-camera flash (5500K) modified with a color conversion gel to bring the flash temperature to 3200K. I also set the camera’s white balance preset to incandescent in order to produce neutral skin tones on the subject. However, the rest of the image has a blue color cast because the light is 5500K or higher. In addition, the light is flat and boring. The exposure was f/4 at 1/6 and ISO 200. The flash metered at f/4.


Here is the setup shot for the final image. The softbox was placed at the 45º/45º position. It was positioned perpendicular to the ground, so that the face of the box was parallel to the subject’s face. If you take a close look the final image, you can see that this rendered the face perfectly lit, and the light gently fell off so the subject’s shirt and pants—and even the rock wall—did not appear overlit. A small Morris Midi light with a warm gel was used below and behind the subject as a rim light.


Here is the final image. Selecting a faster shutter speed (1/60) rendered the background 3.5 stops underexposed, rendering the sky darker and more dramatic.

Case Study: Gels and Exposure Compensation
The images of the biker below were made in a challenging lighting situation. Let’s take a look at how I was able to make a successful image using gels and flash exposure compensation.

Here’s the scenario: The light in this scene came from streetlights—sodium vapor lights with a color temperature of roughly 2750K. I didn’t have the proper gel to convert my flash to 2750K, so I used a color conversion gel to produce an incandescent color balance, which is approximately 3200K. As you can see, the background is a little warm and the man’s back is too dark. The color isn’t perfect, but I like the way it looks. The exposure was f/4 at 0.5 second and ISO 200. In the first image, the on-camera flash was off.

To create the second, third, and fourth and fifth images in the series, I changed the flash exposure compensation on my ungelled on-camera flash to –3, –2, and –1, and 0 respectively. I used the flash compensation setting on the back of the flash rather than making the change via my camera. It is faster and allows for a –3 exposure, versus the camera’s maximum setting of –2. Each of the images in this series was made using the E-TTL mode on the on-camera flash, and each has a different contrast range, yet the images were captured almost as quickly as the flash recycled. The exposure of the subject’s face was consistent throughout all of the images because the off-camera flash was used in manual mode. The camera was also used in the manual mode.

Each of the images in this series was made using the E-TTL mode on the on-camera flash, and each has a different contrast range, yet the images were captured almost as quickly as the flash recycled. Note that the subject’s back, which was initially quite dark, became lighter with each exposure change. The exposure of the subject’s face was consistent throughout all of the images because the off-camera flash was used in manual mode. The camera was also used in the manual mode. As the man’s back becomes lighter, it also becomes more blue because of the color cast that an ungelled on-camera flash added when lighting the back of the subject.What a difference using gelled flash can make! The flash exposure compensation for the final image was set to –2.


Using Gels for Creative Effect
Sure, gels come in handy when you need to convert your flash units to match the color of the ambient light in the scene, but you can also use gels to create more interesting effects. There are some times when you may want to add strong color to a background or to an overall scene to create a more diverse array of image looks or moods. I keep a pack of gels in my camera bag at all times. I am surprised at how often I grab a little piece of color magic.

The images on the next page show how you can use gels to create a wide variety of portrait looks for your clients. By adding creative color to your images, you can add mood and character to your portrait offerings, which can lead to bigger sales.

This image was made with an ungelled flash and a softbox

Here, you can see the effect that was achieved when a purple gel was added to the kicker light (a flash) positioned behind the subject. I like both photographs, but the one made with the gelled flash seems to have more depth and appeal.


To create these two images, I used small Morris slaves with gels to color the black corrugated tin background.

To create the final image, I simply pointed the lights toward the camera, and they became an interesting part of the overall composition.

Lighting Design in Action

Today's post comes from the book Wes Kroninger's Lighting: Design Techniques for Digital Photographers by Wes Kroninger. For this post we are featuring three of his many lighting designs from the book. In this book Kroninger showcases a number of his remarkable images and breaks them down into how they were setup and what equipment was used to achieve the final result, often times including valuable tips about that shot. Each shot is accompanied by multiple diagrams. This book is available from Amazon.com and other fine retailers.

The Scoop
This image is another example of the teamwork between performing and visual artists. It was captured in an abandoned warehouse where I had wanted to create a series of images for a long time. I visualized the juxtaposition of the beautiful lines of the dancers contrasted with the gritty texture of the old building. It took some investigation and a lot of phone calls to get access to the location, but the site proved to be perfect for the shoot.


Tech
There was no electricity, so battery-powered lights were used to create these images. One 4x6-foot softbox was used as the main light. A second bare-bulb strobe was placed off set to camera right to add some light to the darkened building. In this image, a third light was placed on the first floor pointing up through the hole in the floor at the bottom left of the image.


Tip
I did my research on which battery powered lights had the shortest flash duration, but I overlooked the fact that (to save on battery charge) most battery-powered strobe packs have little to no modeling light. As the sun set, this was a big problem while trying to focus. Fortunately, a friend had come to the set to shoot some video and happened to bring a generator with a hot light, which created just enough ambient light to focus.


The Scoop
When photographing actors for their promotional materials, it is a good idea to keep your lighting as simple as possible. Casting agents who are searching for acting talent like to see what a potential selection looks like without distractions or excessive embellishment. By keeping the lighting simple, you make the image a quick read of an actor’s facial features and overall appearance.


Tech
This is another example of how simple lighting can be when the right decisions are made for the right subject. Here, one medium softbox was used overhead. One reflector was used from below to add some upward fill. A digital “cross-processing” effect was used by selecting the tungsten white balance setting while using studio strobes; this created an overall cool blue tone to the image. Texture and grain were also applied for added effect.


The Scoop
Some of the best experiences as a photographer come when collaborating with other artists. Working with dancers is no exception. They are so conscious of their movement and the position of their bodies in action that it guarantees a beautiful image.

Tech
To create this image, two 4x6-foot softboxes were used at corners of the set. To achieve a very short flash duration, I dialed the pack down to a low setting. I adjusted for this loss of illumination by increasing the ISO of my camera to 400. (I generally hesitate to go above 400, because I want to eliminate as much grain or digital noise from the image as possible.) The model was backlit with two gridded lights at the edge of the seamless paper, one on either side.

Tip
When I photograph dancers, I like to stop motion. I find it fascinating to see still frames, frozen in time, of movements that otherwise pass so quickly before our eyes. Certain equipment selections have to be made to achieve these results. Some lights have very fast flash duration (the flash tube itself stays illuminated for a short duration during each firing). This speed eliminates any streaking or blurring in the captured image— because, essentially, the light is doing the work of your shutter. Most strobe packs offer their shortest flash duration when at low power settings, then grow longer as the power is increased.


BUY THIS BOOK FROM AMAZON

Studio Lights Outdoors

Today's post comes from the The Digital Photographer's guide to Light Modifiers: Sculpting with Light by Allison Earnest. It is available from Amazon.com and other fine retailers.

Using your studio lights outside is the same as inside—with one exception: you must determine your shutter speed for the desired background (ambient light) exposure. When shooting with a combination of flash and ambient light, your shutter speed controls the available-light exposure (the exposure of everything not lit by the flash), while your aperture controls the the flash exposure (in most cases, this is the exposure of your subject). Yes, it takes much more effort and
courage to use your studio lights outdoors, but the final images you show your clients will be worth the effort.

Ballerina Rhiona O’Laughlin was the perfect subject for this outdoor studio portrait (PHOTOGRAPH 1). Once the location, wardrobe, and props were selected, a wonderful team of helpers started setting up lights—while trying to stay warm. The main light used on this image was a ring flash on axis with the camera. This was metered to record one stop brighter than the background. A simple monolight fitted with barndoors was used as the accent/hair light. This was powered to record one stop brighter than the main light. The barn doors were useful to help block unnecessary light on the scene.

PHOTOGRAPH 1. An incident-light meter reading taken of the ambient light determined my shutter speed. My flash was metered to determine the aperture, which controlled the exposure desired on my model. SUBJECT: Rhiona O’Laughlin. CAMERA: Nikon D300, Lexar media. SETTINGS: AWB, manual mode, 1/80 second, f/7, ISO 200.

Set scene for PHOTOGRAPHS 2 and 3.

In photograph 2, the main light was changed to a medium softbox. This was positioned at a 45-degree angle to the subject, producing a soft lighting pattern on Rhiona’s face. A warming gel was placed over the accent/hair light to closely match the warmth of the late afternoon sun. My shutter speed was lowered to record more of the ambient light in the scene.

PHOTOGRAPH 2. My shutter speed was lowered to record more ambient light in the scene, and the main light was slightly underexposed. SUBJECT: Rhiona O’Laughlin. CAMERA: Nikon D300, Lexar media. SETTINGS: AWB, manual mode, 1/40 second, f/10, ISO 200.

With the same softbox, the light was remetered after Rhiona changed poses (below). Here’s a bit of advice: when shooting on location, always bring a small wood board for your model to stand on when posing. I didn’t have one for this shoot, and the young lady accidentally stepped on a hidden cactus. As a true professional dancer, Rhiona continued to pose and smile—despite the cactus and the very chilly Colorado weather. It definitely takes a great team to create great photographs.

PHOTOGRAPH 3- Working with the same lighting setup as in photograph 4-6, the exposure was adjusted as Rhiona shifted poses. SUBJECT: Rhiona O’Laughlin. CAMERA: Nikon D300, Lexar media. SETTINGS: AWB, manual mode, 1/125 second, f/5, ISO 200. WARDROBE, STYLING, MAKEUP: Elliot Brooke.

The Double Main Light

Today's post comes from the book Christopher Grey's Advanced Lighting Techniques: Tricks of the Trade for Digital Photographers. It is available from Amazon.com and other fine retailers.

I’ve written about using a double key light approach several times, both in my Master Lighting Guide for Portrait Photographers and in my columns for shootsmarter.com and prophotoresource.com. It’s such a cool technique that I imagine I’ll write about it again in the future, as I keep finding uses for it and new ways to work with it. If you play with it just once, I’m sure you’ll be impressed by the level of its coolness and will find many applications for it in your own work.

The principle is simple: Use a large softbox (the bigger the better; in this case, I opted to use a 4x6-foot unit), along with another light fitted with a gridded parabolic reflector or beauty bowl (image below). The softbox will provide an underexposed but overall soft light, and the reflector will give the most important part of the image a correct and proper exposure.


To prepare for the first series, I began with a grid-spotted beauty bowl and set both lights approximately 6 feet from where my model would be standing. I placed the softbox behind the beauty bowl, keeping both lights at roughly the same angle. This meant that the softbox (as measured at the height of the strobe unit) would be higher than the beauty bowl when the beauty bowl was centered against it. Think of it as a straight line between both strobe units, because we want the same angle to the light so that we can avoid any possibility of conflicting shadows.

This setup takes a little extra time because both sources must be measured separately, then together. While my model was in makeup, I found the hottest area from the gridspot and measured it with my flashmeter, tweaking the power output from the pack until I had a perfect f/11.

I wanted the softbox light to be two stops under the other light. I turned the beauty bowl light off and sparked up the softbox, changing the power output until it was a perfect f/5.6—two stops less than the other light.

When I switched the other light back on and again metered at the hot spot, I found that the extra light increased the exposure by 1/3 stop (the effects of light are additive), which meant my camera’s effective aperture would be f/13.

Finally, I placed a strip light on a boom, centered directly over the model’s space but about 2 feet behind it to avoid having light spill onto the top of her nose. This light was powered up 1/3 stop brighter than the double main light.

Once you have the position of the lights figured out, it’s a simple matter to make adjustments if you change the position of the gridspot or the softbox: simply turn off whichever light you didn’t move and change the power of the other until you get to the same, original, f-stop. I had to do that for this first shot (image below) because the 25 degree grid threw a light that was too broad at its distance from the subject and the actual effect of the double main light was diminished. I found I had to move the beauty bowl in about halfway, to about 3 feet from the model, in order to get the effect I was looking for—a combination of the two lights that would show both underexposure and perfect exposure on the same subject and location.


Notice how the gridspot forms a gentle circle of soft light that seems to dissolve in from the slightly darker light below. This is the beauty of the double main light setup. You can spotlight your subject but still maintain a great deal of detail in the remainder of her form.

Of course, you can use regular parabolic reflectors, too. For the next shot (below), I removed the beauty bowl and replaced it with a parabolic reflector and a 20 degree grid. I had to re-meter and re-power the parabolic as its light is more concentrated than that of a beauty bowl. When I had achieved my target reading of f/11, my model and I were good to go, and we continued with the shoot. Notice that the background is slightly darker here because the reflector is more narrow. You’ll also note that the circle of light is more tightly defined and the shadows are harder because the light source is smaller.


When your subject wears white or light-colored clothing, you can drop the exposure from the softbox even more than two stops and still retain detail. If your strobes don’t allow linear power changes (and are accurate when making adjustments up or down), you’ll have to turn off the gridspot each time you re-meter the softbox. The exposure from the softbox, for this shot (image below), was dropped an additional full stop to an effective f/4. You will still have to re-meter the two lights together to get a working f-stop because the sum output of the two lights will change.


I switched to a 10 degree grid for the next shot (image below) to show what a narrow gridspot would look like. It’s a look that I personally like very much, and I often use it for senior portraits because my clients like the unusual look as well. I also bumped the power from the softbox down an additional stop, making it four stops below the parabolic. I could tell from my camera’s LCD that the exposure on the background was becoming dangerously dark and would soon be ineffective for this series. The solution was to move all of the lights farther from the background (ahh! the Inverse Square Law at work!). By moving everything farther from the background, the amount of exposure reduction due to falloff was reduced and background detail was maintained. The ratio and spacing of the three lights to the model remained the same.


This double main light technique is something you’ll never see the “fast photo” outlets attempt. They use preset lighting scenarios that, to my eye, look like junk. They are simple, foolproof, and without a spark of creativity. Play and practice with techniques like the double key and you’ll produce results that those practitioners can only dream about.

Please note that your results, based on your equipment, shooting style, etc., will, and should, be different from mine. The amount of reflectivity from the walls of your studio, the size of your studio, and other factors will make a difference in your results. However, the premise is sound and will work beautifully. Your assignment is to make it work for you.

BUY THIS BOOK FROM AMAZON

Working With One Light

Today's post comes from the book Understanding and Controlling Strobe Lighting: A Guide for Digital Photographers by John Siskin. It is available from Amazon.com and other fine retailers.

There are several reasons to work with one light. One of the most important is so that you can understand how one light source works. If you understand the way one light works—how the size and position of the light affect the subject—it will be easier to add other lights to your shots. Other reasons for working with a single light are the ease, speed, and flexibility of your lighting setup. When I work, I want to be able to start with a powerful character light and move to a soft light without interrupting the flow of the shoot. I can do that with one light and a few simple tools!

JUST AN UMBRELLA
For the first shot in this exercise, I used a Norman LH2400 strobe head with just 250 watt-seconds of power, plus a 42-inch ribless umbrella. My aperture was set at f/11.3. Though umbrellas often create more even lighting, the effect here is a little harsh because the light is directional and there is no light filling in the shadows. (If you shoot in a small studio space with white walls, the bounced light will fill in the shadows.)

This image was made with a single umbrella. The light works, but it could be better.

For this shot, I placed one light on a stand and positioned it above the subject and to one side. It was a quick and easy setup.

Using a setup like this is great for creating character shots, as texture and shape are well defined. The closer the light is to the subject, the less defined the character lines will be.

ADD A REFLECTOR
I added a large reflector panel to the first shot to create the two images below. I shot two frames—one with a silver reflector and the other with a gold one. Once again, this is a very fast and easy change. Much of the character of the first image is retained, but I’ve opened up the shadows. People often set up a portrait with the lights and reflectors at distances of more than 5 feet from the subject. This will greatly reduce the smoothness of the light in the image.

MAKE A LARGER LIGHT SOURCE
To create the next image, I added a light panel covered with white cotton broadcloth between the umbrella and the subject. This created a soft light the size of the panel. Compare the resulting image to the first shot in this chapter: you can see that the diffused light has yielded softer highlights and there is a smoother transition from highlight to shadow. This light is more flattering, as the wrinkles are not as well defined.

Silver reflector.

Gold reflector. Note that the gold reflector warmed up the shadows.

I added a reflector to the original setup to open up the shadows.

To create this shot, I positioned a light panel between the umbrella and the subject.

Here I used the umbrella/light panel combination. I use this setup a lot.

Adding a silver reflector allowed me to fill in the shadows on the right side of the frame, building light that is even softer than that produced by the umbrella alone. The result is similar to the image above, but there is more fill.

Here is the setup.

The light panel sucked up some light in this rendition of the subject, so I added more light to achieve a similar aperture.

BRING BACK THE REFLECTOR
For the next image, I added a silver reflector, just like I did in the second image. It was placed opposite the diffuser, creating two walls of light. The result is similar to the previous image, but there is more fill. The character lines are softer. That makes many people happy. Because I haven’t changed the light source, there was no change in the exposure. Remember, you can opt to use a gold or white reflector to vary the color of the reflected light if you choose.


For this shot, I positioned the reflector to pick up more light from the umbrella than from the panel.

The light on the subject’s face is very even in this shot. The silver reflector added some highlights, and there isn’t anything filling in from the subject’s left side.

You can position the reflector so it gets more light directly from the umbrella, rather than just through the light panel. This makes the reflector brighter compared to the side of the shot with the light panel and gives you a very soft, even light, like a tent. This will change your exposure a little because you are going to have to adjust the reflector and the light with the umbrella. I use this when I need a quick setup for a shot.

BUY THIS BOOK FROM AMAZON

Portrait Photography: Behind the Scenes

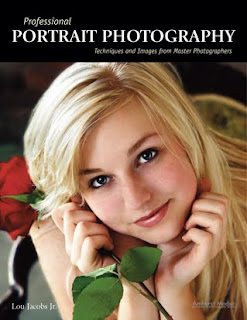
Today's post comes from the book Professional Portrait Photography: Techniques and Images from Master Photographers by Lou Jacobs Jr. This book is available from Amazon.com and other fine retailers. In the book, Jacobs profiles 10 leading portrait photographers about their craft and their business. Here is an excerpt from his profile of photographer Chris Nelson.

A former photojournalist and reporter, Chris used to supplement his income shooting weddings, advertising images, and senior portraits. In high school in the 1970s, he and his friends built a darkroom and shot for the school paper, yearbook, and sporting events. In 1991, he started a portraiture business now called Fall Creek Portrait Design in Fall Creek, WI. Since portraiture became his lifelong interest, Chris has earned Accolades of Photographic Mastery and Outstanding Photographic Achievement from WPPI, and is proud of winning WPPI’s senior portrait category in 2002 and 2004.

Describe your background.
I studied at University of Wisconsin–Milwaukee and graduated with a BA in English with photojournalism and fine art photography as part of my studies. While still in college, I did photography and graphic design for the college magazine, and after graduation, I worked at several newspapers as a reporter and photographer. Since my background was not portraiture, I wanted to learn all I could about this new area, and joining WPPI and PPA were great avenues.

Who are your influences and mentors?
When I caught Monte Zucker’s 1999 tour, and that of portrait artist Al Gilbert, I was blown away by their use of barebulb flash, as opposed to using softboxes, umbrellas, and reflectors. Those photographers had fluid posing styles that made subjects look really natural. I analyzed what they were doing and adopted some of their techniques so my work would look different from most other photographers’ portraits.

Don Blair and Michele Gauger influenced the foundations of my photographic style. Robert Lino and the late Dean Collins influenced my glamour style. While glamour photography comprises only about 20 percent of my studio’s business, that style influences much of my work. All my high school senior girls want to look like models, and seniors are 60 percent of my business.


Describe your studio.
I worked out of my home studio during a three-year transition from photojournalism to portraiture. I continued to take assignments with the local newspaper and shot for Chippewa Valley Technical College, creating images of students for the school’s cutting-edge programs.

In 1994, I moved into my current building, an 1880s bank on the main street of Fall Creek, WI (population 1,250). After renting half the building, I bought the property in 1998 and began restoration. In 2004, I added a large window-lighted camera room, a new production room, and a second dressing room. The studio is now about 3,000 square feet. Though I have two camera rooms, I still do a lot of location work because my clients and I love the variety. Many photographers in the vicinity don’t leave their studios.

I have three employees, my daughter Erin, my son Tim, and Ashley who does a little of everything, except shooting. She specializes in Photoshop, retouching, and finishing images, does client consultations, and a good share of the sales work.


Erin is like Ashley’s understudy, with much the same aptitude for graphics software applications. She has a great eye for design and is in training for high school senior album layout. Tim is a high school junior who enjoys being second camera at weddings, doing mostly candids. We expect when he’s in college he can shoot weddings on his own.

How do you approach your sessions?
The root of portraiture is the word portray. Photographers seek to visually portray their clients in artistic images that describe aspects of their lives or personalities. Before sessions I normally do a consultation where we get to know each other and exchange ideas; that helps keep us on track. How I approach getting what they want evolves through my style, coming from my consciousness and vision. If a casual observer can identify with and understand the meanings conveyed by an image, it’s a good, if not a fine, portrait.

How do you approach posing?
I have favorite poses, but they have to fit the subject. A pose might look great for one person and awkward for another, so you have to analyze your subject. My job is to accentuate the good features and downplay or hide what we don’t want to show through lighting. I try to make a positive aspect of the subject’s appearance so dramatic and compelling that viewers don’t notice a negative. For example, I created a glamour portrait of a woman who had recently had a baby and hadn’t lost all of her belly. She said her husband loved her butt, so I posed her with it at about a 30-degree angle to the camera and had her twist at the waist and look over her shoulder. This hid her tummy, and we chose a high key background with a hint of pink, which blended with her outfit.

In the last few years, I’ve adopted a new posing style by letting people pose themselves. I have clients talk about themselves and I watch their body language. When they do something that looks good, I tell them and then light that pose so it looks natural. This saves the effort of trying to fit someone into a pose. For example, I told a senior girl to pose on a stool in front of a formal
background. Instead, she knelt on it, sitting on her hocks, a pose I’ve never seen before. I said she looked great. I turned the stool about 45 degrees away from the main light, and she turned to look at me. The picture was uniquely her.

What strategies do you employ to communicate with your subjects and elicit the desired expressions?
I often describe the photo session as a stage performance where the part clients play is to talk about themselves. I reassure them, especially shy clients, that it’s my job to make them look good. “What’s the most important thing about a picture?” I’ll ask, and I get all kinds of answers. I’ll say, “The real answer is that you look great. The better I understand what you want, the better I can do this.”


In my orientation about posing, especially for women, I mention the ability to move body parts separately, face toward the light, and tip their head over their left shoulder. I’ll tell them, “Don’t move your upper body, but turn your hips away from me to the right.” I also tell people I don’t want them to smile all the time, that we need to capture a range of moods and expressions. I’ll suggest, “Point your chin toward me a little,” often getting a slightly bewildered look. Their cooperation shows they know I care what their images look like.

Shooting sequences is critical. If you get a good pose, quickly get different angles that really add variety to a sitting. Ask clients not to abandon a pose as soon as they hear the shutter click.

What type of backgrounds work best for you?
When we expanded the building we left the exterior brick exposed. I add props such as an old antique radio and phonograph, or antique furniture. I prefer props you find by chance to those from photographic catalogs, though I do have some of those. I also own painted backdrops, both muslins and canvases.

When a contractor remodeled a house near my studio I was given great old columns, a couple of which now frame the Plexiglas block window I built. I covered the cracked paint of the columns with a light coat of turquoise paint that harmonizes with the earth tones. The columns are used as the center of a set with the Plexiglas window backlit using a tungsten lamp.

Do you conduct any location sessions?
At least 60 percent of my sessions include an outdoor segment, which pleases seniors, couples, and families. We use one of our terrific locations like the rusty riveted steel and geometric trusses of an old railroad bridge. I work in natural light at a dozen or so spots near my studio, and I often augment with a strobe. The sun is a main light, the ambient light level is another, and my strobe or reflector is a third.

Where the sun is intense and there’s no shade or reflected light, I’ll use the sun as backlight with a portable strobe as a main light. If the ambient light level is f/5.6 at 1/250, I’ll set the strobe at f/5.6, which gives me an f/8 highlight or a 2:1 ratio. An f/11 separation light (the sun) gives the subject’s hair a beautiful highlight.


The junkyard is another favorite spot for seniors. I found it doing a senior session for the owner’s son, and I immediately made arrangements to shoot there often. I also use a rustic barn with peeling paint, a hayloft, and antique implements. Horses, goats, geese, turkeys, and ducks add to the atmosphere.

How do you promote your studio?
One main advertising site is a mall kiosk where we have a 10x18-foot display at a key spot; it’s expensive but worth it. We rotate images often, and clients who appear in the display are flattered. Once a year, we sell the prints at 55 to 70 percent off list. Equally important is our web site, which keeps growing and is really quite a bargain. Do your best to keep your web site fresh. The more places you can reinforce your message, the better.


You are in a position where your photography can promote a lot of other businesses (or nonprofits) and end up photographing in the process of doing your job. This type of networking is huge and often doesn’t cost much. I make images available to hotels, limo companies, bars, hair salons, radio stations, and hospitals for nothing more than a photo credit. It’s surprising how much word of mouth you get as a result.

We also do as many as twenty different mailers a year, many of them smaller like our re-order and customer appreciation sale, plus the four we do yearly to our senior prospects. Always refer prospective clients to your web site, where you can put more detailed information. I also do radio advertising and trades for promotional events as well as giving sessions away to nonprofits and community organizations.

How important is a photographer’s personality to his or her success?
Your personality and your ability to communicate with and understand your clients is critical. They will love you for making the effort. In addition, you need to decide what kind of image you want people to have of your studio. They need to understand what kind of photography you do. Image and branding is important, and you have to make the decisions noted above. Once you decide on the message, don’t ever water it down.


BUY THIS BOOK FROM AMAZON