Showing posts with label Monte Zucker. Show all posts

Portrait Photography: Behind the Scenes

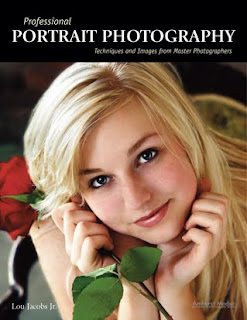
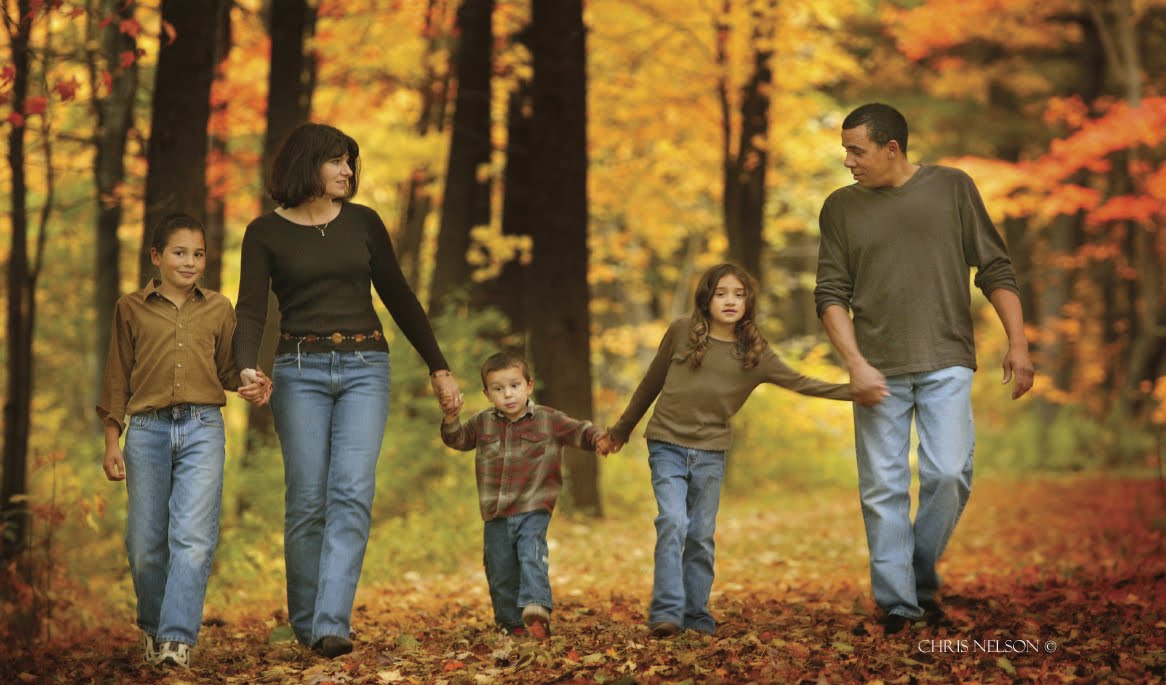
Today's post comes from the book Professional Portrait Photography: Techniques and Images from Master Photographers by Lou Jacobs Jr. This book is available from Amazon.com and other fine retailers. In the book, Jacobs profiles 10 leading portrait photographers about their craft and their business. Here is an excerpt from his profile of photographer Chris Nelson.

A former photojournalist and reporter, Chris used to supplement his income shooting weddings, advertising images, and senior portraits. In high school in the 1970s, he and his friends built a darkroom and shot for the school paper, yearbook, and sporting events. In 1991, he started a portraiture business now called Fall Creek Portrait Design in Fall Creek, WI. Since portraiture became his lifelong interest, Chris has earned Accolades of Photographic Mastery and Outstanding Photographic Achievement from WPPI, and is proud of winning WPPI’s senior portrait category in 2002 and 2004.

Describe your background.
I studied at University of Wisconsin–Milwaukee and graduated with a BA in English with photojournalism and fine art photography as part of my studies. While still in college, I did photography and graphic design for the college magazine, and after graduation, I worked at several newspapers as a reporter and photographer. Since my background was not portraiture, I wanted to learn all I could about this new area, and joining WPPI and PPA were great avenues.

Who are your influences and mentors?
When I caught Monte Zucker’s 1999 tour, and that of portrait artist Al Gilbert, I was blown away by their use of barebulb flash, as opposed to using softboxes, umbrellas, and reflectors. Those photographers had fluid posing styles that made subjects look really natural. I analyzed what they were doing and adopted some of their techniques so my work would look different from most other photographers’ portraits.

Don Blair and Michele Gauger influenced the foundations of my photographic style. Robert Lino and the late Dean Collins influenced my glamour style. While glamour photography comprises only about 20 percent of my studio’s business, that style influences much of my work. All my high school senior girls want to look like models, and seniors are 60 percent of my business.


Describe your studio.
I worked out of my home studio during a three-year transition from photojournalism to portraiture. I continued to take assignments with the local newspaper and shot for Chippewa Valley Technical College, creating images of students for the school’s cutting-edge programs.

In 1994, I moved into my current building, an 1880s bank on the main street of Fall Creek, WI (population 1,250). After renting half the building, I bought the property in 1998 and began restoration. In 2004, I added a large window-lighted camera room, a new production room, and a second dressing room. The studio is now about 3,000 square feet. Though I have two camera rooms, I still do a lot of location work because my clients and I love the variety. Many photographers in the vicinity don’t leave their studios.

I have three employees, my daughter Erin, my son Tim, and Ashley who does a little of everything, except shooting. She specializes in Photoshop, retouching, and finishing images, does client consultations, and a good share of the sales work.


Erin is like Ashley’s understudy, with much the same aptitude for graphics software applications. She has a great eye for design and is in training for high school senior album layout. Tim is a high school junior who enjoys being second camera at weddings, doing mostly candids. We expect when he’s in college he can shoot weddings on his own.

How do you approach your sessions?
The root of portraiture is the word portray. Photographers seek to visually portray their clients in artistic images that describe aspects of their lives or personalities. Before sessions I normally do a consultation where we get to know each other and exchange ideas; that helps keep us on track. How I approach getting what they want evolves through my style, coming from my consciousness and vision. If a casual observer can identify with and understand the meanings conveyed by an image, it’s a good, if not a fine, portrait.

How do you approach posing?
I have favorite poses, but they have to fit the subject. A pose might look great for one person and awkward for another, so you have to analyze your subject. My job is to accentuate the good features and downplay or hide what we don’t want to show through lighting. I try to make a positive aspect of the subject’s appearance so dramatic and compelling that viewers don’t notice a negative. For example, I created a glamour portrait of a woman who had recently had a baby and hadn’t lost all of her belly. She said her husband loved her butt, so I posed her with it at about a 30-degree angle to the camera and had her twist at the waist and look over her shoulder. This hid her tummy, and we chose a high key background with a hint of pink, which blended with her outfit.

In the last few years, I’ve adopted a new posing style by letting people pose themselves. I have clients talk about themselves and I watch their body language. When they do something that looks good, I tell them and then light that pose so it looks natural. This saves the effort of trying to fit someone into a pose. For example, I told a senior girl to pose on a stool in front of a formal
background. Instead, she knelt on it, sitting on her hocks, a pose I’ve never seen before. I said she looked great. I turned the stool about 45 degrees away from the main light, and she turned to look at me. The picture was uniquely her.

What strategies do you employ to communicate with your subjects and elicit the desired expressions?
I often describe the photo session as a stage performance where the part clients play is to talk about themselves. I reassure them, especially shy clients, that it’s my job to make them look good. “What’s the most important thing about a picture?” I’ll ask, and I get all kinds of answers. I’ll say, “The real answer is that you look great. The better I understand what you want, the better I can do this.”


In my orientation about posing, especially for women, I mention the ability to move body parts separately, face toward the light, and tip their head over their left shoulder. I’ll tell them, “Don’t move your upper body, but turn your hips away from me to the right.” I also tell people I don’t want them to smile all the time, that we need to capture a range of moods and expressions. I’ll suggest, “Point your chin toward me a little,” often getting a slightly bewildered look. Their cooperation shows they know I care what their images look like.

Shooting sequences is critical. If you get a good pose, quickly get different angles that really add variety to a sitting. Ask clients not to abandon a pose as soon as they hear the shutter click.

What type of backgrounds work best for you?
When we expanded the building we left the exterior brick exposed. I add props such as an old antique radio and phonograph, or antique furniture. I prefer props you find by chance to those from photographic catalogs, though I do have some of those. I also own painted backdrops, both muslins and canvases.

When a contractor remodeled a house near my studio I was given great old columns, a couple of which now frame the Plexiglas block window I built. I covered the cracked paint of the columns with a light coat of turquoise paint that harmonizes with the earth tones. The columns are used as the center of a set with the Plexiglas window backlit using a tungsten lamp.

Do you conduct any location sessions?
At least 60 percent of my sessions include an outdoor segment, which pleases seniors, couples, and families. We use one of our terrific locations like the rusty riveted steel and geometric trusses of an old railroad bridge. I work in natural light at a dozen or so spots near my studio, and I often augment with a strobe. The sun is a main light, the ambient light level is another, and my strobe or reflector is a third.

Where the sun is intense and there’s no shade or reflected light, I’ll use the sun as backlight with a portable strobe as a main light. If the ambient light level is f/5.6 at 1/250, I’ll set the strobe at f/5.6, which gives me an f/8 highlight or a 2:1 ratio. An f/11 separation light (the sun) gives the subject’s hair a beautiful highlight.


The junkyard is another favorite spot for seniors. I found it doing a senior session for the owner’s son, and I immediately made arrangements to shoot there often. I also use a rustic barn with peeling paint, a hayloft, and antique implements. Horses, goats, geese, turkeys, and ducks add to the atmosphere.

How do you promote your studio?
One main advertising site is a mall kiosk where we have a 10x18-foot display at a key spot; it’s expensive but worth it. We rotate images often, and clients who appear in the display are flattered. Once a year, we sell the prints at 55 to 70 percent off list. Equally important is our web site, which keeps growing and is really quite a bargain. Do your best to keep your web site fresh. The more places you can reinforce your message, the better.


You are in a position where your photography can promote a lot of other businesses (or nonprofits) and end up photographing in the process of doing your job. This type of networking is huge and often doesn’t cost much. I make images available to hotels, limo companies, bars, hair salons, radio stations, and hospitals for nothing more than a photo credit. It’s surprising how much word of mouth you get as a result.

We also do as many as twenty different mailers a year, many of them smaller like our re-order and customer appreciation sale, plus the four we do yearly to our senior prospects. Always refer prospective clients to your web site, where you can put more detailed information. I also do radio advertising and trades for promotional events as well as giving sessions away to nonprofits and community organizations.

How important is a photographer’s personality to his or her success?
Your personality and your ability to communicate with and understand your clients is critical. They will love you for making the effort. In addition, you need to decide what kind of image you want people to have of your studio. They need to understand what kind of photography you do. Image and branding is important, and you have to make the decisions noted above. Once you decide on the message, don’t ever water it down.

BUY THIS BOOK FROM AMAZON

Portrait Photography Recipes

Today's post comes from the book Rangefinder's Professional Photography: Techniques From the Pages of Rangefinder Magazine, edited by Bill Hurter. It is available from Amazon.com and other fine retailers. This book compiles the work of almost 100 photographers as featured in Rangefinder magazine's Cookbook features. Essentially, each photographer offers a photograph and explains how they created it. Here are two of the "recipes".


Fernando Escovar: A Retro Fashion Series

I thought it might be a good idea to produce a retro style in my next fashion series, so I started with an old Shure microphone, like the ones you see in movies from the 1950s. I remembered a location at Bellagio in Las Vegas where they have a cool lounge called the Fontana Bar. They also have an old drum set with an ornate “B” on the bass drum.

A model/actress friend of mine, Amanda Swisten, loves anything retro, so I asked if she would do this for me. As a photographer you have to make a lot of phone calls to orchestrate these “mini movies.” The hair and makeup all had to be just right for this project, which ran as a sixteen-page spread and cover for Las Vegas magazine.


After I scouted and secured the location, I made a shot list with the editor to see what outfit looked best for each scene. That exercise took half a day. After making the selections, we had a fitting with Amanda to double-check the clothes.


I am all digital now, sporting Canon’s 1Ds Mark II, and I don’t remember how I ever lived before digital. The other day I was shooting an assignment for a client who wanted film. I kept looking down at the camera body to view the image I had just captured, but I couldn’t because it was a film camera.

With digital, I can quickly check my work when I am building a shot with lights—like the image of Amanda singing in front of the striking red curtains. I wanted to make sure I was getting shadows where I wanted them. I also wanted to keep light on the drum set and not fully on Amanda while shooting 100 ISO at f/8 and 1/125 second; shooting digital allowed me to ensure
these elements.

We made fine adjustments, flagged off the main Profoto strobe with some GatorBoard, and covered the other strobes with amber gels to give off some deeper colors. I only used three heads on this shot with an Acute 2400 pack.

INGREDIENTS
Camera: Canon 1Ds Mark II
Exposure: 100 ISO at f/8,
1/125 second
Light: Profoto strobe,
flagged off with
GatorBoard; other
strobes covered with
amber gels; Acute
2400 pack


Monte Zucker: The Touch
For this image, Monte Zucker wanted to create a high-key portrait outdoors with simple props. In order to do so, the first thing he looked for was a covered area with strong backlighting. The perfect setting was under a covered porch with no light coming in from above. To get the backlighting, he waited for the afternoon sun, then used a Westcott translucent panel directly behind the couple to diffuse the backlight.

The camera was a Canon EOS 10D loaded with a 640MB Delkin memory card. The ISO was adjusted to 200. Monte says, “I used aperture priority with the lens set at f/5.6. The internal exposure meter saw a lot of white behind them and stopped down too much, so the figures were underexposed. I had to override the in-camera meter by a stop and a half to get the correct exposure on their faces.


“Heads were positioned for profiles of both, with my normal lighting pattern for profiles coming thru the Westcott translucent panel. In addition, they were lying on a Westcott Black/White 4x6-foot panel.

“I used a 27-inch silver reflector as a kicker to help brighten the image. The reflector (Westcott’s Monte Illuminator) was tipped upward to catch light coming over the top of the translucent panel. This opened up the shadows slightly without overpowering the main light coming through behind them.”


Very little was done in Photoshop, except to remove a few minor blemishes from their skin. “The couple in the picture were high-school friends. They came to pose for one of my workshops. They got more and more into my photographing them when they saw how much fun we were having. They originally told me that they didn’t like posed photos, but as we took more pictures and they looked at the LCD screen, they got more enthusiastic. They said, ‘These aren’t what we meant when we said we didn’t like posed pictures. These are fun!’ They said they’ve never looked this good in photographs.”

About photography, Monte says, “It’s exciting to see how far you can take it and nail it every time! I believe in it completely and teach it with love and with passion.” —Bob Rose

INGREDIENTS
Camera: Canon EOS 10D
Lens: Canon 28–135mm
f/4 IS Zoom
Memory Card: Delkin
640MB
White Balance: ExpoDisc
Light Control: Westcott
4x6-foot panel,
Translucent panel and
27-inch silver reflector
(Monte Illuminator)

Window Lighting

Today's post comes from the book Monte Zucker's Portrait Photography Handbook. This book is available from Amazon.com and other fine retailers.

One of the most popular choices for indoor lighting is window light. It’s available for a good part of the day and it’s cheap. When you’ve got indirect sunlight through the window, it’s also easy to work with. Even with direct sunlight, a simple translucent scrim, such as the Westcott 1707, can make it useable for portraiture. The key to successful window lighting is that you want to achieve the same lighting patterns as you would when creating a studio portrait.

When you know what you’re doing, window light can create a dramatic impact.

Sometimes it works to show the window itself in your image. This can be a distraction, though, so you should use the setup judiciously.


DIRECTION OF THE WINDOW
When photographers first began creating daylight portraits, they favored north light as their main light source. That’s because a north-facing window gets no direct sunlight and is usable most of the day. Of course, if you live in the southern hemisphere, you need to go to a window with a southern exposure.

To create a fullface view, the camera is next to the wall with the window.

To create a two-thirds view, the camera moves further out into the room.

For a profile, move the camera even further into the room. For all these views, the subject never moves; the camera is simply repositioned. The background has been muted, however, by positioning the camera.


COMMON PITFALLS
Height of the Light Source. There are several pitfalls with using window light. One of them is the height of the light source. As we discussed in a previous chapter, good portrait lighting should come from above the eye level of the subject. You might think that this would not be a problem with light coming through a window, but quite often the light is not coming from the sky. Often, it’s bouncing off a building or off the sidewalk outside. This means the light will be coming up from below the subject. That’s not good at all; the more powerful light will miss your subject’s face and concentrate on the lower part of their body.

When you see this happening, you need to seat your subject so that the predominant amount of light is hitting their face with a slight fall-off toward the lower part of their body. Alternately, you can cover the bottom of the window and hope that the light coming in over top of that obstruction will be more appropriate. Better yet, find a different window.

Window Treatments. Another thing to be aware of is window treatments that cover the top of the opening and force most of the light to come in from below. If you’re standing your subject near a window like this, the strongest light will be on the bottom of that person, missing the face. Not good! To correct that problem, you would need to seat your subject so that the strongest light illuminates their face.

Showing the Window. Many photographers who use window light show the window in all of their photographs. For the most part, I find the windows to be a distraction. Certainly, you wouldn’t want to get your portrait lights in a photograph, would you? I can see including the window in a portrait from time to time, but not in every image.

DISTANCE OF WINDOW TO SUBJECT
If you keep your subjects a short distance from the window, you’ll find that the light wraps around them more beautifully and with much less contrast than when they’re very close to the window. Therefore, I’ve found it best to work a few feet from the window. With digital cameras, it’s easy to increase your ISO setting to 600, 800, or 1000 without degrading the photograph,
so the drop in light intensity shouldn’t be a big problem.


CAMERA AND SUBJECT POSITIONS

One of the biggest problems photographers have with window lighting is knowing where to stand when setting up for the portrait, and how to change from one facial view to another during the session. Here’s the secret: When photographing with a light source that you cannot move, you have to position your subject’s face to attain the proper lighting first, then adjust your camera position to get the desired view of the face. In other words, when you can’t move the light, move the camera.


Position the Subject. Many photographers have trouble finding the right pattern on their subjects’ faces. Often, this is because they are not standing in the right place. To really see what you’re doing and to “set” the light pattern, you need to be standing against the wall—right next to the window. Your subjects should be standing a few feet away from the window and around the middle or slightly closer to the far end of the opening. Then, turn the face toward the window—but not directly into the window.When you do that you get flat lighting and lose all dimension to the face. Once you see the desired pattern, keep the subject’s face in place and pose the body to support the face.

Position the Camera. Once the proper pose is achieved—that’s it; you cannot turn the subject to achieve full-face, two-thirds, and profile views. Instead, you will move the camera from one position to another. For a full-face picture by a window, the camera will need to be located right against the wall by the window. That’s the only place that you can position yourself and still get a proper light pattern. For a two-thirds view, move away from the wall toward the center of the room. For a profile, move still further into the room. Because the subject and the window remain stationary, the lighting on the subject’s face will be consistent.

USING A REFLECTOR WITH WINDOW LIGHT
When placing a reflector to enhance the window light you have two choices—just as you do when using a reflector in the studio. If the light pattern is already there and all you want to do is to open up the shadows, then the reflector goes on the shadowed side of the face. If, however, there is light only on one side of the face, there is no light in the eyes, and there is no appropriate lighting pattern, then the reflector should be placed on the highlight side of the face; it is what will create the lighting pattern for you.

CAMERA AND SUBJECT POSITIONS
One of the biggest problems photographers have with window lighting is knowing where to stand when setting up for the portrait, and how to change no appropriate lighting pattern, then the reflector should be placed on the highlight side of the face; it is what will create the lighting pattern for you.

In some cases, a reflector can be be paired with window light to be used as the main light.

Reflector for Fill Light. The most common use for a reflector is to open up the shadows in a portrait, allowing you to render detail throughout the image.When used for this purpose, the reflector should remain forward of the face, not beside the it. When it is in front of the face, it can pick up the light from the window and push it around to open up the shadows. When it is beside the face, on the other hand, it tends to act like a second main light source, bringing in noticeable light from the side opposite the main light.

Reflector for Main Light. Another use for a reflector is when the window lights only half of the face. In this case, what you need is an appropriate main light. To accomplish this, the reflector should be placed on the highlight side of the face and, initially, turned toward the window. Then, slowly turn the reflector until it bounces the light onto the shadow side of the face and creates the desired lighting pattern.

BUY THIS BOOK FROM AMAZON