Flawless Indoor Portraits With Flash

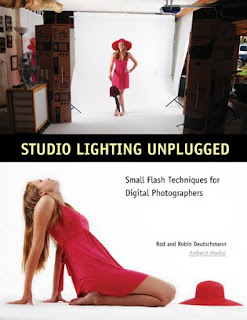
Today's post comes from the book Studio Lighting Unplugged: Small Flash Techniques for Digital Photographers by Rod & Robin Deutschmann. It is available from Amazon.com and other fine retailers.

There is nothing as intimidating as photographing a living subject. So far, our journey has been nonthreatening to our egos (the wall in front of you has yet to complain about a bad photo).

When you photograph people, they are going to want to see the image—and they may give you feedback about your work. This may make you uncomfortable at first.

You may want to invest in a “shooting” stool. This gives your model a chance to rest between shots and keeps them at a comfortable height for the photograph.

Ask someone who loves you very much to help with the fol -lowing experiments and let them know that you are simply trying to better yourself as a studio photographer. Smile a lot, be positive, and when you do get an image perfect, make sure to let your subject know it had everything to do with their winning smile and not just the lighting you created.

Exercise: Freezing Motion
• Work in a room that you are very familiar with, one that you have already had photographic success in.
• Ask your model to stand or sit several feet from you.
• Start with an aperture of f/5.6.
• Set the camera’s ISO to 200
• Set the camera’s shutter speed to its flash sync speed.
• Point the flash toward the ceiling.
• Turn the power of the flash to full (1/1).
• Take a test image and examine it.
• Adjust the power setting of the flash until your model is lit perfectly.
• Examine the image closely. Check out the focus and look at the colors. Adjust the white balance if needed. Do what you can to improve the shot. Make it perfect, then move onto another room and do it again. Devoting just an hour of your time to this exercise will yield some great benefits— confidence and pride in your abilities.
• Now, move the camera a bit when you shoot. Try to create motion blur. You’ll find it’s impossible to get a blurry photo when shooting with a flash in the studio. Imagine never again having to worry about your subject (or you) moving when you take a photograph indoors.


Off the Wall
The light on your portrait subject looks great when it is bounced off the ceiling, but what if you could bounce it off of something farther away, like a distant wall? What effects could you achieve with an even larger light source, coming from a different angle? Let’s check it out


Notice how the shadows from a bounced flash are much more flattering on your subject and background.


By bouncing the flash off a nearby wall, you are both enlarging and scattering your light source. This creates a very pleasing quality of light. Notice the difference between this image and the previous one where the light was bounced from the ceiling. Look closely at the differences between the shadows, how they fall, and the difference in the level of detail that can be perceived in the shadow areas.


Exercise: Off-the-Wall Lighting
• Set the same aperture, shutter speed, and ISO setting you used in the previous exercise.
• Rotate and spin the flash head toward a wall. Ensure the flash is pointed directly at the wall, at a full 90 degrees.
• Take a shot and review the results. Adjust your flash settings and take another photograph. Repeat the process until you are happy with the lighting on your subject. Don’t be surprised if you have to increase the power from the flash dramatically. As the distance needed to illuminate your subject increases, so does your need for power.

Working In A Client's Home

Today's post comes from the book Family Photography: The Digital Photographer's Guide to Building a Business on Relationships by Christie Mumm. It is available from Amazon.com and other fine retailers.


The high ISO capabilities of today’s DSLRs have made shooting in clients’ homes much more feasible. I love the excitement of heading out to a client’s home and knowing it will be an utterly unique shooting location. There are always special areas to photograph the family. An added bonus is that their images will be even more significant because they represent their lives in such a personal way.


Evaluating the Light. Some special considerations with shooting in clients’ homes may include the lack of control you will have over lighting quality and color, working with pets, and learning to be comfortable asking clients to move furniture for the portraits. Many clients will have an idea of where in their home they would like to have portraits taken; sometimes, however, these
locations will not be the best for lighting. As I noted earlier in this chapter, lighting is much more important than the background. Try to prepare your client in advance of their session by letting them know that you will be asking to see all the rooms in the house to determine the best light. This will avoid the potential embarrassment if certain rooms are not tidy and ready for photography.


It is also a good idea to speak with clients in advance about the direction their windows face. This can help you plan the appropriate time of day to hold their session. If the home has many large windows facing due west, I would not recommend shooting there late in the day. At that time, the light will be harsh and hard to control. A morning or early afternoon session would be a better idea. Naturally, the opposite is true for east-facing windows. North-facing windows are great all day long in the northern hemisphere; southfacing windows are, accordingly, good all day for the southern hemisphere.


Locations to Try. Portraits of kids in their own bedrooms can be very fun. Most children love to show off their stuff and will enjoy the personal attention they get. Backyards can be nice—especially if the yard has some sort of play structure (trampolines are particularly fun for kids and grownups alike). I also love to take portraits of families flopped down on Mom and Dad’s bed—cuddling, reading, having a tickle fight, etc. Big, comfy beds are also great for baby and maternity portraits—so encourage your clients to allow you to shoot in their bedrooms if the lighting allows. Other good places can be bathrooms (tubs and showers make clean, simple backdrops) and kitchens, which usually have beautiful light and nice floors.

Lighting is more important than the background—but here the coordinating cool tones of the wall and the parents’ clothes make the warm skin tones the focus of the image.

Creating A Photojournalistic Atmosphere

Today's post comes from the book Engagement Portraiture: Master Techniques for Digital Photographers by Tracy Dorr. It is available from Amazon.com and other fine retailers.

To be truly photojournalistic, your portrait subjects need to be totally at ease and unaware of your presence. Since engagement sessions are scheduled and consist of only the three of you, there is little opportunity for this to occur naturally. They are only with you for a half an hour to an hour and they know that you are shooting their engagement photo, so of course they are more than aware of you and your camera. If the subjects are properly distracted, however, they may momentarily forget all about you, creating a truly photojournalistic moment. So what can you do to encourage a photojournalistic atmosphere?


When you begin the session, select a few poses that allow the couple to loosen up and get comfortable. That will create the open atmosphere needed for them to improvise. Be sure to comment to them that you want them to do whatever comes naturally. They should not feel constrained to a pose—you want them to ad-lib as much as they would like. Offer up examples such as, “Feel free to pick up your fiancĂ©e or move to a new location. You don’t need my permission or instruction to try anything that comes to mind.” By allowing them to dictate what pose comes next or be creative in how they interact, you will inspire natural moments—and totally photojournalistic moments will be born out of those.


You will also benefit from welcoming any and all distractions that occur. If a dog runs through your shot or a huge gust of wind blows, don’t put down your camera and wait for the distraction to pass! Utilize that moment to its fullest extent—be ready to capture the couple’s reaction to whatever distracts them and see how that encourages them to relate to each other. Those moments will be totally unscripted and demand that their attention be withdrawn from you for at least a few moments.