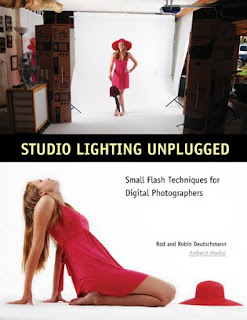
 Today's post comes from the book Studio Lighting Unplugged: Small Flash Techniques for Digital Photographers by Rod & Robin Deutschmann. It is available from Amazon.com and other fine retailers.
There is nothing as intimidating as photographing a living subject. So far, our journey has been nonthreatening to our egos (the wall in front of you has yet to complain about a bad photo).
When you photograph people, they are going to want to see the image—and they may give you feedback about your work. This may make you uncomfortable at first.
You may want to invest in a “shooting” stool. This gives your model a chance to rest between shots and keeps them at a comfortable height for the photograph.
Ask someone who loves you very much to help with the fol -lowing experiments and let them know that you are simply trying to better yourself as a studio photographer. Smile a lot, be positive, and when you do get an image perfect, make sure to let your subject know it had everything to do with their winning smile and not just the lighting you created.
Exercise: Freezing Motion
• Work in a room that you are very familiar with, one that you have already had photographic success in.
• Ask your model to stand or sit several feet from you.
• Start with an aperture of f/5.6.
• Set the camera’s ISO to 200
• Set the camera’s shutter speed to its flash sync speed.
• Point the flash toward the ceiling.
• Turn the power of the flash to full (1/1).
• Take a test image and examine it.
• Adjust the power setting of the flash until your model is lit perfectly.
• Examine the image closely. Check out the focus and look at the colors. Adjust the white balance if needed. Do what you can to improve the shot. Make it perfect, then move onto another room and do it again. Devoting just an hour of your time to this exercise will yield some great benefits— confidence and pride in your abilities.
• Now, move the camera a bit when you shoot. Try to create motion blur. You’ll find it’s impossible to get a blurry photo when shooting with a flash in the studio. Imagine never again having to worry about your subject (or you) moving when you take a photograph indoors.
Off the Wall
The light on your portrait subject looks great when it is bounced off the ceiling, but what if you could bounce it off of something farther away, like a distant wall? What effects could you achieve with an even larger light source, coming from a different angle? Let’s check it out

Notice how the shadows from a bounced flash are much more flattering on your subject and background.

By bouncing the flash off a nearby wall, you are both enlarging and scattering your light source. This creates a very pleasing quality of light. Notice the difference between this image and the previous one where the light was bounced from the ceiling. Look closely at the differences between the shadows, how they fall, and the difference in the level of detail that can be perceived in the shadow areas.
Exercise: Off-the-Wall Lighting
• Set the same aperture, shutter speed, and ISO setting you used in the previous exercise.
• Rotate and spin the flash head toward a wall. Ensure the flash is pointed directly at the wall, at a full 90 degrees.
• Take a shot and review the results. Adjust your flash settings and take another photograph. Repeat the process until you are happy with the lighting on your subject. Don’t be surprised if you have to increase the power from the flash dramatically. As the distance needed to illuminate your subject increases, so does your need for power.


No comments:
Post a Comment