
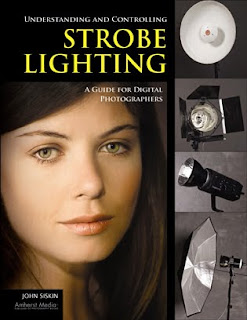
 Today's post comes from the book Understanding and Controlling Strobe Lighting: A Guide for Digital Photographers by John Siskin. It is available from Amazon.com and other fine retailers.
There are several reasons to work with one light. One of the most important is so that you can understand how one light source works. If you understand the way one light works—how the size and position of the light affect the subject—it will be easier to add other lights to your shots. Other reasons for working with a single light are the ease, speed, and flexibility of your lighting setup. When I work, I want to be able to start with a powerful character light and move to a soft light without interrupting the flow of the shoot. I can do that with one light and a few simple tools!
JUST AN UMBRELLA
For the first shot in this exercise, I used a Norman LH2400 strobe head with just 250 watt-seconds of power, plus a 42-inch ribless umbrella. My aperture was set at f/11.3. Though umbrellas often create more even lighting, the effect here is a little harsh because the light is directional and there is no light filling in the shadows. (If you shoot in a small studio space with white walls, the bounced light will fill in the shadows.)
 This image was made with a single umbrella. The light works, but it could be better.
  For this shot, I placed one light on a stand and positioned it above the subject and to one side. It was a quick and easy setup.
 Using a setup like this is great for creating character shots, as texture and shape are well defined. The closer the light is to the subject, the less defined the character lines will be.
ADD A REFLECTOR
I added a large reflector panel to the first shot to create the two images below. I shot two frames—one with a silver reflector and the other with a gold one. Once again, this is a very fast and easy change. Much of the character of the first image is retained, but I’ve opened up the shadows. People often set up a portrait with the lights and reflectors at distances of more than 5 feet from the subject. This will greatly reduce the smoothness of the light in the image.
MAKE A LARGER LIGHT SOURCE
To create the next image, I added a light panel covered with white cotton broadcloth between the umbrella and the subject. This created a soft light the size of the panel. Compare the resulting image to the first shot in this chapter: you can see that the diffused light has yielded softer highlights and there is a smoother transition from highlight to shadow. This light is more flattering, as the wrinkles are not as well defined.
 Silver reflector.
  Gold reflector. Note that the gold reflector warmed up the shadows.
 I added a reflector to the original setup to open up the shadows.
 To create this shot, I positioned a light panel between the umbrella and the subject.
 Here I used the umbrella/light panel combination. I use this setup a lot.
 Adding a silver reflector allowed me to fill in the shadows on the right side of the frame, building light that is even softer than that produced by the umbrella alone. The result is similar to the image above, but there is more fill.
 Here is the setup.
BRING BACK THE REFLECTOR
For the next image, I added a silver reflector, just like I did in the second image. It was placed opposite the diffuser, creating two walls of light. The result is similar to the previous image, but there is more fill. The character lines are softer. That makes many people happy. Because I haven’t changed the light source, there was no change in the exposure. Remember, you can opt to use a gold or white reflector to vary the color of the reflected light if you choose.
 For this shot, I positioned the reflector to pick up more light from the umbrella than from the panel.
 The light on the subject’s face is very even in this shot. The silver reflector added some highlights, and there isn’t anything filling in from the subject’s left side.
 You can position the reflector so it gets more light directly from the umbrella, rather than just through the light panel. This makes the reflector brighter compared to the side of the shot with the light panel and gives you a very soft, even light, like a tent. This will change your exposure a little because you are going to have to adjust the reflector and the light with the umbrella. I use this when I need a quick setup for a shot.
BUY THIS BOOK FROM AMAZON
No comments:
Post a Comment