Showing posts with label softbox. Show all posts

Mixed Lighting


Today's post comes from the book Doug Box's Flash Photography: On- and Off-Camera Flash for Digital Photographers by Doug Box. It is available from Amazon.com and other fine retailers.


Color Conversion Gels
Every light source, natural or artificial, has a specific color temperature, measured in Kelvin degrees. Daylight and flash, for instance, have a color temperature of about 5500K, while incandescent light measures about 3200K. The lower the temperature of the source, the “warmer” the light. The higher the color temperature, the “cooler” the light.

When you’re working in the studio, you have complete control over your lighting. However, when you’re shooting on location, you will encounter many lighting variables. When you’re faced with working with lights of different color temperatures, you have a powerful tool at your disposal: gels. These gelatin sheets can be used to modify your light source, changing the color temperature of your flash. You cannot gel the ambient light, so you must gel your on or off-camera flash to match the color temperature of the ambient light.

Here is an image taken on a cruise ship. It was nighttime, so the incandescent lightbulbs provided the only light in the scene. To capture the final image, I determined the exposure, placed a conversion filter on my flash, and changed the camera’s white balance preset to incandescent. That was it.

I photographed this image using an off-camera flash (5500K) modified with a color conversion gel to bring the flash temperature to 3200K. I also set the camera’s white balance preset to incandescent in order to produce neutral skin tones on the subject. However, the rest of the image has a blue color cast because the light is 5500K or higher. In addition, the light is flat and boring. The exposure was f/4 at 1/6 and ISO 200. The flash metered at f/4.


Here is the setup shot for the final image. The softbox was placed at the 45º/45º position. It was positioned perpendicular to the ground, so that the face of the box was parallel to the subject’s face. If you take a close look the final image, you can see that this rendered the face perfectly lit, and the light gently fell off so the subject’s shirt and pants—and even the rock wall—did not appear overlit. A small Morris Midi light with a warm gel was used below and behind the subject as a rim light.


Here is the final image. Selecting a faster shutter speed (1/60) rendered the background 3.5 stops underexposed, rendering the sky darker and more dramatic.

Case Study: Gels and Exposure Compensation
The images of the biker below were made in a challenging lighting situation. Let’s take a look at how I was able to make a successful image using gels and flash exposure compensation.

Here’s the scenario: The light in this scene came from streetlights—sodium vapor lights with a color temperature of roughly 2750K. I didn’t have the proper gel to convert my flash to 2750K, so I used a color conversion gel to produce an incandescent color balance, which is approximately 3200K. As you can see, the background is a little warm and the man’s back is too dark. The color isn’t perfect, but I like the way it looks. The exposure was f/4 at 0.5 second and ISO 200. In the first image, the on-camera flash was off.

To create the second, third, and fourth and fifth images in the series, I changed the flash exposure compensation on my ungelled on-camera flash to –3, –2, and –1, and 0 respectively. I used the flash compensation setting on the back of the flash rather than making the change via my camera. It is faster and allows for a –3 exposure, versus the camera’s maximum setting of –2. Each of the images in this series was made using the E-TTL mode on the on-camera flash, and each has a different contrast range, yet the images were captured almost as quickly as the flash recycled. The exposure of the subject’s face was consistent throughout all of the images because the off-camera flash was used in manual mode. The camera was also used in the manual mode.

Each of the images in this series was made using the E-TTL mode on the on-camera flash, and each has a different contrast range, yet the images were captured almost as quickly as the flash recycled. Note that the subject’s back, which was initially quite dark, became lighter with each exposure change. The exposure of the subject’s face was consistent throughout all of the images because the off-camera flash was used in manual mode. The camera was also used in the manual mode. As the man’s back becomes lighter, it also becomes more blue because of the color cast that an ungelled on-camera flash added when lighting the back of the subject.What a difference using gelled flash can make! The flash exposure compensation for the final image was set to –2.


Using Gels for Creative Effect
Sure, gels come in handy when you need to convert your flash units to match the color of the ambient light in the scene, but you can also use gels to create more interesting effects. There are some times when you may want to add strong color to a background or to an overall scene to create a more diverse array of image looks or moods. I keep a pack of gels in my camera bag at all times. I am surprised at how often I grab a little piece of color magic.

The images on the next page show how you can use gels to create a wide variety of portrait looks for your clients. By adding creative color to your images, you can add mood and character to your portrait offerings, which can lead to bigger sales.

This image was made with an ungelled flash and a softbox

Here, you can see the effect that was achieved when a purple gel was added to the kicker light (a flash) positioned behind the subject. I like both photographs, but the one made with the gelled flash seems to have more depth and appeal.


To create these two images, I used small Morris slaves with gels to color the black corrugated tin background.

To create the final image, I simply pointed the lights toward the camera, and they became an interesting part of the overall composition.

Studio Lights Outdoors

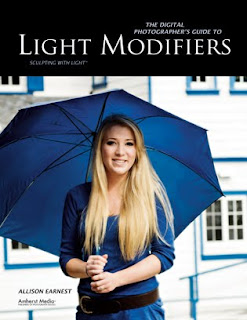
Today's post comes from the The Digital Photographer's guide to Light Modifiers: Sculpting with Light by Allison Earnest. It is available from Amazon.com and other fine retailers.

Using your studio lights outside is the same as inside—with one exception: you must determine your shutter speed for the desired background (ambient light) exposure. When shooting with a combination of flash and ambient light, your shutter speed controls the available-light exposure (the exposure of everything not lit by the flash), while your aperture controls the the flash exposure (in most cases, this is the exposure of your subject). Yes, it takes much more effort and
courage to use your studio lights outdoors, but the final images you show your clients will be worth the effort.

Ballerina Rhiona O’Laughlin was the perfect subject for this outdoor studio portrait (PHOTOGRAPH 1). Once the location, wardrobe, and props were selected, a wonderful team of helpers started setting up lights—while trying to stay warm. The main light used on this image was a ring flash on axis with the camera. This was metered to record one stop brighter than the background. A simple monolight fitted with barndoors was used as the accent/hair light. This was powered to record one stop brighter than the main light. The barn doors were useful to help block unnecessary light on the scene.

PHOTOGRAPH 1. An incident-light meter reading taken of the ambient light determined my shutter speed. My flash was metered to determine the aperture, which controlled the exposure desired on my model. SUBJECT: Rhiona O’Laughlin. CAMERA: Nikon D300, Lexar media. SETTINGS: AWB, manual mode, 1/80 second, f/7, ISO 200.

Set scene for PHOTOGRAPHS 2 and 3.

In photograph 2, the main light was changed to a medium softbox. This was positioned at a 45-degree angle to the subject, producing a soft lighting pattern on Rhiona’s face. A warming gel was placed over the accent/hair light to closely match the warmth of the late afternoon sun. My shutter speed was lowered to record more of the ambient light in the scene.

PHOTOGRAPH 2. My shutter speed was lowered to record more ambient light in the scene, and the main light was slightly underexposed. SUBJECT: Rhiona O’Laughlin. CAMERA: Nikon D300, Lexar media. SETTINGS: AWB, manual mode, 1/40 second, f/10, ISO 200.

With the same softbox, the light was remetered after Rhiona changed poses (below). Here’s a bit of advice: when shooting on location, always bring a small wood board for your model to stand on when posing. I didn’t have one for this shoot, and the young lady accidentally stepped on a hidden cactus. As a true professional dancer, Rhiona continued to pose and smile—despite the cactus and the very chilly Colorado weather. It definitely takes a great team to create great photographs.

PHOTOGRAPH 3- Working with the same lighting setup as in photograph 4-6, the exposure was adjusted as Rhiona shifted poses. SUBJECT: Rhiona O’Laughlin. CAMERA: Nikon D300, Lexar media. SETTINGS: AWB, manual mode, 1/125 second, f/5, ISO 200. WARDROBE, STYLING, MAKEUP: Elliot Brooke.

The Double Main Light

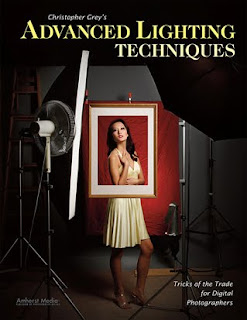
Today's post comes from the book Christopher Grey's Advanced Lighting Techniques: Tricks of the Trade for Digital Photographers. It is available from Amazon.com and other fine retailers.

I’ve written about using a double key light approach several times, both in my Master Lighting Guide for Portrait Photographers and in my columns for shootsmarter.com and prophotoresource.com. It’s such a cool technique that I imagine I’ll write about it again in the future, as I keep finding uses for it and new ways to work with it. If you play with it just once, I’m sure you’ll be impressed by the level of its coolness and will find many applications for it in your own work.

The principle is simple: Use a large softbox (the bigger the better; in this case, I opted to use a 4x6-foot unit), along with another light fitted with a gridded parabolic reflector or beauty bowl (image below). The softbox will provide an underexposed but overall soft light, and the reflector will give the most important part of the image a correct and proper exposure.


To prepare for the first series, I began with a grid-spotted beauty bowl and set both lights approximately 6 feet from where my model would be standing. I placed the softbox behind the beauty bowl, keeping both lights at roughly the same angle. This meant that the softbox (as measured at the height of the strobe unit) would be higher than the beauty bowl when the beauty bowl was centered against it. Think of it as a straight line between both strobe units, because we want the same angle to the light so that we can avoid any possibility of conflicting shadows.

This setup takes a little extra time because both sources must be measured separately, then together. While my model was in makeup, I found the hottest area from the gridspot and measured it with my flashmeter, tweaking the power output from the pack until I had a perfect f/11.

I wanted the softbox light to be two stops under the other light. I turned the beauty bowl light off and sparked up the softbox, changing the power output until it was a perfect f/5.6—two stops less than the other light.

When I switched the other light back on and again metered at the hot spot, I found that the extra light increased the exposure by 1/3 stop (the effects of light are additive), which meant my camera’s effective aperture would be f/13.

Finally, I placed a strip light on a boom, centered directly over the model’s space but about 2 feet behind it to avoid having light spill onto the top of her nose. This light was powered up 1/3 stop brighter than the double main light.

Once you have the position of the lights figured out, it’s a simple matter to make adjustments if you change the position of the gridspot or the softbox: simply turn off whichever light you didn’t move and change the power of the other until you get to the same, original, f-stop. I had to do that for this first shot (image below) because the 25 degree grid threw a light that was too broad at its distance from the subject and the actual effect of the double main light was diminished. I found I had to move the beauty bowl in about halfway, to about 3 feet from the model, in order to get the effect I was looking for—a combination of the two lights that would show both underexposure and perfect exposure on the same subject and location.


Notice how the gridspot forms a gentle circle of soft light that seems to dissolve in from the slightly darker light below. This is the beauty of the double main light setup. You can spotlight your subject but still maintain a great deal of detail in the remainder of her form.

Of course, you can use regular parabolic reflectors, too. For the next shot (below), I removed the beauty bowl and replaced it with a parabolic reflector and a 20 degree grid. I had to re-meter and re-power the parabolic as its light is more concentrated than that of a beauty bowl. When I had achieved my target reading of f/11, my model and I were good to go, and we continued with the shoot. Notice that the background is slightly darker here because the reflector is more narrow. You’ll also note that the circle of light is more tightly defined and the shadows are harder because the light source is smaller.


When your subject wears white or light-colored clothing, you can drop the exposure from the softbox even more than two stops and still retain detail. If your strobes don’t allow linear power changes (and are accurate when making adjustments up or down), you’ll have to turn off the gridspot each time you re-meter the softbox. The exposure from the softbox, for this shot (image below), was dropped an additional full stop to an effective f/4. You will still have to re-meter the two lights together to get a working f-stop because the sum output of the two lights will change.


I switched to a 10 degree grid for the next shot (image below) to show what a narrow gridspot would look like. It’s a look that I personally like very much, and I often use it for senior portraits because my clients like the unusual look as well. I also bumped the power from the softbox down an additional stop, making it four stops below the parabolic. I could tell from my camera’s LCD that the exposure on the background was becoming dangerously dark and would soon be ineffective for this series. The solution was to move all of the lights farther from the background (ahh! the Inverse Square Law at work!). By moving everything farther from the background, the amount of exposure reduction due to falloff was reduced and background detail was maintained. The ratio and spacing of the three lights to the model remained the same.


This double main light technique is something you’ll never see the “fast photo” outlets attempt. They use preset lighting scenarios that, to my eye, look like junk. They are simple, foolproof, and without a spark of creativity. Play and practice with techniques like the double key and you’ll produce results that those practitioners can only dream about.

Please note that your results, based on your equipment, shooting style, etc., will, and should, be different from mine. The amount of reflectivity from the walls of your studio, the size of your studio, and other factors will make a difference in your results. However, the premise is sound and will work beautifully. Your assignment is to make it work for you.

BUY THIS BOOK FROM AMAZON

Feathering Light

Today's post comes from the book Christopher Grey's Studio Lighting Techniques for Photography. It is available from Amazon.com and other fine retailers.

Some time ago, I was involved in a conversation between photographers who believed that digital cameras simply could not record an adequate contrast range. Horror stories flew about the difficulties of shooting blacksuited executives with white shirts, tuxedoed groomsmen and whitegowned brides, and interracial couples. The problem, as they saw it, was that one side of the contrast range had to be slighted in favor of the other. The ultimate dilemma, of course, was deciding which side would take the hit. Most decided it would be best to shoot for the bright side and fix the rest in Photoshop.

Though that approach works in theory, it’s misguided in reality by assuming that exposure deficiencies can always be adjusted to “normal” by using Levels or Curves adjustments. They cannot. After a certain point (1/3 stop of overexposure or 2/3 stop of underexposure), straight Photoshop adjustments will not look the same as a perfectly exposed counterpart. The second flaw in the argument is the tremendous amount of extra work a photographer would have to do just to make the proofs presentable. In other words, one would have to do major, time-consuming retouching on each and every image before making a single dime on prints. Such an investment of time is simply not acceptable in a successful digital workflow environment, even if you go through the trouble of shooting RAW files.

In truth, a little more planning on the front end would mean no work at all on the back end—no masking, no adjustments, no RAW processing—just a quick trip to the printer for terrific proofs (cosmetic retouching optional). We can accomplish this task in the studio by controlling the
strength and direction of the light.

The models for this chapter are friends of mine, Sandra and Keith, who are very much in love and engaged to be married. He is African American, she is Latina. To make this exercise more difficult (and to prove how easy this actually is), I requested that Keith wear white clothing and Sandra wear black. Because I want substantial modeling of the planes of their faces, I will use only one light for my main light, plus two kickers and a background light.

Given enough distance and a large enough light source, such as a large softbox or umbrella, it’s quite possible that you could keep your source far enough away from the subjects so that the light spread will be constant over both (or more) of them.

But what if you don’t have that option? Many photographers work in relatively small spaces and have to make the most of them. Also, many, if not most, do not have the luxury of working with large (4x6-foot) softboxes or umbrellas with a diameter larger than 36 inches.
After my friends arrived, I placed two tape marks on the floor to indicate their positions and began to tweak my previously roughed-in lighting scenario. My main light was a strobe in a 3x4-foot softbox, set at the optimum distance (in my opinion) of 7 feet from the two subjects. At that distance, when the main light is aimed to the center of the two people (which is the logical place to aim it), the difference in exposure from his right shoulder to her left shoulder was 4/10 of a stop, 2/10 on each side of my target aperture of f/5.6 and too wide a range to properly expose everything. I decided I’d fix it after the other lights were set (diagram above).

To separate the subjects from the background and add visual interest, I added two strobes in strip light softboxes, one on each side behind the couple and camera-blocked with black bookends. As a twist to what’s usually done, I powered the two lights down to 1/3 stop less than the main light. I knew I would still have a highlight along the edges because the angle of incidence of those two lights bounced light straight back to the camera along the lens axis, which, by itself, looked like this (image below).


To add depth, I mounted a strobe with a beauty bowl and a 25 degree grid (a favorite combo) on a boom arm. From directly above the couple the light was aimed behind and below shoulder height. This background light was powered 1/3 stop less than the target value for the main light, as measured at the hot spot (image below).


Once the secondary lights were in place, I angled the main light softbox significantly to the left, actually aiming it past her left shoulder. At first blush this doesn’t make sense because logic dictates that he will not get enough light. In truth, however, that’s exactly what we want.

Good softboxes are designed to spray light evenly, but not necessarily with the same intensity, in all directions at it exits the box. What I did was feather the light, by angling the box, until the strength of the light on the right side equaled the strength on the left. From there it was a simple matter to power up the generator to get my target f-stop of f/5.6. I know it looks and sounds odd, but if you try it, I guarantee you it will work (diagram below).


The shoot began with Keith. If he would be overexposed, it would most likely be from this side, as it’s closest to the light. Note that there is detail in even the brightest parts of his shirt as well as in her black outfit. Note also that both faces are represented perfectly, even though no other lights are in play (image below, top). (By the way, all of these images are JPEGs straight out of the camera. A little cropping, but no Curves or Levels adjustments at all [image below, bottom].)


When all lights are up, the true beauty of feathered light becomes obvious. The exposure is even across the board, the kicker lights add contour and visually separate the couple from the background, and the background light provides dimension. The feathered light is so constant and perfectly controlled that their positions make no difference at all, as long as they stay on their marks (image below).


A Bonus
As we were wrapping up this shoot, it occurred to me that this scenario would be very romantic without the main light. I turned it off but maintained the camera’s aperture at f/5.6. The background light does wonderful things, adding a sense of mystery to the image, while the side lights contour my friends and give them some dimension (image below). The ability of light to feather itself across a large area is something that you’ll be able to use in dozens of situations. You only need to play with this once to get the concept, and each additional time you use it, it will become easier to estimate just how much angle you’ll need. The first time I tried it, years ago, I spent ten minutes getting it right. These days, it takes only a minute or two. The best part? You can feather light from much shorter light-to-subject distances.


BUY THIS BOOK FROM AMAZON

Softboxes


Today's post comes from the Softbox Lighting Techniques for Professional Photographers by Stephen Dantzig. It is available from Amazon.com and other fine retailers.

Softboxes are a specific type of light modifier. They are designed to produce an even spread of light from all parts of the box. Your light fits into a housing that you use to attach the softbox. The housings will be different depending on your strobe or hot light. The number of connectors will also vary according to the shape of the softbox.

HOW THEY WORK
Softboxes work by spreading out the light from what would be a small specular light source. Softboxes are designed to go from narrow by the light to as broad as the outside dimensions of the softbox. The inside of softboxes are lined with highly reflective fabric—oftentimes bright silver. As the light travels through the expanding corridor, it bounces around the inside of the box, reflecting off of the fabric in all directions. It is no longer a spot source of light by the time it reaches the outside diffusion material. Rather, it becomes a wall of light that is equal at all points. It is this wall of light that is further diffused as it passes through the outside diffusion material. Note that you can use different-colored panels to line the inside of your softbox to change the color of the light illuminating your subject.

There are usually two sets of diffusion material that the light waves pass through before illuminating your subject. The first is known as a bevel. This is a thin piece of translucent white fabric that attaches to the inside of the softbox. This material is usually fairly close to the light and provides the initial diffusion. The now diffused light continues to travel through the softbox until it hits the outer translucent white material. The outside dimensions of the box determine the size of your light source, creating a larger (and hence softer) light source than what you attached to the softbox. Furthermore, the light leaving the softbox is diffused twice, and this softens the light even more.


The double diffusion design of the softbox yields a beautifully soft light that is perfect for beauty headshots. The quality of light will differ depending upon the size of the softbox, but it will still be softer than the spotlight. In this case, a 30x40-inch softbox was fitted with a Circlemask to create this beauty image of Midori Every. The Circlemask creates round catchlights that look natural. The main light was metered at f113/10 with a silver board in place to bounce light back under Midori’s chin. Two medium StripDomes were used as hair lights. The image was exposed at f11—1/3 of a stop overexposed.


The inside bevel is just one of the things you can modify to change the effect created by the softbox. Here, we removed the inside bevel and created a beauty image with a little more “pop” than we had with the bevel attached. The new exposure was f117/10, so the inside bevel “eats” almost 1/2 a stop of light! We turned down the strobe to f113/10 to make the exposure the same as the shot with the bevel. The light is still soft enough for general use, and the technique may help if you do not have powerful strobes and you need all the output you can get.


WHY USE THEM?
Light, in most cases, needs to be diffused before it will give you a pleasing photograph. Spotlights can produce very dramatic fashion images—partly due to the harsh quality of light, but also to the repetitive shadow patterns that can be created. However, diffused light has many more applications.

HOW TO USE THEM
Every light source has an “ideal” distance that allows you to maximize its design. In the case of a rectangular softbox, you use the Pythagorean theorem to determine the theoretical distance that will optimize the contrast of the box while maintaining its quality of light. You would have two right triangles if a rectangular softbox were dissected along its diagonal.

The theoretical ideal distance would be the hypotenuse of the right triangle. The Pythagorean theorem tells us that the hypotenuse (C) is obtainable via the following equation: A2 plus B2 equals C2 . Let’s assume that A=40 inches and B=30 inches for a fairly standard 30x40-inch softbox. A2=1600 and B2=900, so C2=2500. The hypotenuse, C, is determined by taking the square root of 2500, which is 50 inches. The theoretical ideal placement for a 30x40-inch softbox is 50 inches from the subject! However, there is a less scientific (and easier) way to judge the proper distance from the light to your subject: watch the light as you pull the softbox closer to your subject, and stop when his or her face “pops.”


Diagram and above image—We created a very dramatic glamour headshot of Tishanna by keeping the inside bevel but removing the outside translucent fabric. In this case, we created a fairly large spotlight that was softened a little by the inside bevel. The exposure from the softbox was f11. The hair light was a small StripDome set to f112/10. There was also a spotlight with a 10- degree grid that illuminated Tishanna’s hip when we backed up and shot full length and 3/4 poses. The spotlight was also set for f11. You need to be extremely careful when lights overlap on your subject. In this case, we had to be even more careful because Tishanna put baby oil all over her body and hair to add a shimmer to the reflections from the light and accentuate the “glamour” feel of the image. The shine made it more difficult to control the highlights. The combination of the softbox and spotlight on her hip was f114/10— well within my desired range of 1 stop from the working aperture.


This 3/4 pose shows the effect of the lighting technique just described. In this case, the hair light was set at f112/10. Both images were exposed at f11.


Diagram and above imageThe extremely small lights create a harsh lighting effect that can add some snap to an image. Here, we used a couple of spotlights with honeycomb grids to add a stylish look to blue jeans. Two spots were positioned directly behind the camera and aimed at Ruthchelle Melchor’s face and torso. The falloff from the lights places her legs and feet in relative shadow, drawing your eye to her face. The spotlights also create a strong shadow behind her, adding a new graphic dimension to the image. The gray seamless backdrop was also lit with a spotlight without a grid, but covered with a green gel. Honeycomb grids come in varying degrees and narrow the beam of light even further—creating a smaller and even harsher light source!

BUY THIS BOOK FROM AMAZON

*excerpted from the book Softbox Lighting Techniques for Professional Photographers