Today's post comes from the book Photographic Lighting Equipment : A Comprehensive Guide for Digital Photographers by Kirk Tuck. It is available from Amazon.com and other fine retailers.
There are a few basic things you need to know about flash that will make your life easier. Let’s go through them.
Synchronization Speed. Since a flash exposure happens in a really short amount of time, your camera can only properly use the light from the flash if the entire sensor (or film) plane is completely uncovered by the shutter curtain or blades and the mirror is completely up at the moment of the flash. All of this has to be synchronized mechanically. On most digital SLRs, there is a top speed limit for all conventional flashes, which is often 1/250 second (on bigger formats and on cheaper digital SLRs it is usually a bit slower, maybe 1/125 second). Once you use a faster shutter speed than your maximum sync speed, the shutter in your camera becomes more like a slit that travels across the sensor plane rather than a version of fully opened theater curtains. If you try to use a flash at a faster shutter speed than your max sync speed, only part of your frame will be exposed. This is good news if you are trying your hand at experimental photo art. It is bad news if you have a paying client in tow.

 A shot for Texas Gas Service. We were doing several locations around town and I wanted the speed that comes from bringing your own power. I used a battery-powered pack and head system from Profoto called the Acute 600B. We put the pack on the floor, set it to ¼ power, and put a head with a standard reflector on a stand, and bounced the light off the ceiling. A Nikon SB-800 was aimed into a 40-inch white umbrella for fill. It was set up nearly on axis with my Nikon D700 camera. Diagram—(1) Window. (2) Kid with teddy bear. (3) Dryer. (4) Washer. (5) Storage. (6) SB-800 flash, at 1/2 power, fired into 40-inch white umbrella. (7) Nikon D700 with 28–105mm lens. (8) Profoto 600B with standard reflector at 1/4 power, bounced from ceiling.
 Synchronization. This may seem obvious, but somehow your camera has to get the message to whatever flash you use that the shutter is open and now is the crucial time to fire. The simplest way to do this is via direct, physical contact. In the case of a hot-shoe mounted flash, the camera sends a triggering signal or voltage to electrical contacts in the foot of the flash that screams, “now! now!” The flash goes off immediately, and everything is great. Another option is a sync cord. The flash and camera are connected with a two-wire cable. The camera sends a signal through the wire, and the flash triggers. As long as the contact points are physically sound, everything works great. It gets a bit more complicated if you want to fire the flash without wires.
The low-tech method of wireless flash sync is the optical photo slave. A small “slave” unit is attached to a remote flash. This unit uses a kind of transistor that sends out a voltage spike or signal to the flash when it “sees” a quick increase in light. It is generally triggered by either a flash attached to the camera or an infrared signaling unit (or transmitter) which sends out an infrared light when the shutter is fired. Optical slaves are fairly inexpensive and work well indoors. They are much less effective in areas with high light levels and are especially bad when used in bright sunlight.
A variation on the white light optical slaves are the “pulsed” infrared slaves. These are more sophisticated than the optical slave because they can be triggered without additional white light contaminating the scene and, since they can be pulsed, the receivers can be set up on channels to reduce misfires caused by other people’s flashes being used in the vicinity.
 A lot of photographers are scared to shoot in the sun—especially in the not so pretty hours of 10:00AM to 4:00PM. Who can blame them? The light is raw and contrasty and most shoe mount flashes don’t have the oomph it takes to push enough power through an umbrella and then compete with direct sun. But if you bring along a Profoto 600b, a Profoto 7b, a Hensel Porty, or an Elinchrome Ranger, you’ll have the power and the autonomy you need.
 Just plug in your flash head, set the power levels, and find a camera with a fast sync speed. I photographed this image and the one just above with a Canon G10 compact camera. If you need sync speed, this is a great camera. You can sync nondedicated flashes up to 1/2000 second. It’s a good way to control how light or dark the background will be rendered.
 Moving up the evolutionary ladder, we come to the newly ubiquitous radio slave receivers and transmitters. These are exactly what they sound like. A transmitter on the camera or attached to the camera’s sync terminal senses the triggering voltage and sends a radio signal to a receiving unit attached to the flash. The receiver triggers the flash. The Pocket Wizard radio trigger has dominated the market for the better part of a decade but is now being assailed on all sides by much less expensive versions made in China and elsewhere. With radio triggering, more dollars spent means greater distance ranges and more reliable operation.
The current hot technology is the Nikon CLS and the Canon ETTL system. In both systems, the camera uses either a built-in flash or a hot-shoe-mounted controller to send pulses of visible light or infrared light to control the output of individual flashes. It makes off-camera flash quite simple, especially if you are willing to work with TTL automation. Generally, you’ll need to be using relatively current digital cameras and current flashes to gain this level of automation. In both systems you need to make use of the hot shoe on the camera as part of the control circuit for the lighting system. The camera meters the flash exposure through the lens, and when it senses the correct exposure it sends a signal via the hot shoe contacts through a digitally coding transmitter (either a system “master” flash or a dedicated system controller) which tells the flash to halt its output.
Whether to choose radio triggers like the Pocket Wizards or dedicated flash systems will depend largely on how you need to light and how big an area you need to cover. While the camera systems tend to be “line of sight” solutions (generally, they work best in small, bright rooms), the radio slaves have a much larger range and are much more reliable in areas with high light levels as well as outdoors.Most professionals use both systems on fully manual exposure settings, changing the relative output of the lights by setting different power ratios. There are trade-offs in both systems. The dedicated camera systems require the use of more expensive flash units and are not usable with other brands of flash units. The radio trigger solution allows you to use less expensive non-dedicated flash units, but the cost of the radio triggers and receivers themselves is higher.
The bottom line is getting reliable triggering every time, and that’s where radio units such as the Pocket Wizards have the edge for professionals.
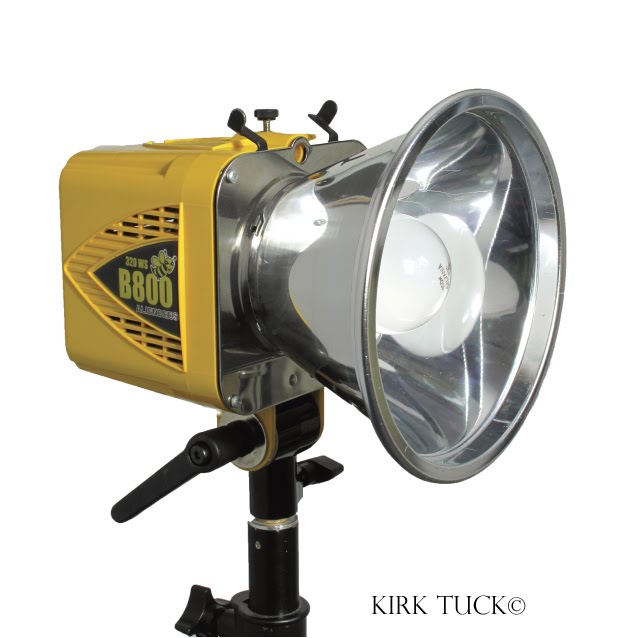
Flash Duration. As mentioned above, most flashes don’t have instantaneous flash durations. They range from a duration of 1/125 second for bigger, older generation power pack systems to around 1/10,000 second for battery-powered units used at very low power settings. Here’s the relationship: the more power that needs to go through a single flash tube, the longer the burn time of the flash will be if all other things are equal. They are rarely equal.
 This is a very inexpensive optical slave (think $30) that works very well indoors. It sees flash from a main flash or trigger flash and triggers whatever flash it is attached to. It has both astandard PC socket and a hot shoe so it can be used with a wide range of flash units.
 What does this mean in real life? If you are a still life shooter, not much. If you shoot portraits, not much. In fact, where fast duration flash comes into its own is with sports, dance, action, and with products that need to be captured exploding (champagne bottles), being poured (beer, wine, water, Coca Cola), etc. Some portrait photographers actually prefer longer duration flashes because the potential for tiny subject movements makes the fine detail look a little smoother.
 Radio slaves have a number of benefits: they “see” around corners, trigger reliably, and do away with the need for sync cords. Here’s one Velcroed to the side of my flash unit. I often use small flashes as accent lights in the studio.
Here’s how you shorten the duration: turn the power down. The lower the power, the shorter the duration. If you are using a pack and head system, plug in more heads. The more flash tubes the power is distributed to, the shorter the total duration. Be aware though that when you change the duration of the flash you will have changes in the color temperature of the light itself. Flashes tend to be at their lowest and most accurate color temperature when used at full power, becoming progressively bluer as the duration shrinks.
Hint: Many small pops add up to one big exposure. If you select your flashes correctly, you’ll probably have enough power for just about anything you might come across, but every once in a while you’ll find a still life project that calls for sharp focus from front to back of a subject that’s close to the camera, and that means you may have to really stop down. And in still life, most people use the lowest ISO they can find on their cameras to ensure the lowest noise and best color. So what do you do when you have your softbox covering your flash, the light is perfect in terms of direction and quality, but you do the math and figure out that you need two more stops of power in order to correctly expose the scene at the f-number you need to set? Well, you could rush out and buy a power pack that is four times as powerful as the one you are using or you could save money and do some math. If you add two pops to your first pop, you will get one more stop. If you then add four more pops to the last two, you will build up a cumulative exposure that will get you to that extra stop. It’s a simple logarithmic progression and a neat trick for doing more with less gear. It works with any size or type of flash, but you’ll need to subdue the existing light so that it doesn’t become part of the overall exposure. That means blacking out the windows and turning out all the lights including modeling lights. Obviously, this won’t work when you are shooting outside or in an environment where lighting can’t be controlled, but it’s a great quick fix for what seems to be a routine issue encountered by car and still life shooters.
A word to the wise: just because you have a very short duration flash doesn’t mean you’ll freeze motion in locations that have high ambient light levels. Most cameras can only sync to 1/250 second, and most smaller flashes can only deliver so much motion stopping power. If you are shooting in an environment like a sunlit exterior and you are trying to freeze motion your limiting factor will be the relatively slow shutter speed. At 1/250 second you won’t quite be able to freeze a runner moving parallel to your position or the swing of a hand in a golf swing. Be sure to consider these factors before you shell out a lot of extra money for a fast flash duration. Along the same lines, most of the stop action you see successfully done of leaping dancers, etc., is done in a dim studio or dimly lit location so that the ambient light isn’t a big factor.
Color Temperature. All manufacturers specify a color temperature, but the honest ones specify a range. That’s because, with few exceptions, the flash output tends to get bluer as the power gets lowered. Additionally, units without very precise voltage regulation tend to have variable color consistency from shot to shot. Even if you are buying the best units around, all of your efforts at getting great color could be jeopardized by the coating of the flash tube. If the glass tubes are uncoated, they allow a lot of ultraviolet (UV) light to be emitted. If whiteners or certain bleaches are used in fabrics (especially man-made fabrics) or in the fabrication of products, the high levels of UV will cause a fluorescence that turns colors either more blue or more magenta than they should be. These color anomalies can be very hard to correct for after the fact.
The solution is to buy flashes with UV coated tubes to inhibit the transmission of UV light waves.
Photography is never as simple as you might think. There are always details that can derail the best of plans. That’s why it is recommended that you test new flashes thoroughly before using them on important projects. There isn’t an option to buy UV-coated flash tubes for battery-operated units or most inexpensive monolights and power pack systems, but you can buy sheets of UV filtration and cut them to size if you find yourself with unexpected color shifts.
 Whether you use electronic flash or continuous lighting, your most important decisions aren’t which gear to use but how to get the lighting effect you have in mind.
 There’s another color “gotcha” to be aware of: We use a number of light modifiers in our quest to soften and manipulate the small light sources of our flashes and make them work for our vision, but you need to know that the quality of the fabrics used on umbrellas, softboxes, bounce reflectors, and scrims can be highly variable. The bleaching agents used to make the front of your softbox really white may make your images really blue or impossible to correct in Photoshop. You’ve probably realized that white fabrics also tend to yellow over time and make light sources “warmer” (lower color temperatures). This isn’t a real issue in the digital age until you need all the lights on a set to have the same color temperature. It can be maddening to use
several different brands of umbrellas to light a background while using yet another brand of softbox, only to find that different zones of your important image have big color shifts that defy the remedy of a “global” color balance correction. And this can be a major problem, which might cause you to lose a picky commercial client or spend a fortune in retouching fees.
 I never seem to realize just how important reflectors are until I get into the middle of a studio shoot and start to fine tune. For this shoot, there was a white card on the posing table bouncing light up under my model’s chin, but it wasn’t enough, so I added a round reflector over to the right. The black panel to the left has white on the other side and works as a reflector. On the far side is a piece of foam core, which adds some side fill. A black panel in the back toward the center of the frame cut spill light from the hair light.
 The answer is to test all of your accessories and understand what might cause a shift and how to correct it. Most umbrellas are so cheap relative to day rates, model fees, etc., that it makes sense to change them out en masse every couple of years and to replace them with units that come from the same manufacturer, and if possible, the same manufacturing batch.
BUY THIS BOOK FROM AMAZON