
 Today's post is from the book Jeff Smith's Lighting for Outdoor & Location Portrait Photography. This book is available from Amazon.com and other fine retailers.
FLASH AS MAIN LIGHT
Flash in an outdoor scene should only be used as a main light, not the fill light. Natural light is much too soft and delicate to try to fill the shadows with flash. Attempting to use flash for fill on location causes most of the unnatural lighting you see in outdoor portraits.
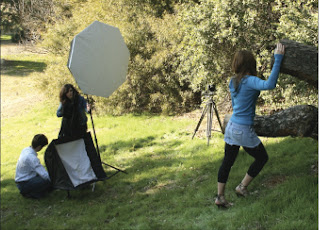
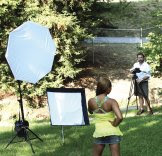
When we use flash outdoors, the flash is the main light and is placed in the main-light position (45 to 90 degrees from the camera position, at a starting height that has the light box roughly level with the subject’s chest). The natural light is then used to fill the shadows.
FLASH CHARACTERISTICS
To use flash outdoors, as in the studio, you must understand the characteristics of different types of light and learn how to control them. With studio flash units, there are many factors that can impact the characteristics of the light: the size of the modifier, the interior fabric, the diffuser panels, whether the light reflects off the back of the light modifier or is aimed toward the subject, the use of louvers and grids, as well as the angle of main light to the subject. Here are some things to consider:
1. The larger the light source, the softer the lighting.
2. The closer the light source is to the subject, the softer the lighting will be.
3. A silver interior on a light box will provide more contrast than a white interior.
4. The opacity of the front diffusion panels will affect the characteristics of the light. I never use a second interior baffle because I feel this oversoftens the light.
6. The closer you place the light to a 90-degree angle to the subject, the more contrast the light will have. The closer you bring the light to the 45-degree position in relation to the subject, the softer the light will appear. It will produce less shadowing to contour the subject.

This tells you how to control the lighting—and thus, how to control the outcome of the image. I am all about working with what I have to produce the look I want. You don’t need every gadget known to man, you need to learn how to control light so well that you can reliably change its characteristics to produce exactly the look you want for a particular scene and/or client. For example, if you only had a 4x6-foot light box and you found the light it produced was too soft for a scene, you could:
1. Power up the light and move it further from the subject.
2. Take off the front diffusion panel.
3. Move the light more toward the 90-degree position.
 Knowledge is power—and when working on location you test your knowledge of lighting every day. Each scene, every room, or each side of a building will be different, and it’s never controlled like in the studio. The creative process of working with flash on location is no different than in the studio. You first decide what you and the client want the end product to be, then you make the required decisions to lead you to that end product.

* Excerpted from the book Jeff Smith's Lighting for Outdoor & Location Portrait Photography
No comments:
Post a Comment