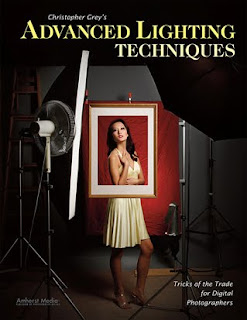
 Today's post comes from the books Christopher Grey's Advanced Lighting Techniques. It is available from Amazon.com and other fine retailers.
We’re all familiar with using white reflectors, usually bookends or panels, to bounce light into shadow areas and open them up. White reflectors are usually better than fill flash, as they won’t add shadows of their own or overpower the main light.
Gold reflectors are often used to warm up skin tones, especially when working outside. However, traditional gold reflection on digital images can sometimes look a little weird.
So, what about silver? When shooting outdoors, using a silver reflector can produce a look that’s a bit harsh, as the silver surface throws a “snappy” and more contrasty light than white (of course, the decision to use it is purely a matter of taste). In the studio, silver reflectors can act as either a main light or as fill and will impart a “certain something” to an image that’s visually intriguing but subtle and difficult to pin down.
Bear in mind when working with any reflector that the size of the reflection is directly related to the size of the reflector. Larger reflectors are more efficient and cover more area than smaller ones.
Aside from the background, the first image (below) was lit with only one light. I mounted a parabolic reflector fitted with a 30 degree grid behind my model (see below) and skimmed the edge of its light over the back of her head. Most of the light, including the center hot spot, was aimed at the silver reflector. It’s important to control the skimmed light, as too much of it will overexpose the back of the model’s head. The reflected light, which was metered to act as the main light, looks like a large and contrasty source but with minimal specularity, something that’s tough to achieve with a standard light/reflector combination.


It’s also important to angle both the source light and the reflector properly (below) in order to get shadow lines that complement the model and the image. My subject was standing for this shot (below), which meant the background had to be raised to get the proper nose shadow. I anchored the reflector frame to an Avenger accessory arm that spanned two light stands (sandbags are a must for this) and raised it to the proper height to get a perfect Rembrandt shadow on the model’s cheek. I also turned my source a bit more toward her, to brighten her hair. Notice how the large reflector highlighted her arm.


Should you turn the model away from the reflector and add another light to act as the main light, the silver reflector can add an attractive accent on the shadow side. For the next image, I moved the hair light so it hit only the reflector, not the model. I’d also moved the reflector more behind her, so the light on her was not as broadly directed as in the previous images. See diagram below.


I wanted an image with hot reflections both front and back. So to the next image, I first moved the main light to camera left, at the same angle as her face to the camera. Once that was set I moved the hair light back into play and let it spill generously over her hair and shoulder. I knew from the light meter that I would have areas of serious overexposure in the image, but in view of the drama such light can create, I was content to let it go. Overexposure in most forms of portraiture will not be tolerated, but in fashion or glamour photography it can be a terrific tool. I also moved the reflector closer to the model to strengthen the reflection. See diagram below.


My final example for this chapter exhibits a warmer, more subtle look, which was easily accomplished. By powering down the main light by 12/3 stops (but maintaining the same aperture as image 2), the skin tones, as well as the background (the density of which is influenced by any light that falls upon it), darken and exhibit deeper saturation.

Each of these examples was made more interesting by using a modifier in a slightly unusual manner. Personally, I think we need to look at each of our modifiers and what they do, finding ways to work with them that produce different and nontraditional results. Like most techniques that are borderline unorthodox, you may not use it often. Still, it’s a valuable trick to pull out of your hat when you need one.
For these images, I used a 39x72-inch silver/white Photoflex panel (www.photoflex.com). Similar gear may be investigated on sites maintained by Lastolite (www.lastolite.com), Westcott (www.fjwestcott.com), and others.
BUY THIS BOOK FROM AMAZON

No comments:
Post a Comment