
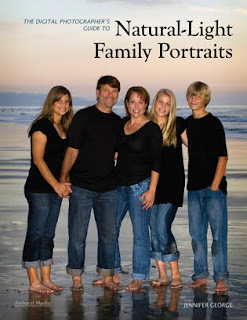
 Today's post comes from the book The Digital Portrait Photographer's Guide to Natural-Light Family Portraits by Jennifer George. It is available from Amazon.com and other fine retailers.
There are times when working in a client’s home or at another indoor location isn’t feasible. When you are photographing a large group or want to use a more natural backdrop to create an environmental image, for instance, selecting an outdoor location might be your best option. For those who live in coastal communities, the beach is frequently the preferred session location. As J. Romero (www.rstudios.org) has noted, “The beach is an ideal location in southern California, as it is a familiar environment for the family and they are comfortable there.”
A GROWING TREND
In the past, when a family wanted an environmental portrait, they wanted an image that showed how the family members look in a pretty environment. They were not interested in artistic expression, creative poses, or emotion-filled images that depicted the interrelationships of the subjects.
 Allowing the family to do what they want to can lead to fun and unique images. On the facing page, we see an image created while the mom was playing with her baby in between setup shoots for the session. The family shown in the image below was asked to walk over to this location and stand any way they wanted.
 Fortunately, photojournalistic coverage, which has long been popular in wedding photography, has more recently begun to influence portrait photography styles, and clients are more interested than ever in purchasing relaxed and spontaneous family portraits. A wise portrait photographer will always capture the classic, posed portrait of the family along with the contemporary, unstructured, or unprompted portrait.
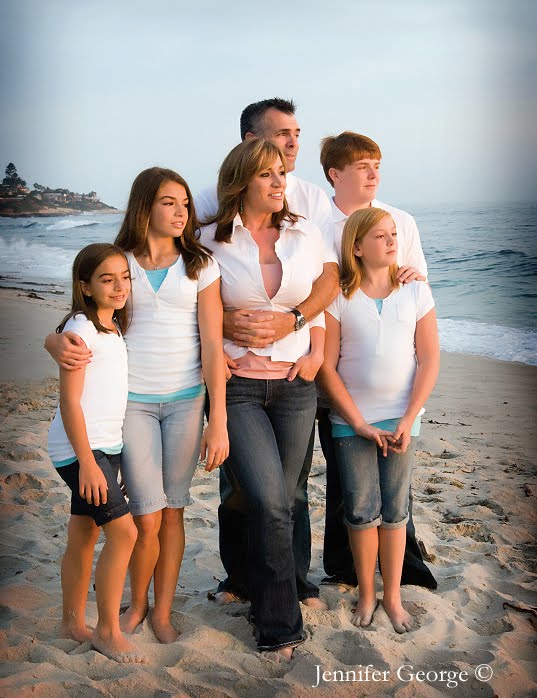 In this photograph of a family staring off into the ocean, a slight vignette was added to focus the viewer’s attention on the group. The family’s white shirts tie in perfectly with the ocean’s whitewash, ultimately unifying the photograph. This image was photographed with a Nikon D2X. The exposure was 1 /160 second at f/6.3 and ISO 640
ADVANTAGES TO WORKING ON LOCATION
Working on location is ideal for large family groups. The traditional portrait studio normally has a 9-foot background, and posing more than five people in front of a 9-foot background is difficult—especially when you’re working with adults. When doing a consultation with a client, either in
person or on the phone, immediately find out the number of subjects, as that will help you determine your best portrait location and posing options.
Working on location has a second very important advantage: being able to sell a large wall portrait to the client. One of the most profitable products for the portrait photographer is a large wall portrait. A large wall portrait is also a good passive marketing tool, as your client’s friends and family will see your work whenever they enter your client’s home.
FINDING GREAT LOCATIONS
Find several locations in your area that are ideal for environmental family portraits. The obvious choices are nearby parks and beaches, but also look for attractive landscaping in your neighborhood, playgrounds, bike paths, historic sites, and gardens. For state-owned and historic properties, you may have to get permission and possibly a permit before the session. Don’t exclude unusual locations such as open fields, rustic buildings, urban settings, and commercial development areas.
ENSURING THE BEST-POSSIBLE LIGHT
Open Shade. Upon arriving at your location, you should immediately look for the ideal place to pose the family. Choose an area where you can control the light. In a park setting, this may be an area with a full background of trees or other pleasing structures. The location should have an open sky that will illuminate the faces of the subjects. Note that shooting later in the day will allow you to work when the sun is lower in the sky and is coming from a horizontal direction rather than from overhead. When possible, pose the subjects near a large tree or other light-blocking object. This will produce the shadow side of the face, creating a pleasing light
ratio and a dimensional look.
Fill Flash. You can create great images on location when the sun is low in the sky. When the lighting scenario is less than ideal, though, you can often improve your images by adding flash to fill in the shadows that can appear under the subject’s eyes. When faced with a scenario in which the light on the background is brighter than the light falling on your subject, using flash can also help to balance the light and produce a more even, natural look.
 It can be difficult to find open shade when photographing in a park setting. However, if you wait until later in the day, the sun will be lower in the sky and behind trees or hills. Here most of the park is now in open shade due to the setting sun. To add sparkle and life to the client’s eyes, fill flash was used.
  Sometimes moving your subjects to another area of the location will improve the lighting. Here, fill flash was used to open up the shadows. Note the beautiful light coming through the trees due to the setting sun.
 There are several ways to set your flash for fill. J. Romero sets his Nikon flash on TTL with an exposure compensation of –3 and his camera set to aperture priority. He sets the flash to –3 because he wants to add just enough flash to light the eyes. Mike Strickland sets his flash between half and full power and uses an exposure of ISO 125, f/8, and 1 / 250.
 While on location, ask the family to do several simple activities that will provide numerous photo opportunities for you. Walking along the beach, walking toward you, walking away, the children running down the beach and the parents swinging or carrying a child are all easy, informal shots.
 With digital cameras, it is much easier to use fill flash correctly. Simply set your flash on manual and take a meter reading, then set your flash to 1 / 4 power to start. Take a test shot and make an adjustment if necessary. When the sun is setting, you may need to reset the flash several times to achieve a perfect balance between the client and the environment.
Sweet Light. When you are shooting outdoors, timing is everything when it comes to finding great light. In the hour after sunrise and the hour before sunset, the sun is low in the sky and its rays travel horizontally, rather than from overhead. Many photographers call this “sweet light.”
Depending upon the location of your shoot, you may not need to use any fill flash during this time. J. Romero has taken hundreds of family portraits at the beach over the years. He likes to shoot 20 minutes before sunset to capture that “golden light.” He feels that the shadows produced by the sun when shooting any earlier than that are too harsh. His goal is to have the client be able to comfortably look into the sun without having to use flash. He shoots most of his images at ISO 400 on aperture priority. When the sun is low, he uses an ISO of 800 with a wide-open aperture. He feels that this allows him to create the most beautiful natural light images.
 Good family portraits show the love and warmth the individuals have for one another. Having the family connect and touch gives the image a circular feel that can be cropped either square or rectangular for the finished wall portrait.
No comments:
Post a Comment