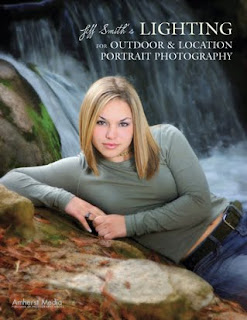
 Today's post comes from the book Jeff Smith's Lighting for Outdoor & Location Portrait Photography by Jeff Smith. It is available from Amazon and other fine retailers.
Subtractive lighting is just what the names implies: removing light or, in essence, creating shadows to achieve a more dimensional portrait. I learned subtractive lighting from Leon Kennamar, who was probably the most well-known subtractive-light photographer of his day. The outdoor portraiture he created was truly outstanding, because with subtractive lighting he could completely control the shadows of his images—something that most photographers to this day don’t do. As we have already learned, it is the darkness that draws our eyes to the light and without shadows, no one notices or cares about the light.
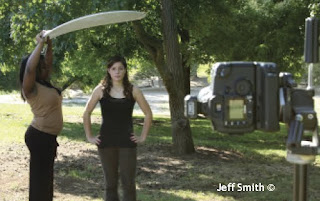 Here, a reflector is actually used as a gobo. Placed directly over the subject’s head, the reflector blocks the overhead light and eliminates the dark circles under the subject’s eyes.
 The downside of the teaching of subtractive lighting is that, while it is great for creating shadows, reducing the size of the main light to a proper size, or keeping light from hitting a certain part of the subject or scene, a scene must be close to ideal to use only subtractive lighting techniques.
To demystify subtractive lighting, let’s call it what it is: creating shadows. For example, if you have a main light that produces beautiful catchlights in the eyes but a flat lighting on the face, you know that your main-light source lacks direction and is too large. To correct the problem, just put a black panel, gobo, flag, or other light-blocking device on the side of the subject where the shadow should be. This will create a shadow and improve your final image.
 A white reflector is used over the subject’s head as a gobo, blocking the overhead light and producing a more flattering lighting effect.
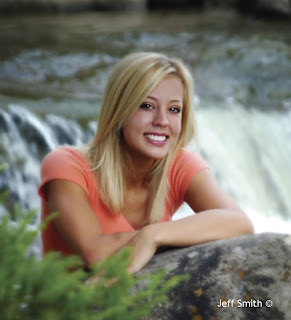
Which type of light blocker to use will depend on the circumstances. Black devices block light from the desired area, but they also tend to suck the light out of neighboring areas. Depending on the light levels and scene, white blockers can actually bounce light back onto your subject, adding a color cast or changing the desired appearance of the lighting. Let’s imagine you are placing a blocker above a subject to block the overhead light. If my subject was standing in a grassy area, I would typically use a white reflector for this. The light from the ground won’t cast enough light into this white reflector to act as a light source and won’t affect the light hitting the face. If, on the other hand, the subject was standing on light-colored concrete in direct sunlight, the concrete would reflect up enough light to change the appearance of the lighting. Switching to a black device might be necessary, although it would tend to darken the hair of the top of the head.
BASIC DECISIONS
The decision to add light or take it away always starts with the selection of the background. Many photographers suggest that you first find the light and then determine the background based on that area of ideal lighting. This is the practice employed by photographers who work at those “ideal light” times of day. When I go into an area, however, it is usually in the middle of the day, so my first consideration is to look for usable backgrounds; I know that I can make the light usable no matter what it currently looks like. This is the basic idea of working on location when the lighting isn’t perfect—it is much easier to change the light on the subject than the light on the background or the scene around the subject.
Once a background is located, the next decision is whether to use additive light sources or subtractive light sources—although there are times that both are used in the same image. This is typically a straightforward decision: if the light on the background is more intense than that on the subject, you must use at least some additive light sources. However, if the background is lit by the same light as the subject, then subtractive lighting alone may be enough. I find that there are very few scenes in which the light can’t be improved dramatically using additive or subtractive techniques.
SUBTRACTIVE LIGHTING IN PRACTICE
The easiest way to learn subtractive lighting is to start with a subject and available light only. Then, add the lighting controls you need and observe their effects as you transform the portrait into a salable image.
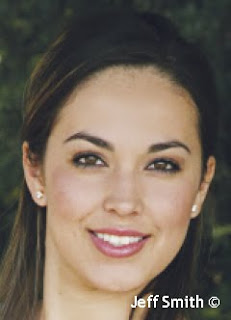
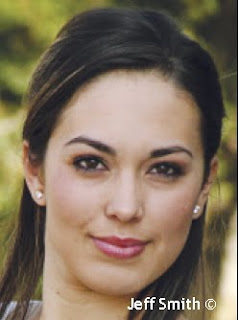 The unmodified light gives this subject raccoon eyes and unpleasant highlights on her cheeks and nose.
 In the first image (above), you see this beautiful young lady in a typical outdoor location. The amount of light in the subject’s area is relatively close to the amount of light on the background area. This means that we will not have to add light to balance the scene (i.e., darken the background). However, because the light is coming down from directly overhead, the subject has raccoon eyes as well as unattractive highlights on her forehead and nose.
The first correction I would make is to place a white reflector overhead to block this light. I would use white here because the shaded grass will not reflect enough light up to the white reflector to affect the final image. In the second photo (below), you can see the improvement in the lighting with just that one correction. Yet, while the image is improved, there are still some problems that need to be corrected. The eyes have nice catchlights in them, but the face has no shadowing or transition zone to draw the viewer’s eyes to the most important areas of the face and hide those that shouldn’t be seen.
 Adding a gobo overhead corrects some of the problems, but leaves the image without any shadowing to shape the face.
 Therefore, a second step would be to place a black panel on the right side of the frame to establish a shadow zone and create a transition from highlight to shadow. In the third image (below) you see the effects of this change. The face appears thinner and the structure of the face is more noticeable. While this is a major improvement, we aren’t done yet!
As you look at photo three, you see a little highlight toward the end of the nose, this means that the main light is wrapping too far around the subject. To compensate, you could put another black panel on the opposite side of the subject to reduce this side light—but that would create a second shadow on the highlight side of the face. The best solution is to use a piece of translucent fabric. Placed to camera left, this will reduce the light coming from the side without creating a second noticeable shadow area.
Now we are getting close to a salable image—actually, at this point, this image is better than most of the outdoor portraits I see displayed in some studios. Still, let’s take it one step further. Since most of the light in this scene comes from above, I almost always add a white or silver reflector underneath the subject’s face to give the portrait a more glamorous look. The light from this reflector brings out more of the eye color; softens the darkness under the eyes, something all of us have; and helps to smooth the complexion. I use white when reflecting sunlight and silver when reflecting light from a shaded area. At this point we have created a salable professional portrait.
Subtractive Light Photo Booth.
Subtractive lighting is one of the simplest ways to control the lighting in an average scene. Therefore, I have used these principles to assemble a photo booth that provides perfect outdoor lighting with any outdoor background. This booth consists of the exact combination of modifiers discussed above: a 4x8-foot black panel on a rigid frame, a translucent panel on a rigid frame, a
white reflector attached to the two panels with clamps, and a white or silver reflector clamped at the level needed to provide light in the appropriate place for a head-and-shoulders pose.
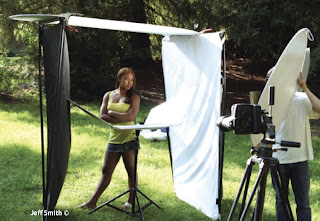
This photo booth makes outdoor lighting very easy to deal with. To use it, I look for an area that has strong backlighting, usually provided by the sun. I want to have each client separated by a backlight, since the majority of them have darker hair and I instruct them to wear darker shades of clothing as well. When I can find this backlight, I use the white reflector; when working in a shaded area with little or no backlight, I use the silver reflector.
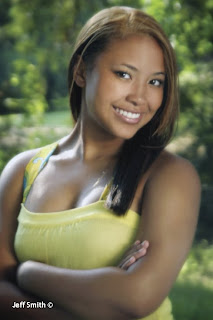
The only variable in this setup is the main light. In most scenes, the area in front of the subject will be open sky, providing a fairly good main-light source—at least with all the photo-booth’s modifiers in place. Should the area have obstructions that don’t provide a usable main-light source, you can simply add a reflector or scrim with mirrored light to produce one.
BUY THIS BOOK FROM AMAZON


I am a heavy portrait shooter. Not only recognized some techniques I already know but I also learned some new tips on natural lightning. Inspiring :)
ReplyDelete