Thanks For a Great 2010!
If you're new here, be sure to dig around a bit, there is a wealth of great info at your fingertips.
And did you know that Amherst Media is active in the e-book market? Be sure to check us out for great books on your Kindle, Nook, iPad and other e-reader and tablet devices. The variety of titles and formats will just continue to expand through 2011 so be sure to poke around your favorite e-book seller and find us. I'll stick a few links below as well.
All the best and Happy New Year!
-Amherst Media
Kindle
Nook and Nook Color
iPad
Amherst Media on Facebook
Amherst Media on Twitter
Lighting Design in Action
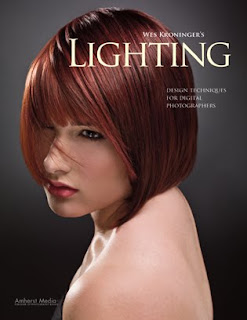
 Today's post comes from the book Wes Kroninger's Lighting: Design Techniques for Digital Photographers by Wes Kroninger. For this post we are featuring three of his many lighting designs from the book. In this book Kroninger showcases a number of his remarkable images and breaks them down into how they were setup and what equipment was used to achieve the final result, often times including valuable tips about that shot. Each shot is accompanied by multiple diagrams. This book is available from Amazon.com and other fine retailers.
The Scoop
This image is another example of the teamwork between performing and visual artists. It was captured in an abandoned warehouse where I had wanted to create a series of images for a long time. I visualized the juxtaposition of the beautiful lines of the dancers contrasted with the gritty texture of the old building. It took some investigation and a lot of phone calls to get access to the location, but the site proved to be perfect for the shoot.

Tech
There was no electricity, so battery-powered lights were used to create these images. One 4x6-foot softbox was used as the main light. A second bare-bulb strobe was placed off set to camera right to add some light to the darkened building. In this image, a third light was placed on the first floor pointing up through the hole in the floor at the bottom left of the image.
Tip
I did my research on which battery powered lights had the shortest flash duration, but I overlooked the fact that (to save on battery charge) most battery-powered strobe packs have little to no modeling light. As the sun set, this was a big problem while trying to focus. Fortunately, a friend had come to the set to shoot some video and happened to bring a generator with a hot light, which created just enough ambient light to focus.
The Scoop
When photographing actors for their promotional materials, it is a good idea to keep your lighting as simple as possible. Casting agents who are searching for acting talent like to see what a potential selection looks like without distractions or excessive embellishment. By keeping the lighting simple, you make the image a quick read of an actor’s facial features and overall appearance.

Tech
This is another example of how simple lighting can be when the right decisions are made for the right subject. Here, one medium softbox was used overhead. One reflector was used from below to add some upward fill. A digital “cross-processing” effect was used by selecting the tungsten white balance setting while using studio strobes; this created an overall cool blue tone to the image. Texture and grain were also applied for added effect.

The Scoop
Some of the best experiences as a photographer come when collaborating with other artists. Working with dancers is no exception. They are so conscious of their movement and the position of their bodies in action that it guarantees a beautiful image.
Tech
To create this image, two 4x6-foot softboxes were used at corners of the set. To achieve a very short flash duration, I dialed the pack down to a low setting. I adjusted for this loss of illumination by increasing the ISO of my camera to 400. (I generally hesitate to go above 400, because I want to eliminate as much grain or digital noise from the image as possible.) The model was backlit with two gridded lights at the edge of the seamless paper, one on either side.
Tip
When I photograph dancers, I like to stop motion. I find it fascinating to see still frames, frozen in time, of movements that otherwise pass so quickly before our eyes. Certain equipment selections have to be made to achieve these results. Some lights have very fast flash duration (the flash tube itself stays illuminated for a short duration during each firing). This speed eliminates any streaking or blurring in the captured image— because, essentially, the light is doing the work of your shutter. Most strobe packs offer their shortest flash duration when at low power settings, then grow longer as the power is increased.
A Five-Light Setup
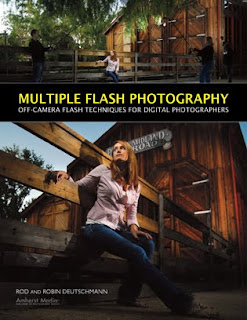
 Today's post comes from the book Multiple Flash Photography: Off Camera techniques for Digital Photographers by Rod & Robin Deutschmann. It is available from Amazon.com and other fine retailers.
When you have a purpose, everything makes sense. Here, we wanted total control over the image. The aperture and shutter speed settings were quickly dialed in to eliminate any ambient light. From this, we began adding our flashes, lighting one graphic tier of information at a time. It took five unmodified flashes—three pointed at our model and two pointed toward various tiers in the background—to accomplish our objective.

First, the base light was chosen by using an aperture and shutter-speed combination that stripped the natural light from the scene.

We always work from the back forward, adding light as we move. Here, one flash was used to illuminate the train car.

Two more lights were added, one to the side of the model and one on the ground.

Two more lights were added, one to the side of the model and one on the ground.

Finally, the photographer added the last flash with his hand-held unit. Note how different the day actually looks compared to the final image on the opposite page.

PUTTING IT ALL TOGETHER: ONE MORE FIVE-LIGHT SETUP
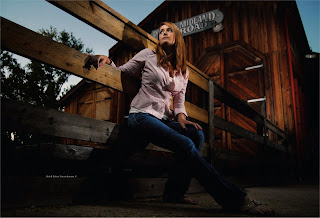
Two extending handles, five unmodified flashes shooting at full power, three assistants, and five minutes of light remaining—man, this multiple light stuff is fun! It all comes down to experience. The more you have, the more quickly you can create unforgettable images. It’s an added bonus when each and every person involved in a shoot knows not only what they are doing but what everyone else is doing as well. When we get a group of photographers together to test out equipment or simply take fun pictures, the whole process becomes one fluid movement. Each person knows their part and each is invested in a successful final outcome. This feeling of shared responsibility is contagious. It’s hard to go wrong when everyone cares.

This image shows what the chosen base light looked like.

Here, an assistant helps light the barn with one hand-held unit.

Quickly, each of us assumed a position. One person grabbed an older flash, attached a radio receiver to it, and aimed it at the barn itself. Another assistant took hold of a homemade ten-foot extending handle. The remaining assistant picked up the smaller Lastolite model. Both equipped their “light sticks” with two separate flashes; one sat atop the handle, while the other directed light from a lower section. The photographer quickly grabbed a wide-angle lens, attached a radio transmitter to the top of the camera, and dialed in the appropriate white balance, contrast, and saturation settings. He then picked an aperture and shutter speed and asked each member of the team to take their position. In less than five minutes, the final image was created.

BUY THIS BOOK FROM AMAZON


