Portrait Photography: Behind the Scenes

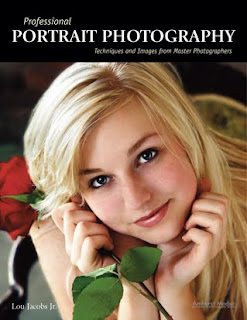
Today's post comes from the book Professional Portrait Photography: Techniques and Images from Master Photographers by Lou Jacobs Jr. This book is available from Amazon.com and other fine retailers. In the book, Jacobs profiles 10 leading portrait photographers about their craft and their business. Here is an excerpt from his profile of photographer Chris Nelson.

A former photojournalist and reporter, Chris used to supplement his income shooting weddings, advertising images, and senior portraits. In high school in the 1970s, he and his friends built a darkroom and shot for the school paper, yearbook, and sporting events. In 1991, he started a portraiture business now called Fall Creek Portrait Design in Fall Creek, WI. Since portraiture became his lifelong interest, Chris has earned Accolades of Photographic Mastery and Outstanding Photographic Achievement from WPPI, and is proud of winning WPPI’s senior portrait category in 2002 and 2004.

Describe your background.
I studied at University of Wisconsin–Milwaukee and graduated with a BA in English with photojournalism and fine art photography as part of my studies. While still in college, I did photography and graphic design for the college magazine, and after graduation, I worked at several newspapers as a reporter and photographer. Since my background was not portraiture, I wanted to learn all I could about this new area, and joining WPPI and PPA were great avenues.

Who are your influences and mentors?
When I caught Monte Zucker’s 1999 tour, and that of portrait artist Al Gilbert, I was blown away by their use of barebulb flash, as opposed to using softboxes, umbrellas, and reflectors. Those photographers had fluid posing styles that made subjects look really natural. I analyzed what they were doing and adopted some of their techniques so my work would look different from most other photographers’ portraits.

Don Blair and Michele Gauger influenced the foundations of my photographic style. Robert Lino and the late Dean Collins influenced my glamour style. While glamour photography comprises only about 20 percent of my studio’s business, that style influences much of my work. All my high school senior girls want to look like models, and seniors are 60 percent of my business.


Describe your studio.
I worked out of my home studio during a three-year transition from photojournalism to portraiture. I continued to take assignments with the local newspaper and shot for Chippewa Valley Technical College, creating images of students for the school’s cutting-edge programs.

In 1994, I moved into my current building, an 1880s bank on the main street of Fall Creek, WI (population 1,250). After renting half the building, I bought the property in 1998 and began restoration. In 2004, I added a large window-lighted camera room, a new production room, and a second dressing room. The studio is now about 3,000 square feet. Though I have two camera rooms, I still do a lot of location work because my clients and I love the variety. Many photographers in the vicinity don’t leave their studios.

I have three employees, my daughter Erin, my son Tim, and Ashley who does a little of everything, except shooting. She specializes in Photoshop, retouching, and finishing images, does client consultations, and a good share of the sales work.


Erin is like Ashley’s understudy, with much the same aptitude for graphics software applications. She has a great eye for design and is in training for high school senior album layout. Tim is a high school junior who enjoys being second camera at weddings, doing mostly candids. We expect when he’s in college he can shoot weddings on his own.

How do you approach your sessions?
The root of portraiture is the word portray. Photographers seek to visually portray their clients in artistic images that describe aspects of their lives or personalities. Before sessions I normally do a consultation where we get to know each other and exchange ideas; that helps keep us on track. How I approach getting what they want evolves through my style, coming from my consciousness and vision. If a casual observer can identify with and understand the meanings conveyed by an image, it’s a good, if not a fine, portrait.

How do you approach posing?
I have favorite poses, but they have to fit the subject. A pose might look great for one person and awkward for another, so you have to analyze your subject. My job is to accentuate the good features and downplay or hide what we don’t want to show through lighting. I try to make a positive aspect of the subject’s appearance so dramatic and compelling that viewers don’t notice a negative. For example, I created a glamour portrait of a woman who had recently had a baby and hadn’t lost all of her belly. She said her husband loved her butt, so I posed her with it at about a 30-degree angle to the camera and had her twist at the waist and look over her shoulder. This hid her tummy, and we chose a high key background with a hint of pink, which blended with her outfit.

In the last few years, I’ve adopted a new posing style by letting people pose themselves. I have clients talk about themselves and I watch their body language. When they do something that looks good, I tell them and then light that pose so it looks natural. This saves the effort of trying to fit someone into a pose. For example, I told a senior girl to pose on a stool in front of a formal
background. Instead, she knelt on it, sitting on her hocks, a pose I’ve never seen before. I said she looked great. I turned the stool about 45 degrees away from the main light, and she turned to look at me. The picture was uniquely her.

What strategies do you employ to communicate with your subjects and elicit the desired expressions?
I often describe the photo session as a stage performance where the part clients play is to talk about themselves. I reassure them, especially shy clients, that it’s my job to make them look good. “What’s the most important thing about a picture?” I’ll ask, and I get all kinds of answers. I’ll say, “The real answer is that you look great. The better I understand what you want, the better I can do this.”


In my orientation about posing, especially for women, I mention the ability to move body parts separately, face toward the light, and tip their head over their left shoulder. I’ll tell them, “Don’t move your upper body, but turn your hips away from me to the right.” I also tell people I don’t want them to smile all the time, that we need to capture a range of moods and expressions. I’ll suggest, “Point your chin toward me a little,” often getting a slightly bewildered look. Their cooperation shows they know I care what their images look like.

Shooting sequences is critical. If you get a good pose, quickly get different angles that really add variety to a sitting. Ask clients not to abandon a pose as soon as they hear the shutter click.

What type of backgrounds work best for you?
When we expanded the building we left the exterior brick exposed. I add props such as an old antique radio and phonograph, or antique furniture. I prefer props you find by chance to those from photographic catalogs, though I do have some of those. I also own painted backdrops, both muslins and canvases.

When a contractor remodeled a house near my studio I was given great old columns, a couple of which now frame the Plexiglas block window I built. I covered the cracked paint of the columns with a light coat of turquoise paint that harmonizes with the earth tones. The columns are used as the center of a set with the Plexiglas window backlit using a tungsten lamp.

Do you conduct any location sessions?
At least 60 percent of my sessions include an outdoor segment, which pleases seniors, couples, and families. We use one of our terrific locations like the rusty riveted steel and geometric trusses of an old railroad bridge. I work in natural light at a dozen or so spots near my studio, and I often augment with a strobe. The sun is a main light, the ambient light level is another, and my strobe or reflector is a third.

Where the sun is intense and there’s no shade or reflected light, I’ll use the sun as backlight with a portable strobe as a main light. If the ambient light level is f/5.6 at 1/250, I’ll set the strobe at f/5.6, which gives me an f/8 highlight or a 2:1 ratio. An f/11 separation light (the sun) gives the subject’s hair a beautiful highlight.


The junkyard is another favorite spot for seniors. I found it doing a senior session for the owner’s son, and I immediately made arrangements to shoot there often. I also use a rustic barn with peeling paint, a hayloft, and antique implements. Horses, goats, geese, turkeys, and ducks add to the atmosphere.

How do you promote your studio?
One main advertising site is a mall kiosk where we have a 10x18-foot display at a key spot; it’s expensive but worth it. We rotate images often, and clients who appear in the display are flattered. Once a year, we sell the prints at 55 to 70 percent off list. Equally important is our web site, which keeps growing and is really quite a bargain. Do your best to keep your web site fresh. The more places you can reinforce your message, the better.


You are in a position where your photography can promote a lot of other businesses (or nonprofits) and end up photographing in the process of doing your job. This type of networking is huge and often doesn’t cost much. I make images available to hotels, limo companies, bars, hair salons, radio stations, and hospitals for nothing more than a photo credit. It’s surprising how much word of mouth you get as a result.

We also do as many as twenty different mailers a year, many of them smaller like our re-order and customer appreciation sale, plus the four we do yearly to our senior prospects. Always refer prospective clients to your web site, where you can put more detailed information. I also do radio advertising and trades for promotional events as well as giving sessions away to nonprofits and community organizations.

How important is a photographer’s personality to his or her success?
Your personality and your ability to communicate with and understand your clients is critical. They will love you for making the effort. In addition, you need to decide what kind of image you want people to have of your studio. They need to understand what kind of photography you do. Image and branding is important, and you have to make the decisions noted above. Once you decide on the message, don’t ever water it down.


BUY THIS BOOK FROM AMAZON

Flash Facts

Today's post comes from the book Photographic Lighting Equipment : A Comprehensive Guide for Digital Photographers by Kirk Tuck. It is available from Amazon.com and other fine retailers.

There are a few basic things you need to know about flash that will make your life easier. Let’s go through them.

Synchronization Speed. Since a flash exposure happens in a really short amount of time, your camera can only properly use the light from the flash if the entire sensor (or film) plane is completely uncovered by the shutter curtain or blades and the mirror is completely up at the moment of the flash. All of this has to be synchronized mechanically. On most digital SLRs, there is a top speed limit for all conventional flashes, which is often 1/250 second (on bigger formats and on cheaper digital SLRs it is usually a bit slower, maybe 1/125 second). Once you use a faster shutter speed than your maximum sync speed, the shutter in your camera becomes more like a slit that travels across the sensor plane rather than a version of fully opened theater curtains. If you try to use a flash at a faster shutter speed than your max sync speed, only part of your frame will be exposed. This is good news if you are trying your hand at experimental photo art. It is bad news if you have a paying client in tow.


A shot for Texas Gas Service. We were doing several locations around town and I wanted the speed that comes from bringing your own power. I used a battery-powered pack and head system from Profoto called the Acute 600B. We put the pack on the floor, set it to ¼ power, and put a head with a standard reflector on a stand, and bounced the light off the ceiling. A Nikon SB-800 was aimed into a 40-inch white umbrella for fill. It was set up nearly on axis with my Nikon D700 camera. Diagram—(1) Window. (2) Kid with teddy bear. (3) Dryer. (4) Washer. (5) Storage. (6) SB-800 flash, at 1/2 power, fired into 40-inch white umbrella. (7) Nikon D700 with 28–105mm lens. (8) Profoto 600B with standard reflector at 1/4 power, bounced from ceiling.

Synchronization. This may seem obvious, but somehow your camera has to get the message to whatever flash you use that the shutter is open and now is the crucial time to fire. The simplest way to do this is via direct, physical contact. In the case of a hot-shoe mounted flash, the camera sends a triggering signal or voltage to electrical contacts in the foot of the flash that screams, “now! now!” The flash goes off immediately, and everything is great. Another option is a sync cord. The flash and camera are connected with a two-wire cable. The camera sends a signal through the wire, and the flash triggers. As long as the contact points are physically sound, everything works great. It gets a bit more complicated if you want to fire the flash without wires.

The low-tech method of wireless flash sync is the optical photo slave. A small “slave” unit is attached to a remote flash. This unit uses a kind of transistor that sends out a voltage spike or signal to the flash when it “sees” a quick increase in light. It is generally triggered by either a flash attached to the camera or an infrared signaling unit (or transmitter) which sends out an infrared light when the shutter is fired. Optical slaves are fairly inexpensive and work well indoors. They are much less effective in areas with high light levels and are especially bad when used in bright sunlight.

A variation on the white light optical slaves are the “pulsed” infrared slaves. These are more sophisticated than the optical slave because they can be triggered without additional white light contaminating the scene and, since they can be pulsed, the receivers can be set up on channels to reduce misfires caused by other people’s flashes being used in the vicinity.

A lot of photographers are scared to shoot in the sun—especially in the not so pretty hours of 10:00AM to 4:00PM. Who can blame them? The light is raw and contrasty and most shoe mount flashes don’t have the oomph it takes to push enough power through an umbrella and then compete with direct sun. But if you bring along a Profoto 600b, a Profoto 7b, a Hensel Porty, or an Elinchrome Ranger, you’ll have the power and the autonomy you need.


Just plug in your flash head, set the power levels, and find a camera with a fast sync speed. I photographed this image and the one just above with a Canon G10 compact camera. If you need sync speed, this is a great camera. You can sync nondedicated flashes up to 1/2000 second. It’s a good way to control how light or dark the background will be rendered.

Moving up the evolutionary ladder, we come to the newly ubiquitous radio slave receivers and transmitters. These are exactly what they sound like. A transmitter on the camera or attached to the camera’s sync terminal senses the triggering voltage and sends a radio signal to a receiving unit attached to the flash. The receiver triggers the flash. The Pocket Wizard radio trigger has dominated the market for the better part of a decade but is now being assailed on all sides by much less expensive versions made in China and elsewhere. With radio triggering, more dollars spent means greater distance ranges and more reliable operation.

The current hot technology is the Nikon CLS and the Canon ETTL system. In both systems, the camera uses either a built-in flash or a hot-shoe-mounted controller to send pulses of visible light or infrared light to control the output of individual flashes. It makes off-camera flash quite simple, especially if you are willing to work with TTL automation. Generally, you’ll need to be using relatively current digital cameras and current flashes to gain this level of automation. In both systems you need to make use of the hot shoe on the camera as part of the control circuit for the lighting system. The camera meters the flash exposure through the lens, and when it senses the correct exposure it sends a signal via the hot shoe contacts through a digitally coding transmitter (either a system “master” flash or a dedicated system controller) which tells the flash to halt its output.

Whether to choose radio triggers like the Pocket Wizards or dedicated flash systems will depend largely on how you need to light and how big an area you need to cover. While the camera systems tend to be “line of sight” solutions (generally, they work best in small, bright rooms), the radio slaves have a much larger range and are much more reliable in areas with high light levels as well as outdoors.Most professionals use both systems on fully manual exposure settings, changing the relative output of the lights by setting different power ratios. There are trade-offs in both systems. The dedicated camera systems require the use of more expensive flash units and are not usable with other brands of flash units. The radio trigger solution allows you to use less expensive non-dedicated flash units, but the cost of the radio triggers and receivers themselves is higher.

The bottom line is getting reliable triggering every time, and that’s where radio units such as the Pocket Wizards have the edge for professionals.

Flash Duration. As mentioned above, most flashes don’t have instantaneous flash durations. They range from a duration of 1/125 second for bigger, older generation power pack systems to around 1/10,000 second for battery-powered units used at very low power settings. Here’s the relationship: the more power that needs to go through a single flash tube, the longer the burn time of the flash will be if all other things are equal. They are rarely equal.

This is a very inexpensive optical slave (think $30) that works very well indoors. It sees flash from a main flash or trigger flash and triggers whatever flash it is attached to. It has both astandard PC socket and a hot shoe so it can be used with a wide range of flash units.

What does this mean in real life? If you are a still life shooter, not much. If you shoot portraits, not much. In fact, where fast duration flash comes into its own is with sports, dance, action, and with products that need to be captured exploding (champagne bottles), being poured (beer, wine, water, Coca Cola), etc. Some portrait photographers actually prefer longer duration flashes because the potential for tiny subject movements makes the fine detail look a little smoother.

Radio slaves have a number of benefits: they “see” around corners, trigger reliably, and do away with the need for sync cords. Here’s one Velcroed to the side of my flash unit. I often use small flashes as accent lights in the studio.

Here’s how you shorten the duration: turn the power down. The lower the power, the shorter the duration. If you are using a pack and head system, plug in more heads. The more flash tubes the power is distributed to, the shorter the total duration. Be aware though that when you change the duration of the flash you will have changes in the color temperature of the light itself. Flashes tend to be at their lowest and most accurate color temperature when used at full power, becoming progressively bluer as the duration shrinks.

Hint: Many small pops add up to one big exposure. If you select your flashes correctly, you’ll probably have enough power for just about anything you might come across, but every once in a while you’ll find a still life project that calls for sharp focus from front to back of a subject that’s close to the camera, and that means you may have to really stop down. And in still life, most people use the lowest ISO they can find on their cameras to ensure the lowest noise and best color. So what do you do when you have your softbox covering your flash, the light is perfect in terms of direction and quality, but you do the math and figure out that you need two more stops of power in order to correctly expose the scene at the f-number you need to set? Well, you could rush out and buy a power pack that is four times as powerful as the one you are using or you could save money and do some math. If you add two pops to your first pop, you will get one more stop. If you then add four more pops to the last two, you will build up a cumulative exposure that will get you to that extra stop. It’s a simple logarithmic progression and a neat trick for doing more with less gear. It works with any size or type of flash, but you’ll need to subdue the existing light so that it doesn’t become part of the overall exposure. That means blacking out the windows and turning out all the lights including modeling lights. Obviously, this won’t work when you are shooting outside or in an environment where lighting can’t be controlled, but it’s a great quick fix for what seems to be a routine issue encountered by car and still life shooters.

A word to the wise: just because you have a very short duration flash doesn’t mean you’ll freeze motion in locations that have high ambient light levels. Most cameras can only sync to 1/250 second, and most smaller flashes can only deliver so much motion stopping power. If you are shooting in an environment like a sunlit exterior and you are trying to freeze motion your limiting factor will be the relatively slow shutter speed. At 1/250 second you won’t quite be able to freeze a runner moving parallel to your position or the swing of a hand in a golf swing. Be sure to consider these factors before you shell out a lot of extra money for a fast flash duration. Along the same lines, most of the stop action you see successfully done of leaping dancers, etc., is done in a dim studio or dimly lit location so that the ambient light isn’t a big factor.

Color Temperature. All manufacturers specify a color temperature, but the honest ones specify a range. That’s because, with few exceptions, the flash output tends to get bluer as the power gets lowered. Additionally, units without very precise voltage regulation tend to have variable color consistency from shot to shot. Even if you are buying the best units around, all of your efforts at getting great color could be jeopardized by the coating of the flash tube. If the glass tubes are uncoated, they allow a lot of ultraviolet (UV) light to be emitted. If whiteners or certain bleaches are used in fabrics (especially man-made fabrics) or in the fabrication of products, the high levels of UV will cause a fluorescence that turns colors either more blue or more magenta than they should be. These color anomalies can be very hard to correct for after the fact.

The solution is to buy flashes with UV coated tubes to inhibit the transmission of UV light waves.

Photography is never as simple as you might think. There are always details that can derail the best of plans. That’s why it is recommended that you test new flashes thoroughly before using them on important projects. There isn’t an option to buy UV-coated flash tubes for battery-operated units or most inexpensive monolights and power pack systems, but you can buy sheets of UV filtration and cut them to size if you find yourself with unexpected color shifts.

Whether you use electronic flash or continuous lighting, your most important decisions aren’t which gear to use but how to get the lighting effect you have in mind.

There’s another color “gotcha” to be aware of: We use a number of light modifiers in our quest to soften and manipulate the small light sources of our flashes and make them work for our vision, but you need to know that the quality of the fabrics used on umbrellas, softboxes, bounce reflectors, and scrims can be highly variable. The bleaching agents used to make the front of your softbox really white may make your images really blue or impossible to correct in Photoshop. You’ve probably realized that white fabrics also tend to yellow over time and make light sources “warmer” (lower color temperatures). This isn’t a real issue in the digital age until you need all the lights on a set to have the same color temperature. It can be maddening to use
several different brands of umbrellas to light a background while using yet another brand of softbox, only to find that different zones of your important image have big color shifts that defy the remedy of a “global” color balance correction. And this can be a major problem, which might cause you to lose a picky commercial client or spend a fortune in retouching fees.

I never seem to realize just how important reflectors are until I get into the middle of a studio shoot and start to fine tune. For this shoot, there was a white card on the posing table bouncing light up under my model’s chin, but it wasn’t enough, so I added a round reflector over to the right. The black panel to the left has white on the other side and works as a reflector. On the far side is a piece of foam core, which adds some side fill. A black panel in the back toward the center of the frame cut spill light from the hair light.

The answer is to test all of your accessories and understand what might cause a shift and how to correct it. Most umbrellas are so cheap relative to day rates, model fees, etc., that it makes sense to change them out en masse every couple of years and to replace them with units that come from the same manufacturer, and if possible, the same manufacturing batch.

BUY THIS BOOK FROM AMAZON

Capturing Motion with Off-Camera Flash

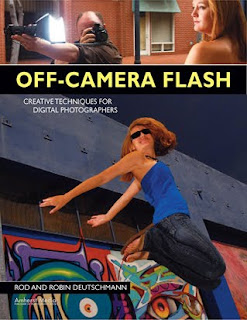
Today's post comes from the book Off-Camera Flash : Creative Techniques for Digital Photographers by Rod and Robin Deutschmann. It is available from Amazon.com and other fine retailers.

Capturing motion with your off-camera flash opens a world that is seldom seen. Being creative means pushing your vision and your equipment further than ever before.

VARIATIONS ON A THEME
As an artist with an off-camera flash, you have more options than most when it comes to dealing with movement. A quick splash of light from any angle or height will freeze things when nothing else will. It will also clear up a poorly executed pan or fill in the shadows on quickly moving subjects. You can, as always, highlight any tier of graphic information. Plus, if you use a fast enough shutter speed, you can darken even the brightest sky, ensuring that you can keep your true intent illuminated above everything else.

STARTING WITH ONE FLASH
As always, if you’re new to all this, begin with one flash connected to your camera via a wire and try to freeze some action. It doesn’t matter what—just freeze something. Even at slower shutter speeds, the flash will help freeze movement. Keep adjusting the power output on the flash. Change the aperture in the camera. Move closer and further away. Review your images. Notice
how even the slightest changes can weaken or strengthen the flash. Now, modify the light. Use a softbox to enlarge it or a snoot to direct it. Get to know the magic that one flash offers before you move onto more.

ADDING MORE LIGHT
When your skill allows it, move onto two flashes and trigger them wirelessly. Once you’ve mastered this, move onto three flashes—and then even more. Be creative with your lighting setups, triggering methods, and modification rituals. Don’t keep doing the same thing each time you shoot. Explore the possibilities of motion frozen with flash while paying attention to how things change in the rest of the image. You will use all of this experience later.


Two unmodified flashes gave this image the needed boost of light it deserved. The flashes were set off with the help of two optical slave devices called “peanuts.” These extremely small optical receivers are connected to a PC wire that runs directly to each flash. When these “peanuts” sense a bright contrast, they set off the flash unit they are connected to. In this case, the camera’s pop-up flash provided the needed contrast. When the pop-up flash fired, so did the other flashes. The pop-up flash did not illuminate any portion of the scene; it was only used as a triggering device for the much more powerful off-camera flashes


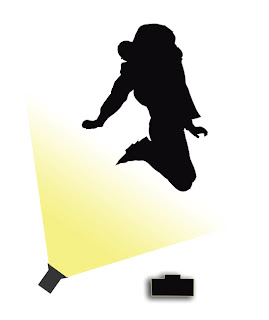
You have three choices when dealing with motion and using an off-camera flash: freeze it, let it blur, or do both at the same time. Here, one hand-held flash brings our message into the light (above).


It’s amazing what your images can look like when you employ as many lights as you possibly can. Remember: the more power you have, the more options you gain.


Seven unmodified lights set to full power were employed to freeze the twirling model. Four were used behind an umbrella, two were set on light-stands, and one was hand held by an assistant (and sometimes the photographer). High contrast and saturation settings were used along with a bluer-than-normal white balance.


One off-camera, unmodified flash can still be quite effective in freezing detail. The shallow depth of field seen here was accomplished with a very fast 85mm lens (f/1.4). The longer focal length also allowed the photographer to move backward, dramatically changing the offered perspective.


Two unmodified lights perfectly illuminated the right and front side of our model. A verywide-angle lens (18mm) was used.


Four unmodified flashes set to full power were needed to light each corner of our model during this rather dramatic jump over the San Diego skyline. A very light red filter was added to each flash to complement the redder-than-usual white balance setting. In-camera contrast, saturation, and hue choices were adjusted to taste. A smaller aperture (f/11) and shorter focal length lens (18mm) were used to help with the required depth of field.


Now, increase the power of your flashes by combining them. Create as much light as possible and see what happens. Overpower the sun itself if you can. Know what gear it takes to have complete control over every aspect of the scene. And don’t limit your vision when it comes to subjects, either; there are more things to shoot than just people, so try it on moving animals, as well. Understand the maximum amount of light you can produce with all your gear, then figure out how you can use it with all moving subjects—at any time of the day or night.

Sculpting with Ambient Light

Today's post comes from the book Sculpting with Light by Allison Earnest. It is available from Amazon.com and other fine retailers.

When talking about ambient light, we are referring to light (of all types) that is present in and around the area where we are photographing—light that we do not add to the scene or subject(s). Ambient light (also called available light) can come from the sun, the lamps or overhead lights inside a chapel or other room, or a variety of other sources. Ambient light can be measured using an incident light meter and controlled using a combination of shutter speed and aperture. Additionally, ambient light can be redirected using reflectors, diffused with scrims (also called silks or panels), and/or blocked with gobos (such as flags and black cards).

Sunlit Portraits
The Challenges of Sunlight. When you photograph using the sun as your only source of illumination, it is important that you learn to “see” the light and its effect on your subject. Sunlight is, of course, a notoriously challenging source of lighting for portraiture. In fact, a student once informed me that her previous photo instructor had told her to avoid the sun like the plague—and to always keep the sun behind the subject and flash them with straight flash. I strongly disagree.

Instead, I feel that the sun should be used and controlled just as you would control the lights in a studio environment. As in the studio, the position of the sun (the main light) will determine the lighting pattern on your subject’s face. The only difference is that you can’t move the sun when you want to change the lighting. As we’ve seen in previous studio examples, however, you can accomplish the same effect by moving your subject instead.

The position of the subject’s face in relation to the sun dictates the lighting pattern that will be created

An important factor in using sunlight is predetermining the best time of day to photograph your subjects. This will greatly enhance your ability to produce pleasing portraits. It is not ideal to photograph portraits between the hours of 11:00AM and 1:00PM because the sun is directly overhead and will create unpleasant shadows under the eye area and facial mask, as seen in
the photo below. The light’s color temperature is also not ideal at this time of day.

The image of Alena was created with the sun as the only source of illumination. The sun was at high noon and created unpleasant shadows under her eyes. This is not the ideal time of day to photograph portraits. (Program mode, ISO 100, 1/250 second, f/5.6)

A better time of day for portrait photography is early in the morning or later in the evening. At these times of day, the sun is lower in the sky. This lower angle is more similar to the angles at which you would place your main light in the studio and results in the same flattering lighting patterns on the face. The light at these times of day also tends to be more golden, creating more appealing skin tones.

Using the Sun Alone. The following photographs illustrate how using the sun to your advantage can create pleasing images with essentially the same lighting patterns as you would see in images made in the studio. For example, the next photo is an image ofMichael Johnson that was created for his portfolio. We have become great friends and always come up with different themes for his portfolio shots. This day proved to be no different. Michael, a photographer himself, scouted the location and time of day to ensure dramatic light. An incident ambient exposure reading was recorded and the camera set accordingly. By adjusting Michael’s head placement, I produced a portrait with dramatic loop lighting on his face.

Careful subject positioning was used to create a loop-lighting pattern in this ambient-light portrait. (Shutter priority mode, ISO 200, 1/250 second, f/10)

On a beautiful sunny day, David Thompson and I drove his motorcycle through the yellow aspen groves of Colorado and came across the abandoned train car seen below. Fortunately, I had my camera and created this image as an illustration of the sun producing a beautiful dramatic Rembrandt lighting pattern. The portrait was created around sunset, when the sun is
lower on the horizon and produces a natural warm light.

Late-day sun helped created warmth in this portrait, shot with a Rembrandt lighting pattern. (Shutter priority mode, ISO 200, 1/250 second, f/11)

My dear friend Bob Ray, of California, created a beautiful portrait of Severine Tasset while in Italy the image below. Severine was posed lying on her side in a living room, in front of a green couch. A black leather jacket was draped behind her to create a low-key background. She was lit only by window light, which streamed through a sliding glass door to camera right. The curtains on this window were drawn but parted slightly, creating a natural strip light.

Partially drawn curtains created a natural strip light that illuminated this portrait by Bob Ray. (Aperture priority mode, ISO 640, 1/60 second, f/11)

Photographer Taralyn Turner Quigley created this beautiful bridal portrait of Rebecca Bruns using only sunlight. Taralyn arrived at the chapel early to scout out possible locations to create a soft formal portrait of her bride. Selecting the location, she positioned Rebecca close to a sunlit arched window that acted as a natural diffuser. Taking extra time to familiarize yourself with your shooting situations will greatly enhance your ability to create beautiful images.

Window light often provides a naturally soft source of lighting, as seen in this bridal portrait by Taralyn Turner Quigley. (Manual mode, ISO 250, 1/100 second, f/2.8)

Using the Sun with Natural Reflectors. Learning to recognize the natural reflectors that exist all around us can add a nice look to your outdoor photographs. For example, try positioning your subject under a white porch where sunlight is able to bounce onto him or her, allowing the shadows to be filled with natural light. Alternately, look for reflective surfaces, such as a nearby white wall or other highly reflective material, and find ways to incorporate this light into a beautiful portrait.

Jon Asp of Colorado photographed the next image, a wedding-day image of groom John Teten. Jon recognized the harsh Colorado sun and positioned his subject in a stairwell that had a naturally reflective surface. An incident meter reading was made and the camera set accordingly. With the sunlight behind the subject, light reflected off the granite to camera left produced a pleasant image that clearly sculpted the groom’s face.

Jon Asp created this portrait of the groom using reflected light. (Aperture priority mode, ISO 125, 1/200 second, f/4.5)

Scouting locations to photograph Meryl Vedros and Daniel Davis was a bit challenging as we were shooting on a bright, sunny day (below). I finally found the perfect spot between two old buildings. The location was very narrow birdbath. An incident meter reading was made with the meter pointing toward the light that was shining in between the buildings. The recorded exposure was f/8, and a higher ISO setting was chosen to create a little more grain, which worked well for this particular portrait.

This portrait, photographed inWeston, MO, was created by posing the subjects between two old buildings, which served as natural reflectors. Meryl was wearing white pants, but I came prepared with a blanket for them to sit on—a good practice for all your location shoots. (Manual mode, ISO 1600, 1/400 second, f/8)

The beautiful image ofMeryl Vedros below was created with the sun behind the model, resulting in the beautiful accent light on her left cheek. The main source of illumination came from the sun bouncing off the white building directly in front of the model, which produced a gentle lighting quality that was perfectly suited to her soft features. To determine the correct exposure, an incident-light reading was made with the dome of the meter at the subject position and facing the camera.


With the sun behind the subject, reflected light from a white building served as the main light. (ISO 200, 1/60 second, f/5)